Welcome to Battle Bulk Sausage.
A flavorful breakfast sausage is the key to making good Sawmill Gravy (aka sausage gravy).
There are many contenders but few will make the grade.
Today, we have three contenders. All mild breakfast sausage.
John Morrell
Farmland
Independent Meat Co.
I'm the commentator, cook, judge and chairman for this tasting.
We're ready to start.
Allez! Cuisinez!
The packages quickly are opened.
74 grams are weighed out from each roll.
They're formed into rectangular patties, 3.5" by 4".
The George Foreman Grill (GFG) is plugged in and preheating.
Here's a closer look at the challengers.
John Morrell
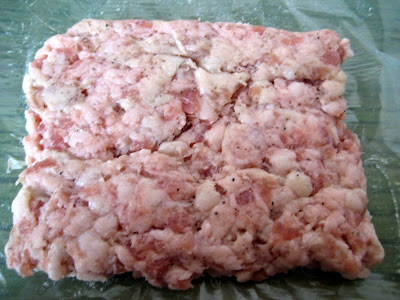
A very dense pork product that didn't roll out easily. Looking that the patty, you can see solid little cubes of pork fat and appears to be a coarser grind of pork.
Farmland
Softer sausage that rolled out quite easily. The pork is ground finely.
Independent Meat Company
This product was also very easy to roll. Also, the one appeared to have a lower percentage of pork fat. You can actually see pork. The other two brands made patties were virtually white due to the higher pork fat content when compared to this patty.
Each patty was cooked individually in a preheated GFG for 4.5 minutes.
Before the next patty was cooked, the GFG was cleaned with a wet towel to remove any residual crispy bits and grease. A minutes was allotted to allow the GFG to come back to temperature.
After cooking the patties were allowed to cool.
Each cooled cooked patty was weighed to see how much was cooked out.
Surprisingly, each cooked patty weighed the same, 46 grams.
The sausage patties were served as part of a breakfast. No gravy.... so sad... no milk.
The Tasting
The patties were tasted as is and tasted again with the eggs and biscuits, as part of a typical breakfast.
John Morrell
Taste: Not a strong sausage flavor. Mainly taste salt.
Texture: The crust that formed on the outside is nice and golden. Crispy, as if deep fried. I believe enough pork fat rendered out around the patty to give it a deep fried crust. Although the patty was difficult to form, the cooked patty has a soft, crumbly texture. You can feel the coarse ground pork as you chew.
Farmland
Taste: A slight sausage flavor. You can taste the pork.
Texture: The patty is firm, but rather juicy. The crust is typical of pan-frying.
Independent Meat Co.
Taste: A better sausage flavor of the three.
Texture: A firm patty, slightly drier and dense. The crust is darker than the other patties. Higher sugar content in the seasoning mix?
The Winner
Each sausage seemed to have it's pros and cons.
Enjoyed the texture and the coarse grind of the John Morrell. The Farmland had a cleaner flavor, but ultimately I pick Independent Meat Co. due to the better, stronger breakfast sausage flavor.
Thanks for reading... There will be another battle in the future. I have to include Jimmy Dean into the tasting.
Saturday, May 31, 2008
Monday, May 26, 2008
May 26: Banquet Food
My dad flew into town and we were invited to a celebratory Chinese banquet.
Part of the celebration - Dragons, lion dancers and lots of firecrackers.
Dragons are a symbol of good luck.
The lion dance is performed to drive away evil spirits and bring in good luck and good fortune. Firecrackers are also used to drive away evil spirits.
They must want extra protection from evil spirits. The string of firecrackers was three stories high and still unrolling.
The lion playing with a little girl.
The Banquet
Banquets are typically multi-course meals that becomes sort of a contradiction. The menu is somewhat more traditional "real" Chinese food, but since it is a banquet where many people are served - guessing over 300 diners, the food becomes ordinary and inconsistent.
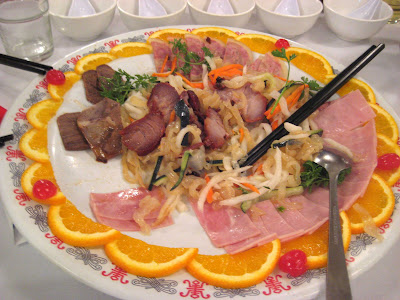
Course 1 - A Chinese Charcuterie Platter - Ham, Praised meat, BBQ pork, some type of head cheese. The shredded stuff is shredded diakon radish and jelly fish in a toasted sesame vinaigrette.
Geek Word of the Day: Charcuterie is the French word for the art of preparing and preserving meat. For example, sausages, salamis and hams are one approach to preserving meat.
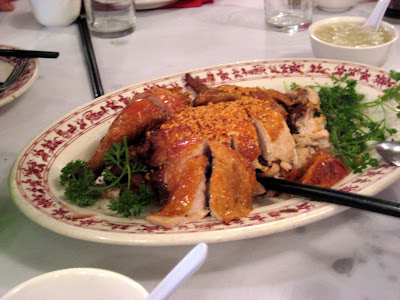
Course 5: Crispy Chicken
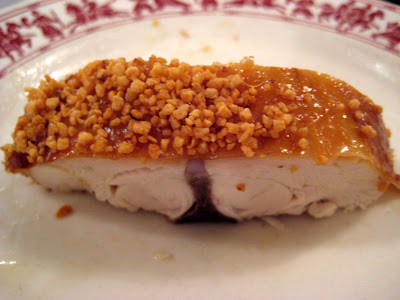
Initially, I thought the topping was crushed peanuts. However, it was minced garlic fried. I believe the chicken is poached whole and deep fried to crisp up the skin. Surprisingly, this was a flavorful dish was very moist. Sometimes the double cooking dries out the chicken.... and in a banquet it dries out even more waiting to be served.
The rest of the meal can be seen in the slideshow below. Hopefully it works. If not, click on the image below the slide show to go directly to the album.
Cheers!
The slideshow of the entire meal. (Playing with blogger) lol
Click below picture to see the rest of the album
banquet |
Sunday, May 25, 2008
May 25: Sunday Miscellaneous
I should have finished up the gardening today - planting the Brussels sprouts and the sunflowers, but it was too hot to till and work the soil. Anything over 65F is too hot... lol. I think it was 75F outside before my outdoor remote sensor conked out.
Instead I went to the local Asian market to look at the weird foodstuff.
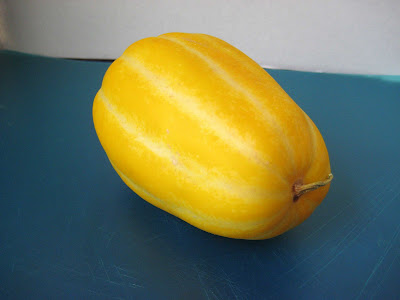
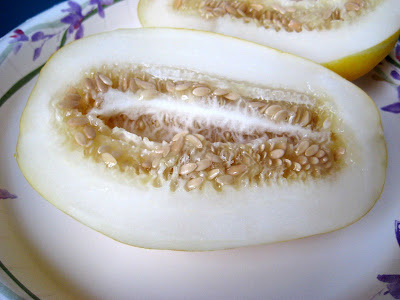
One thing did catch my eye... it was a bright yellow melon that looked like someone drew on with yellow highlighter. The melon was the size of a large mango.
The tag identified it as a "Korean Melon".
Being a curious eater, I purchased one.
Not knowing how to choose one... I gave a couple a light squeeze. They all felt the same - firm. The sniff test didn't yield much. I did smell a very faint sweet fragrant aroma. I just picked one that looked the "yellowest".
Brought it home and put it in the fridge. Cool fruit on a hot day sounded good.
After a few hours, I cut it in half. Small seeds with a central mass and some weird gelatinous material... like other melons.
The first bite.
The melon was crispy and firm like a cucumber. Also, juicy.
It was surprisingly sweet. It's not as sweet as an apple, but sweeter than I expected. I guess I imagined something this bright would be kind of bland.
The flavor reminded me of a honeydew melon.
The skin was a little tough to chew.
The second bite
Peeled the melon. The melon is thin skinned and peeled quite easily with a potato peeler. Although thin-skinned, the skin is a little tough.
Cold, crispy, sweet and juicy. A nice little treat on a hot day.
More info: This online seed website has a description of the Korean melon, Hybrid Golden Liner.
The container garden
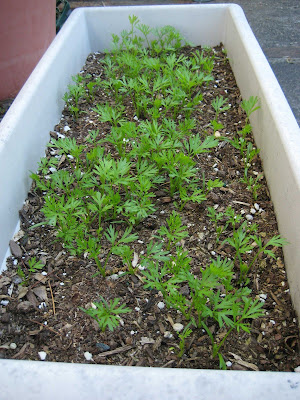
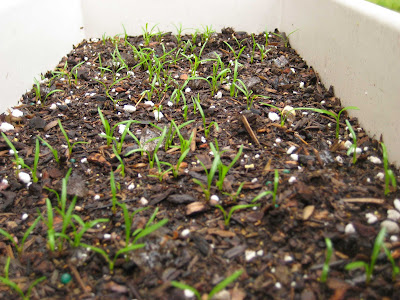
The carrots with its real leaves - the feathery ones.
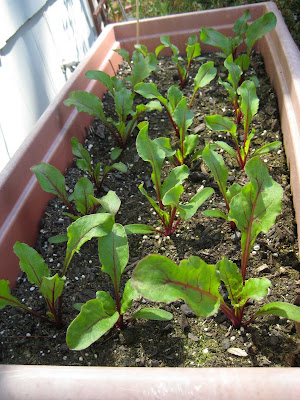
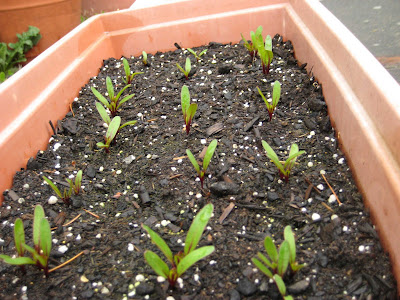
The beet leaves are growing. Hopefully, the beet roots are getting plump and sweet.
The beets with their real leaves.
When to harvest? I don't know.
Monday, May 19, 2008
May 19: Thai Red Curry Beef
I have the leftover roast beef from last night. I figure the way to tenderize the beef is to cook it in some liquid.
My craving for the day is Thai Red Curry.
The Fixins'
1 Can (13.5 fl oz) Coconut Milk
1.5 T (30 g) Red Curry Paste
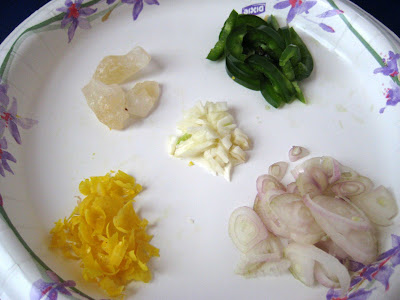
1/2 Jalapeno, sliced
1 T Shallots, sliced
1/2 t Lemon zest, light chopped
2 or 3 small pieces, Rock Candy
2 Cloves Garlic, coarse chop
1/4 C Lemon Juice
1 T Fish Sauce
1.5 C Japanese Eggplant, large cuts
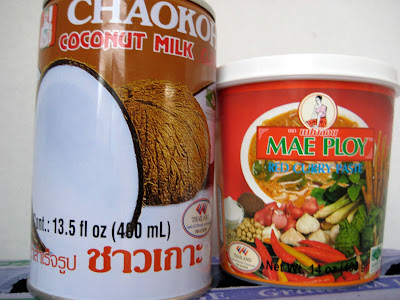
The coconut milk and red curry.
Going clockwise: Jalapeno, shallots, lemon zest, rock candy and garlic (in the center)
Open the can of coconut milk (don't shake). The top layer is usually the coconut oils.
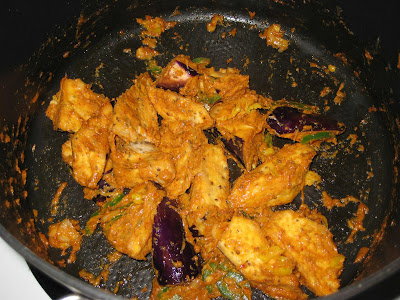
Spoon the top layer into the pot and fry the red curry paste (to release the flavors).
After a minute, add the shallots, jalapeno, lemon zest, garlic and eggplant.
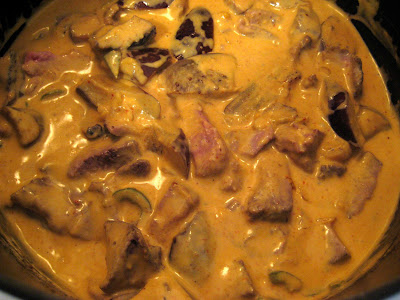
Cook another 5 minutes before adding the rest of the coconut.
Add the rock candy and beef... simmer about 10 minutes.
The Final Dish
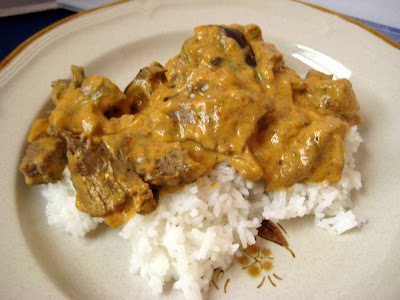
Thai Red Curry Beef with Eggplant over rice.
I'm accustomed to red curry that's a little more brighter red. However, the flavor was nice and had a nice little zing. The instructions on the red curry paste calls for 50 g (estimated 2 T) per 2 C of coconut milk. I used 1.5 T per can of coconut milk. Next time, 2 T per 1 can of coconut milk would be just the right heat for me.
Overall, the red curry had nice flavor, aromatic and slightly spicy. The Japanese eggplant is sweeter than a regular purple eggplant. The beef was flavorful and did soften in the curry.
Also, the dish was quick to prepare... about 30 minutes.
Bonus:
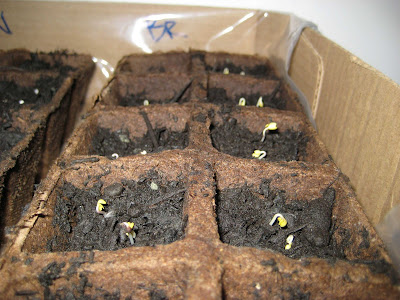
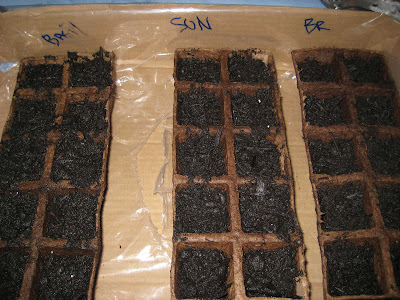
The sunflower seeds are sprouting. That's four days from sowing into the flat. Nothing from the Thai Basil (not shown)
Sunday, May 18, 2008
May 18: Where's the Beef?
I defrosted a beef top round roast. My original intent was to run an experiment with the beef.
An Experiment?
Yep, a cooking experiment. :-)
I've always wondered how Chinese restaurant tenderize the meat used in beef dishes. You know, the beef that's so tender that it seems to melt in your mouth and where the beef has a strangely unnatural squishy texture.
Is it meat tenderizer? Is it the cut of beef? Is it the cooking method?
However, today, I scaled back the experiment. The weather was much cooler so I worked on the backyard and cleaning the carpets in the house. I'm a tired boy! lol.
Also, I bought a digital probe thermometer so I wanted to try it out on the beef roast. Gotta try out the new gadget!
I did reserve a little beef for the Chinese beef experiment.
Doing some online research some sites suggest using baking soda. Also, my sister-in-law concurred that baking soda is used in Chinese beef dishes.
I'm actually skeptical about baking soda tenderizing beef.
My quick experiment - most of this was done by estimating - nothing was weighed or measured.
1. Thinly slice the beef and mix: The idea of mixing is to randomize the pieces so any bias with which end the piece was cut from is reduced.
2. Divide into two samples - a control batch and a baking soda batch. The batches were about the size of an egg when held in my hand.
3. Add baking soda to one batch - approximately 1/4 teaspoon.
4. Wait 10 minutes.
5. Rinse the baking soda beef to ensure the baking soda is washed out.
6. Rinse the control beef so both batches go through the same process.
7. Dry
8. Heat up a frying pan at medium high. Wait 1 minute add 1 tsp oil. Wait another minute before cooking the control batch. No salt or other seasonings. Just canola oil.
9. Wash pan and repeat step 8 for the baking soda batch.
10. Allow beef to cool before sampling.
Observations:
1. When I was rinsing the beef, there was definite difference between the two. The baking soda beef was smoother to the touch while the control felt like wet beef, a little coarse.
2. I noticed the baking soda batch had thinner slices. I guess I didn't mix enough.
Left - Baking soda treated beef
Right - Control
Tasting:
1. Surprisingly, the baking soda batch was more tender than the control batch.
2. The baking soda batch doesn't have the beefy taste while the control batch still taste like beef.
The baking soda does tenderize the beef, but it seems you sacrifice the beef flavor. However, in Chinese dishes with strong sauces, I guess the sauces make up for the lack of beefy flavors.
How does the baking soda tenderize the beef?
I don't know.
However, I can understand the slick feeling when I was washing the beef.
Baking soda is an alkali... that reacts with the fat to make soap.
The geek word for today is "Saponification".
I think I'll try this experiment again, but the next time around I'll try to measure and weigh things out. Also, I'll try different amounts of baking soda and varying "soak" times before rinsing.
Part 2: The new gadget
The Roast Beef - using the digital probe thermometer.
Beef Roast - Top Round Roast for today.
1 Tablespoon Suzy-Q
Bake 350F until desired doneness is achieved.
My goal was medium-rare at 145F internal temperature.
Note to self... Read instructions. I forgot to turn on the beeper. By the time I checked the thermometer the beef was at 150F. After resting it peaked at 157F.
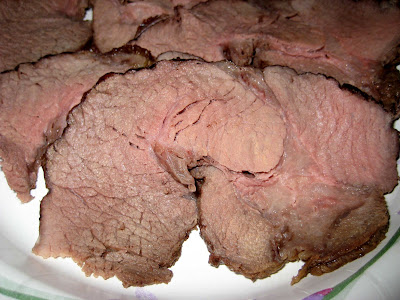
Sliced roast beef - medium. A bit too done for my liking. The problem with roasting a less tender cut of beef. It really should go above medium-rare if you want something less chewy.
One thing I am confused about. The thermometer's control unit comes preset with a temperature target for the meat being cooked and desired doneness.
For beef, the instructions list medium-rare as 145F to 159F. I could have sworn medium-rare was 130F to 140F. The temperature the roast max'd out at was 157F which to me is medium-well, not medium-rare. I need to look into this.
Saturday, May 17, 2008
May 17: Sausage Gravy in a Can !?!?
On a previous shopping trip, I found sausage gravy in a can!
Like the Loch Ness Monster and Bigfoot, I've heard of this mythical product, but haven't spied the can until recently.
My plan for today was to take advantage of three days of sunshine and warm weather to work on the backyard. To fuel up for the day's chores, this would be a good time to try the gravy.
Canned biscuits and sausage gravy from Campbell's.
Instructions are very simple: Heat, stirring occasionally.
The Final Dish:
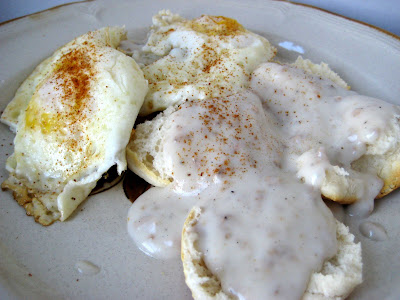
Biscuits and sausage gravy with two fried eggs over easy.
The gravy has an initial taste of sausage, for a brief second, but then the saltiness overpowers taste buds. The little sausage bits have a weird squishy texture. From all of the processing?
This product would probably make a good basis for a larger casserole-type dish, like the other Campbell's "Cream of" soups. For serving on biscuits, maybe adding milk to the gravy would help cut down on the sodium.
The rest of the day...
After running errands around town, the temperature was 93F when I returned home, which is much too hot for working in the backyard.
I was able to replant a habanero plant I keep at work. After three years and many inadvertent attempts to kill it, the plant bounced back each time and did well. However, now it's pot-bound to the point where the leaves are dropping. This called for some drastic measures. Massive pruning on the top from 3 ft span down to 10" inches. Trimmed and cutout 50% of the roots.
We'll see if the plant bounces back after a drastic root and leaf pruning.
Took a look the seeds from a couple days ago... The brussels sprouts have sprouted. Wow! Germinated really quickly. No germination from the basil and sunflowers.
Thursday, May 15, 2008
May 15: The Container Garden
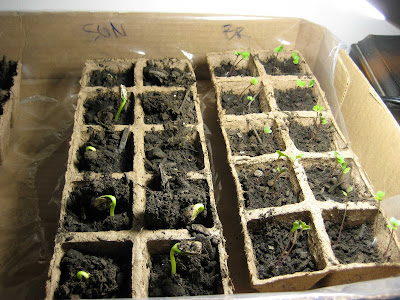
We're supposed to have a few dry days through the weekend. Today, without getting soaked, I was able to look at the beets and carrots I planted.
The geek word for today is "cotyledon." Cotyledon is the fancy botanical name for a sprouted seeds first leaves, usually two.
The carrots. Only the first leaves, no "real" carrot leaves.
The beets have all sprouted and are growing. Since each beet I planted contained more than one seed. I had to thin out the beets - remove the extra plants.
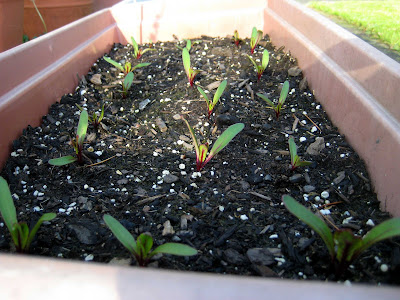
The beets after thinning.
I read that the seedlings are edible so I washed and towel dried the microgreens.
Note - the rootlets (?) are dying the towel pink like an itty-bitty little beet.
Also, the beets are starting to grow it's real leaves.
I popped one in my mouth and chewed. The first taste tasted like a radish. The next one I tried the root only. The taste was bland with a very faint hint of sweetness. Next, the leaves which tasted like raw spinach.
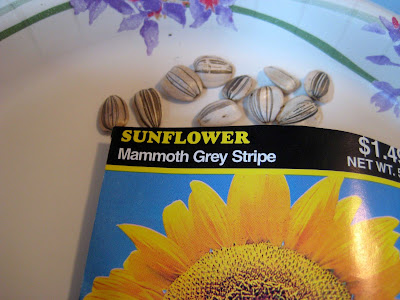
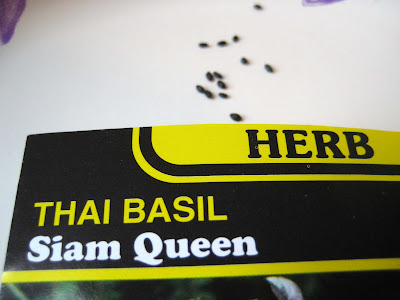
Adding to the garden. Other vegetables I'm adding to the garden.
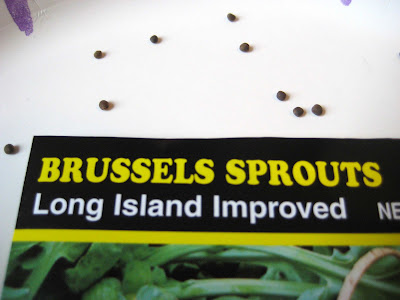
Little miniature cabbages.
Big Flowers
A fragrant herb
Planted and watered. We'll see if the seeds will sprout in about two weeks.
Not quite self-sufficient farming, yet. lol :-)
Monday, May 12, 2008
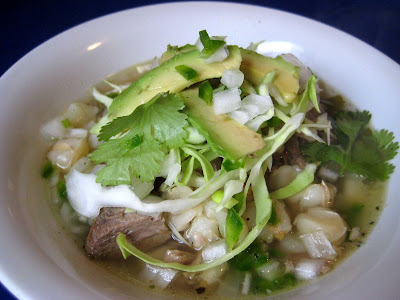
May 12: Pozole (Carnitas leftovers again!)
I've been trying to figure out what to do with the last bits of leftover carnitas.
Initially, taquitos and flautas were planned but the more I thought about the deep frying, the cleaning and leftover oil, I changed my mind.
I decided to make Pozole.
Pozole (or Posole) is a pork and hominy soup/stew which sounds more appetizing and healthier than a plate of deep fried food.
The Fixins'
4 Cups of Broth/Water - I had 1 cup of braising juice and added 1 14.5 oz can of broth plus water to make up he difference.
1 - 29 oz can Hominy
1/2 Onion, chopped (reserved 1 T for garnish)
1/2 Jalapeno, diced
1/4 C Cilantro, chopped
1 C Carnitas, coarse chop
Couple pinches Oregano and Basil, crumbled
Salt and Pepper
Sweat the onion, jalapeno and cilantro in a little oil, salt and pepper.
Add the broth and pork bring to a boil.
Add the hominy and let simmer for 15-20 minutes.
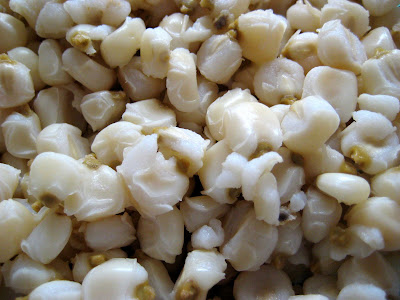
Hominy is dried corn kernels that have been soaked in lye. The alkali solution helps break down the tough outer hull of the kernel and removes the germ. The geek word for today is "nixtamalization." Hominy is also the basis for grits - the Southern breakfast hot porridge.
This is the hominy. I purchased the Mexican-style hominy. I don't know what that means. However, it looks like the germ is still attached - the yellow bits on the end of the kernel. Also, some hull bits are still attached. I guess this is a homey style of hominy.
After 20 minutes, the finished soup.
Garnished with thinly sliced cabbage, chopped onions, cilantro leaves, diced jalapeno and a few slices of avocado (for added richness.)
While the soup cooked, I pan-fried some carnitas to make a quesadilla.
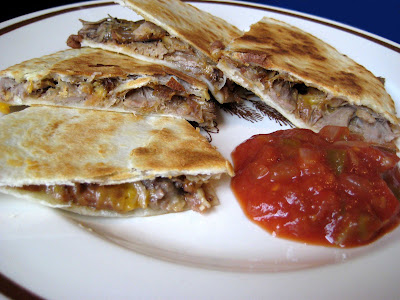
Two tortillas between a layer of refried beans, carnitas and cheese.
The soup definitely hit the spot. The broth was very flavorful while the hominy was more towards the bland side. I feel my cholesterol dropping with each spoonful. The quesadilla was my grilled cheese to the pozole soup. :-)
Sunday, May 11, 2008
May 11: Happy Mother's Day!!!
Today we celebrate the Mothers in our lives.
Those caring women that wipe runny noses, kiss boo-boo's and comfort their crying children.
I was invited to a luncheon. My mission is to bring Greens.
Greens is a boiled leafy vegetable dish flavored with smoked meats. The leafs come from one or all of the following plants - collard, turnip or mustard.
My recipe is a hybrid of two recipes: Pot O'Greens by Alton Brown and the recipe on the back of the package.
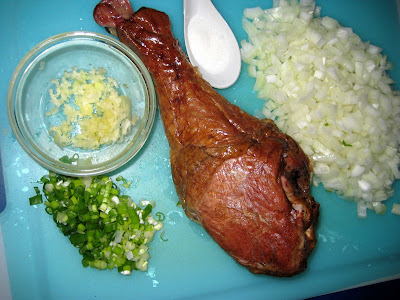
The Fixins'
1/3 C Green Onions, chopped
2 Cloves Garlic, minced
1 Smoked Turkey Leg
1 t Sugar
1 Medium Onion, Chopped (about 1.5 C)
4 C Water
Black pepper (a few grinds)
Salt (about 1/2 t)
2 lbs Greens
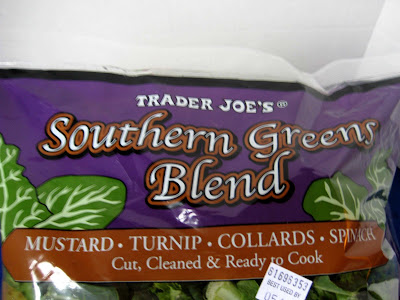
As the package states, "Cut, Cleaned & Ready to Cook"
Packaged veggies are definitely a time saver.
I did soak and wash one bag to see how clean the greens were... No grit was found on the bottom of the cleaning tub. We're good to go!
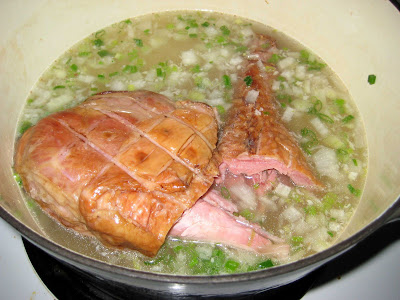
First... sweat the onion, green onions and garlic in a little oil and salt. Sweating is not browning... sweating helps draw out the flavors from aromatics.
Added the 4 C water and the turkey leg to make a broth. Simmer about 10-15 minutes. The turkey leg was too big for the pot so I had to chop in half. Instead of a smoked turkey leg, you can use ham, ham hocks, ham bones.. etc. The smoke turkey leg gives a nice smokey flavor without being overly smoky or too salty which happens sometimes with a ham hock.
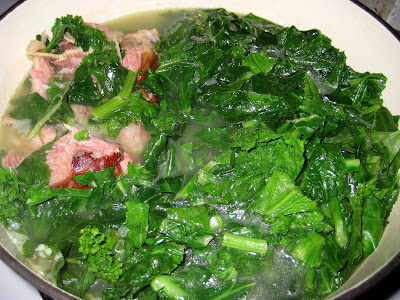
2 pounds of raw greens takes a lot of space. However, like spinach, leafy greens will cook down and wilt.
Cover and let simmer another 45 minutes.
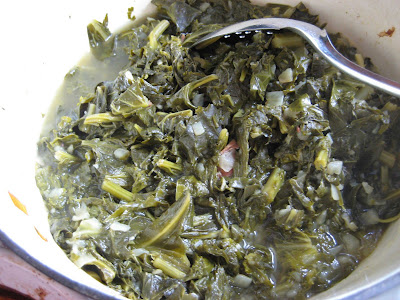
The cooked greens
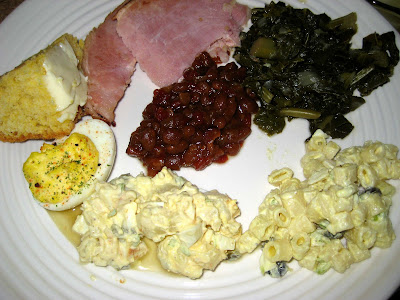
The Final Plate
My contribution was a small part of the whole meal.
Ham, Greens, Mac Salad, Potato Salad, Deviled Eggs, Cornbread and Baked Beans.
The food was great and the company was wonderful!
Can't forget Dessert:
Two pies from Marie Callender's.
Strawberry Cream Pie
Lemon Cream Pie
I actually have many more food photos, but not sure how many photos I can have per posting.
Click the image below to see the rest!
Happy Mother's Day!
Those caring women that wipe runny noses, kiss boo-boo's and comfort their crying children.
I was invited to a luncheon. My mission is to bring Greens.
Greens is a boiled leafy vegetable dish flavored with smoked meats. The leafs come from one or all of the following plants - collard, turnip or mustard.
My recipe is a hybrid of two recipes: Pot O'Greens by Alton Brown and the recipe on the back of the package.
The Fixins'
1/3 C Green Onions, chopped
2 Cloves Garlic, minced
1 Smoked Turkey Leg
1 t Sugar
1 Medium Onion, Chopped (about 1.5 C)
4 C Water
Black pepper (a few grinds)
Salt (about 1/2 t)
2 lbs Greens
As the package states, "Cut, Cleaned & Ready to Cook"
Packaged veggies are definitely a time saver.
I did soak and wash one bag to see how clean the greens were... No grit was found on the bottom of the cleaning tub. We're good to go!
First... sweat the onion, green onions and garlic in a little oil and salt. Sweating is not browning... sweating helps draw out the flavors from aromatics.
Added the 4 C water and the turkey leg to make a broth. Simmer about 10-15 minutes. The turkey leg was too big for the pot so I had to chop in half. Instead of a smoked turkey leg, you can use ham, ham hocks, ham bones.. etc. The smoke turkey leg gives a nice smokey flavor without being overly smoky or too salty which happens sometimes with a ham hock.
2 pounds of raw greens takes a lot of space. However, like spinach, leafy greens will cook down and wilt.
Cover and let simmer another 45 minutes.
The cooked greens
The Final Plate
My contribution was a small part of the whole meal.
Ham, Greens, Mac Salad, Potato Salad, Deviled Eggs, Cornbread and Baked Beans.
The food was great and the company was wonderful!
Can't forget Dessert:
Two pies from Marie Callender's.
Strawberry Cream Pie
Lemon Cream Pie
I actually have many more food photos, but not sure how many photos I can have per posting.
Click the image below to see the rest!
Happy Mother's Day!
M_day_08 |