Wednesday, November 19, 2008

Nov 19: Roasted Chiicken

Today, gave Julia Childs recipe for Roasted Chicken a try.

Her recipe calls for just coating with butter and seasoning with salt and pepper. Sounds simple enough. :-)

The tough part of the recipe calls rotating the chicken every 10 minutes for the first 30 minutes.
Preheat oven to 450F
Start breast side up, cook 10 minutes...
rotate so one side is up, cook 10 minutes...
rotate so the other side is up, cook 10 minutes...

rotate chicken back to breast up, reduce the temp to 350F and finish roasting (about 40 minutes)*.

*Note: The actually recipe call for rotating again at 350F, but I was impatient with this method.
Sorry Julia... :-)

Instead of a V-rack, I cooked the chicken over potatoes and onions.


After 30 minutes, I added a leek to the roasting pan.


After roasting the chicken was allowed to rest for 10 minutes while the rest of the meal was completed.

The finished chicken on serving platter.
Brussels sprouts, leeks and potatoes were the sides for the chicken.


Overall, you can't go wrong with roasted chicken. :-)
However, the cooking method is quite intricate.

Saturday, November 15, 2008

Nov 15: Seattle Deli Location #2

I was reading Nancy Leson's Blog: All You Can Eat where she mentioned a second location for a Vietnamese Deli, Seattle Deli.

Nancy Leson was the restaurant critic for the Seattle Times where she reviewed restaurants incognito. She came out of the shadows to write about food, but gave up the restaurant critic position.

I was in the area of the new location so I stopped by to try out the food.

My purchases... starting with the sandwich and going clockwise.
Bahn mi Dac Biet (sandwich special)
Styrofoam plate of rice noodles and dumplings
Pork-filled puff pastry
Hom Bao (Savory bun)


Sandwich special - is usually a Vietnamese cold cut sandwich with three types of cold cuts.
Chicken loaf, Vietnamese style ham and headcheese.
Instead of mayo, this sandwich had butter, Maggi (?) and pate.
Dressed with pickled carrots, daikon, cucumbers, cilantro and sliced jalapenos.


The puff pastry filled with a pork meatball. The item was identified as Pate Choux. Is this correct? I don't know.


Hom Bao... filled with pork, Chinese sausage and hard boiled egg.


Rice flour noodles and dumplings with a diluted fish sauce dipping sauce.

Tuesday, November 11, 2008

Nov 11: Toot Toot Hey Beet Beet!

A poor rendition of Donna Summer's song "Bad Girl"?

No! It's just me cooking beets two ways!

Beets from the farmer's market.


Method 1: Sauteed Grated Beets
1 C Beets, Raw and shredded
1/2 T Butter
2 Cloves Garlic, grated
1/4 C Water
Salt and Pepper to taste
Red wine vinegar to finish and a little Oregano

Grated two beets... about 1 C. Fortunately the beet juice washed out of my hand.


S and I bought this plate at a craft and food show... the plate grates the garlic into a fine paste.


Browned the butter... used about 1/2 to 1 Tablespoon of butter.
Added the garlic and sauteed really quickly before adding the beets.


1/4 C water, salt and pepper... Cover and steam for about 10 to 15 minutes.


The cooked beets - plated and given a splash of olive oil, red wine vinegar and a little oregano.


Wow! The brown butter added a nice buttery flavor to the beets. The garlic also added to the flavor of the dish without overpowering the flavor of the beets. This turned out to be a nice hearty side dish.


Method 2: Steamed Beets

Wash the beets and trim off the leaves. However, leave about 1" of the stalk (stems?) and leave the root intact. This will reduce the red color leaching out of the beet.

Steam about 35 to 45 minutes... until fork tender.


When cool, peeling the beets is easy... Just rub with a paper towel and the skin slides off.


Cooked beets ready for use. I'll probably slice and add to a salad. Nice and simple.

Sunday, November 9, 2008

Nov 09: Experiment - Making Vinegar?

It's amazing how nature works. There seems to be some type of organism that feeds on the by-products of another organism, thus nothing in nature truly goes to waste.

For example, fermentation.
Many people think of fermentation as leading to the production of alcohol.

Yes, we enjoy alcohol. If we really look at where alcohol comes from, alcohols is the "waste" product of yeast consuming sugars.

Some caveman a few thousand years ago found that eating spoiled fruit or sweetened liquids gave them a feeling of euphoria.

However, the older the liquid becomes it eventually became sour. Yet, humans found uses for that sour liquid in preserving foods.

The way it works...
Step 1: Yeast eats sugar and makes alcohol. (Yeast eats sugar and makes alcohols as a waste product)
Step 2: Nature still working... A bacteria now finds alcohol tasty and starts consuming alcohol which makes acetic acid (vinegar) as a by-product.

What I did?
I had a bottle of Pinot Grigio from 2003 that was in the back of the pantry. Last weekend, we tried to open the bottle, but the cork was in tight (and it didn't help that I had a simple cheap corkscrew).

Finally, today, I bought a new corkscrew and it pulled that stubborn cork out with ease.
The wine still taste fine, but I'm not a big wine drinker and the fun was last week so I have a bottle of wine with a holey cork.

I decided to give try at making vinegar... In theory, it's only the fermentation of alcohol. All I needed was a mother.

The Quantities
1 bottle of wine - 750 ml
1/2 C Raw Vinegar - I found an apple cider vinegar at the local Coop.
2 C Water - I used distilled


Mixed in the water, apple cider vinegar and wine.


Covered with a towel and set into a warm place... my oven.
The bacteria needs oxygen so the towel cover. (I don't have cheesecloth.)


Will this work?
In theory it should... the bacteria in the raw vinegar should convert the alcohol in the wine, but I'm not 100% sure.

1. Bacteria (the Mother) can be very particular to the medium/liquid. For example, will the apple cider Mother like being in wine?

2. Did I add enough vinegar?

3. Will the sulfites in the wine act to kill off the Mother?

4. Now that I've looked up a few websites... most refer to making red wine vinegar. White wine vinegar can come out tasting corky or cardboardy...

5. Will I have the patience to stick with this experiment? It can take up to 3 months to convert wine to vinegar. I didn't expect it to take that long.

I should have researched this a little more, but we'll see how this experiment turns out over the next few months.

*** Update Nov18 ***
For the past 9 days, I've stirred the wine, every 3 days, with a slotted spoon. My reasoning is that the "mother" needs oxygen to propagate.

Over the past few days, I've noticed that the wine has become drier. Today, the there was a vinegary aroma, but no sour taste.

Visually, there are little floating bits in the wine. Hopefully, it's the mother forming. It could also be some type of precipitate from the wine.

*** Update Nov26 ***
About 2 1/2 weeks since the start of my vinegar experiment.
This is the first time I've stirred the concoction since Nov 18th.

There's definitely something growing in the wine. It looks like a gelatinous spider web floating in the wine. (Can it still be called wine?)

There is a vinegary aroma, but licking the stirring spoon, there is no strong vinegar flavor. In fact, there doesn't seem to be any particular flavor at all. I'm kind of hesitant to taste a spoonful.

My next step is to feed the bacteria by adding more alcohol to the mixture. Hopefully some more Pinot Grigio... as a last resort some diluted vodka (diluted to 10% abv).

Also, I'd like to transfer the mixture to another container. A sun tea jar? A large mason jar? Glass is preferred.


*** Update Nov28 ***
Today, I added about 1/4C liquid (10% Vodka solution).

I was surprised to see that the spider web mass has formed a layer on the surface of the liquid... in only 2 days.

This is a good sign that the aceto-bacteria have colonized the wine mixture and thriving. With positive signs that I am making vinegar, I was emboldened to give the liquid a taste (about 1/2 tsp). There is definitely a mild sour taste, not as strong as rice wine vinegar. No particular flavor or sweetness.

I stirred the mixture down... Not sure if I'm supposed to do that or not.
The image shows the cellulose layer containing the mother.


*** Update Dec 04 ***
Checking if the vodka had any effect.
Also, bought another bottle pinot grigio. The pinot gris has the flavor of a crisp green apple - sweet and slightly tart.

The vinegar: The solution is definitely tart. There's a faint, but noticeable sweetness.

The pictorial shows that there's quite a bit of acid (acetic acid - vinegar) in the liquid.

A 1/4 t of baking soda added to about 1/2 t of my experiment.


Wow! A acid-base reaction releasing CO2.


*** Update Dec 06 ***
Checking to see if the wine added any flavor or effected the mother?
Another cellulose layer is forming. However, I noticed a slight film on the side of the glass mixing bowl so I decided to decant the liquid and wash the bowl.

The flavor of the vinegar solution is ever so slightly sweet, tasting faintly of apples with a little lemon juice. However, the vinegar it's not that strong. Not enough time has elapsed since the added wine on Dec 4th.

Today, added more wine to the mixture with the hopes of boosting the flavor.
200 ml wine (13% abv) + 60 ml distilled water to make a 10% abv mixture.

The vinegar solution was decanted into a stainless steel bowl. The mother of vinegar (the mass that looks like a wet paper towel) is very noticeable. After the glass bowl was dried, the solution went back into the bowl and covered with a paper towel.


*** Update Dec 14 ***
It's been just over a month since I've started this experiment. There is a definite aroma of vinegar. I'm not sure of the stregth of the vinegar, but doing a taste with distilled white vinegar... this batch isn't as strong.

I'm going on vacation so I decided to aerate the vinegar before leaving town.

My basic method was to pour the vinegar back and forth between two bowls.
Does this really do anything? I'm just guessing that this will.

Decanting into another bowl...


There are bubbles forming due to the pouring action... Hopefully, this helps aerate the mixture.


The mother of vinegar formed a thick layer on the surface. Again, hopefully this is an indication that the experiment is going well.

Saturday, November 8, 2008

Nov 08: Potato Leek Soup

A couple weeks ago was the last day of the season for Tacoma's Farmers Market. I lucked out and happened to be in the area.

I scored a great deal on a bunch of leeks, $1 for a bunch. In the supermarket, it's a $5 expense.

Leeks are a member of the onion family, Allium. Other delicious members of the family are onions, shallots, garlic and chives. Now that's a yummy family tree!

What to do with the leeks?

One of the simplest preparations is Potato Leek Soup I learned from S.
Potatoes, leeks, salt and water or broth.

Potato Leek Soup

8 ounces Leek, sliced (about 2 cups)
1 pound Potato, peeled and cubed (about 4 cups)
3 cups liquid (I used 1 C broth + 2 C Water)
1 Chicken bullion cube (Optional)
1/2 tsp Kosher Salt
1T Butter
Milk or Cream or Sour Cream (Optional)


Leeks are grown by mounding soil around the stalk as the stalk grows. The mound blocks light helps keep the leaves white and tender. However, the mounding just means that you end up with dirt in-between the layers of leaves.

To wash... I split the leek down the middle and slice into semi-circles.


Soak the sliced leaves in water for a few minutes, to loosen dirt, and swish around. Repeat as needed.


Potatoes are coarsely chopped.


Optional: saute the cleaned leeks in butter and salt for about 5 minutes. Don't need to brown.


Add the potatoes and a quick stir.


Add the liquid and bullion cube. Simmer about 30 to 40 minutes.


The Finished Soup
The soup can be served many ways...

As a hearty, chunky rustic soup....


Or more typically, pureed in a blender. Since the soup is low fat, you can add milk or cream to the soup during blending.

Instead of using a blender, I used a stick (immersion) blender to puree the soup.


I didn't have any cream or sour cream... I did find some cream cheese so I added a small dab of cream cheese.


I wanted the soup to be a little more heartier so I added a pouched egg.


Overall, the soup turned out nicely. Nice leek flavor and easy to make.

What surprised me was the blended soup was very smooth, silky and thick. No cream was added but the texture was similar to a rich bisque. Also, the soup reminded me of a split pea soup without the grittiness that sometimes accompanies split pea soup.

Friday, October 31, 2008

Oct 31: Happy Halloween 2008

In the USA, a Halloween tradition is children, wearing costumes, going house to house asking for candy by saying, "Trick or Treat"... Which really means, "Give us candy or we will smash your pumpkins or egg your house!" LOL!

Last year, I seem to remember about 70 children. I hadn't planned on that many so I ran out of candy. I searched the pantry and found individually wrapped packages of microwave popcorn (from my favorite place Costco). Some of the kids actually preferred the popcorn over the candy.

This year we stocked up and we're ready for the little monsters.
A Wal-Mart deal was found on full size candy bars (3 for $1) so we have 81 bars.


Today was mostly rainy. Fortunately, the weather cleared up a little towards the evening.

However, the evening turned out slower than expected.
Cold weather with the threat of rain and the merchants downtown were holding an event that reduced the number of Trick or Treaters.

The numbers this year worked out to 65 Trick or Treaters, 7 bottles of water and a handful of tissues to a cute little monster with a very runny nose.

Wednesday, October 29, 2008

Oct 29: Daring Baker - Pizza

This month's Daring Bakers challenge is dedicated in Memory of Sherry Cermak who blogged at What Did You Eat?.

Daring Baker's is an group of online baking enthusiast where many of have formed lasting friendships, especially amongst the original Daring Bakers. Although I didn't know her, it is obvious from the tributes on various blogs that Sherry was a friend to many in Daring Bakers and to many in the general food blogging community.


Welcome to Pizzeria Giovanni!

Pizza is one of those food groups that I've been experimenting with since college. Wow! A Daring Baker's Challenge that I'm actually familiar with!

This month's challenge is hosted by Rosa of Rosa's Yummy Yums.

THE CHALLENGE: You have to use the tossing method (as explained below) for at least 2 Pizza Crusts. If you are not comfortable with it, then you can switch to the rolling method, but you HAVE to try the traditional method and exercise it, using at least two dough pieces. You should also capture the moment by either filming or photographing yourself while tossing the dough.

THE RULES: This month’s recipe leaves you with much freedom! You can either make the Pizza Dough gluten-free or the normal way. You may use the sauce (anything liquidy, saucy and spreadable like cream cheese, flavored oils, pesto, Nutella, Peanut Butter, pumpkin puree, etc...) and toppings of your choice, may they be savory or sweet, gluten-free, vegan, vegetarian or non-vegan/vegetarian. You must use BOTH (sauce & toppings).

JUST USE YOUR IMAGINATION!!!

Before I get to the pizza dough we're using for the challenge, this is the pizza sauce I've been using since college. A roommate worked in a mom and pop pizza parlor in high school and he showed me how he made sauce - tomato sauce, diced tomatoes and tomato paste. I tried different ratios of the three basic ingredients plus adding dried herbs. The following is the sauce I ended up with...

My Basic Pizza Sauce
1 can 14.5 oz Diced Tomatoes with Basil, Onion and Oregano
1 can 8 oz Tomato Sauce
1 to 2 T Tomato Paste
1 Clove Garlic, minced
1/3 t Basil, Dried
1/3 t Oregano, Dried
1 T Olive Oil

Heat olive oil and minced garlic to release flavors.
Pour in tomatoes and tomato sauce.
Add the dried herbs and let simmer about 5 to 10 minutes.
Puree using a stick blender.
Add tomato paste to thicken the sauce... Simmer another 5 minutes.
Let Cool before using.

RECIPE SOURCE: “The Bread Baker's Apprentice: Mastering The Art of Extraordinary Bread” by Peter Reinhart. Ten Speed Press, Berkeley, CA. Copyright 2001. ISBN-10: 1-58008-268-8, ISBN-13: 978-158008-268-6.

~ BASIC PIZZA DOUGH ~
Makes 6 pizza crusts (about 9-12 inches/23-30 cm in diameter). *

Ingredients:
4 1/2 Cups (20 1/4 ounces/607.5 g) Unbleached high-gluten (%14) bread flour or all purpose flour, chilled
1 3/4 Tsp Salt
1 Tsp Instant yeast
1/4 Cup (2 ounces/60g) Olive oil or vegetable oil (both optional, but it’s better with)
1 3/4 Cups (14 ounces/420g or 420ml) Water, ice cold (40° F/4.5° C)
1 Tb sugar
Semolina/durum flour or cornmeal for dusting

*Note: I halved the recipe to make 3 pizza crusts.


DAY ONE

Method:
1. Mix together the flour, salt and instant yeast in a big bowl (or in the bowl of your stand mixer).

2. Add the oil, sugar and cold water and mix well (with the help of a large wooden spoon or with the paddle attachment, on low speed) in order to form a sticky ball of dough. On a clean surface, knead for about 5-7 minutes, until the dough is smooth and the ingredients are homogeneously distributed. If it is too wet, add a little flour (not too much, though) and if it is too dry add 1 or 2 teaspoons extra water.

NOTE: If you are using an electric mixer, switch to the dough hook and mix on medium speed for the same amount of time.The dough should clear the sides of the bowl but stick to the bottom of the bowl. If the dough is too wet, sprinkle in a little more flour, so that it clears the sides. If, on the contrary, it clears the bottom of the bowl, dribble in a teaspoon or two of cold water.
The finished dough should be springy, elastic, and sticky, not just tacky, and register 50°-55° F/10°-13° C.

3. Flour a work surface or counter. Line a jelly pan with baking paper/parchment. Lightly oil the paper.

4. With the help of a metal or plastic dough scraper, cut the dough into 6 equal pieces (or larger if you want to make larger pizzas).

NOTE: To avoid the dough from sticking to the scraper, dip the scraper into water between cuts.
5. Sprinkle some flour over the dough. Make sure your hands are dry and then flour them. Gently round each piece into a ball.

NOTE: If the dough sticks to your hands, then dip your hands into the flour again.

6. Transfer the dough balls to the lined jelly pan and mist them generously with spray oil. Slip the pan into plastic bag or enclose in plastic food wrap.

7. Put the pan into the refrigerator and let the dough rest overnight or for up to thee days.

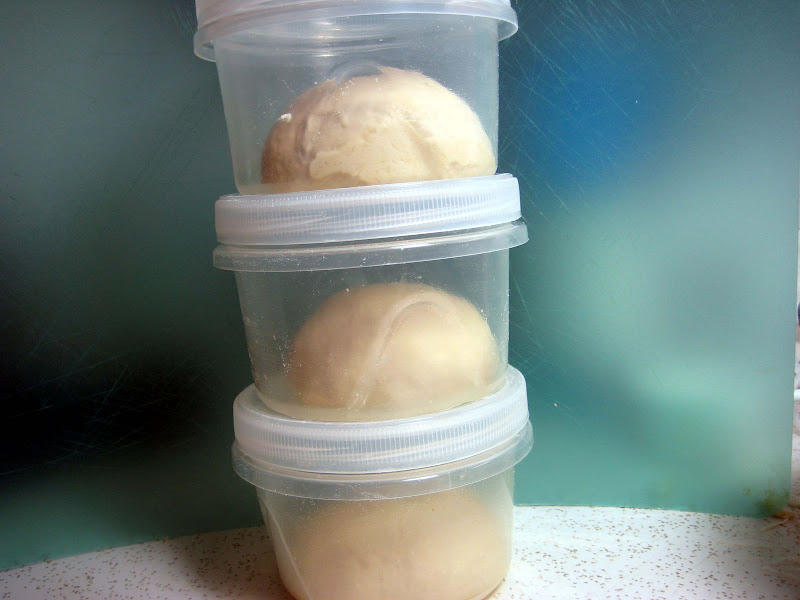
Dough packed and ready for the refrigerator... Each dough ball is about 170 grams each.

NOTE: You can store the dough balls in a zippered freezer bag if you want to save some of the dough for any future baking. In that case, pour some oil(a few tablespoons only) in a medium bowl and dip each dough ball into the oil, so that it is completely covered in oil. Then put each ball into a separate bag. Store the bags in the freezer for no longer than 3 months. The day before you plan to make pizza, remember to transfer the dough balls from the freezer to the refrigerator.

DAY TWO
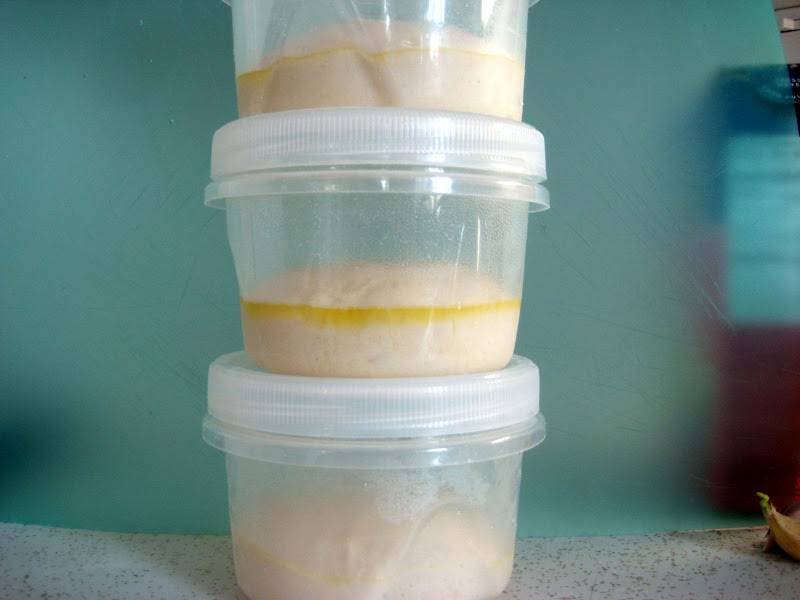
The next day - out of the fridge.


8. On the day you plan to eat pizza, exactly 2 hours before you make it, remove the desired number of dough balls from the refrigerator. Dust the counter with flour and spray lightly with oil. Place the dough balls on a floured surface and sprinkle them with flour. Dust your hands with flour and delicately press the dough into disks about 1/2 inch/1.3 cm thick and 5 inches/12.7 cm in diameter. Sprinkle with flour and mist with oil. Loosely cover the dough rounds with plastic wrap and then allow to rest for 2 hours.

Dough taken out of the container. Dusted with a flour/corn meal mixture.
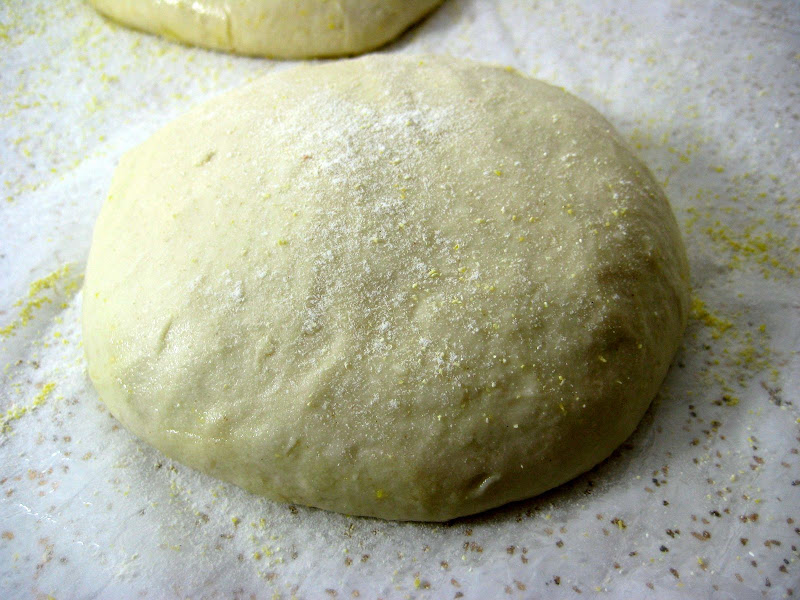

9. At least 45 minutes before making the pizza, place a baking stone on the lower third of the oven. Preheat the oven as hot as possible (500° F/260° C).

NOTE: If you do not have a baking stone, then use the back of a jelly pan. Do not preheat the pan.

10. Generously sprinkle the back of a jelly pan with semolina/durum flour or cornmeal. Flour your hands (palms, backs and knuckles). Take 1 piece of dough by lifting it with a pastry scraper. Lay the dough across your fists in a very delicate way and carefully stretch it by bouncing it in a circular motion on your hands, and by giving it a little stretch with each bounce. Once the dough has expanded outward, move to a full toss.


NOTE: Make only one pizza at a time.
During the tossing process, if the dough tends to stick to your hands, lay it down on the floured counter and reflour your hands, then continue the tossing and shaping.
In case you would be having trouble tossing the dough or if the dough never wants to expand and always springs back, let it rest for approximately 5-20 minutes in order for the gluten to relax fully,then try again. You can also resort to using a rolling pin, although it isn’t as effective as the toss method.

11. When the dough has the shape you want (about 9-12 inches/23-30 cm in diameter - for a 6 ounces/180g piece of dough), place it on the back of the jelly pan, making sure there is enough semolina/durum flour or cornmeal to allow it to slide and not stick to the pan.

12. Lightly top it with sweet or savory toppings of your choice.
NOTE: Remember that the best pizzas are topped not too generously. No more than 3 or 4 toppings (including sauce and cheese) are sufficient.

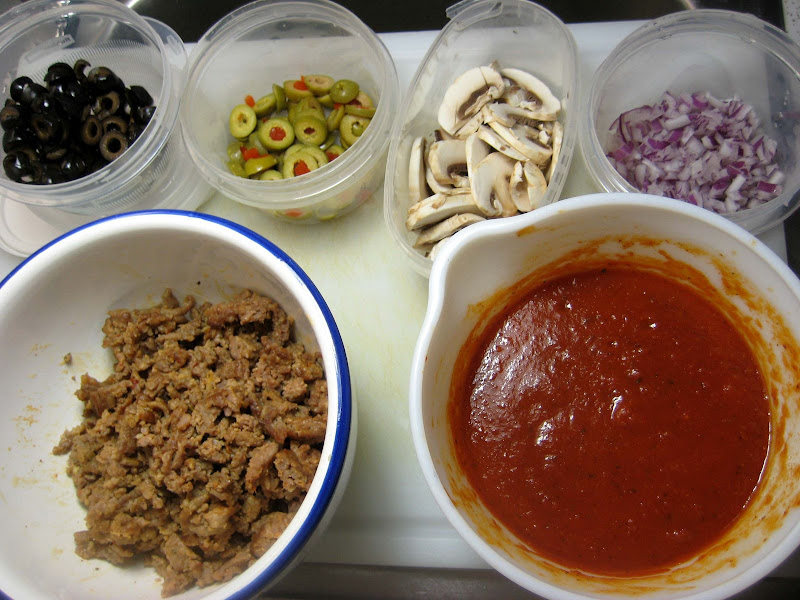
My toppings at the ready - olives (black and green), mushrooms, red onions, tomato sauce and mild Italian sausage. Cheese is not shown - mozzarella and cheddar.

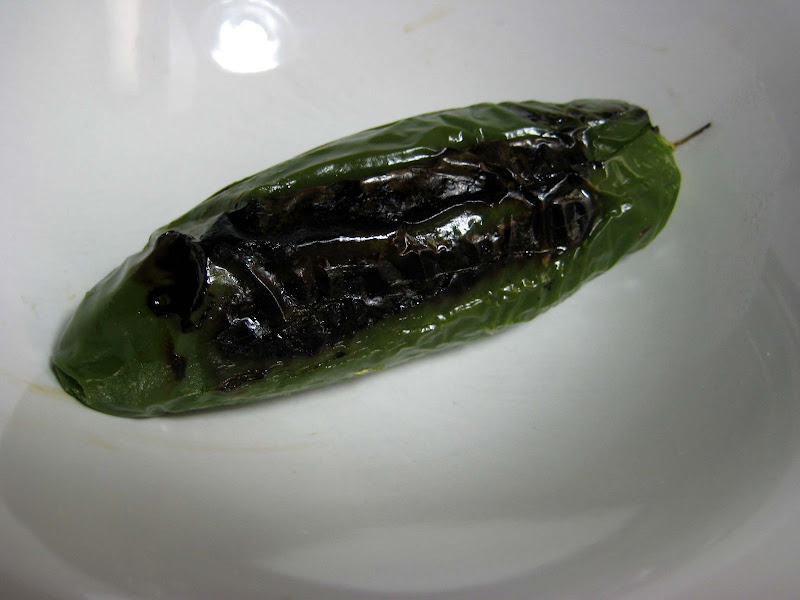
My secret ingredient! A roasted jalapeno pepper which I peeled and diced.

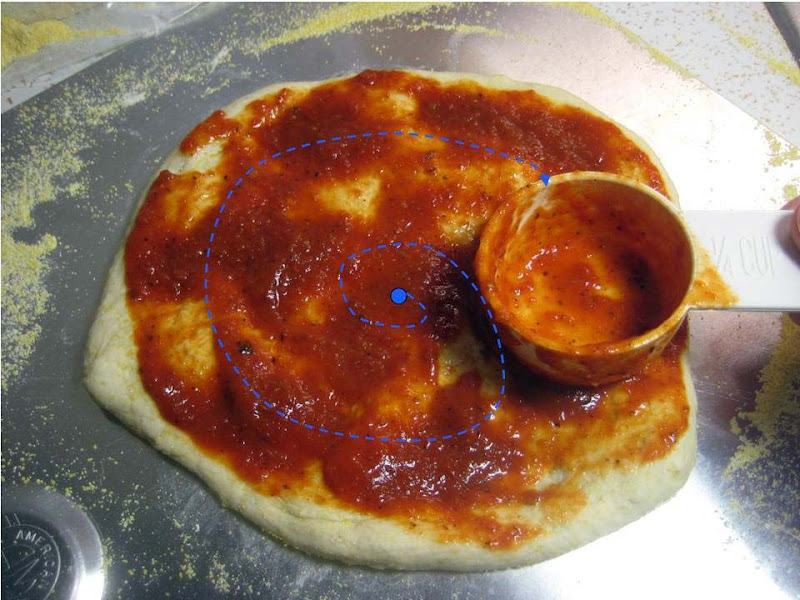
Based upon the many good pizza making videos on YouTube, this is a neat way to sauce a pizza.

Ladle sauce onto the center and use the bottom of the ladle to swirl the sauce to the edges. I used 1/4 C of sauce for a 10" pizza.

I tend to overload the pizza, but that's the way I like it.
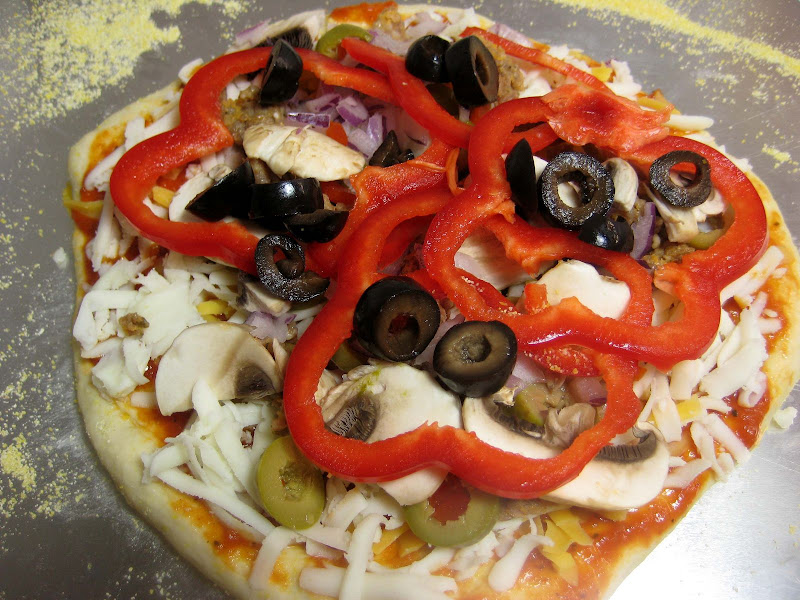

13. Slide the garnished pizza onto the stone in the oven or bake directly on the jelly pan. Close the door and bake for about 5-8 minutes.

Note: Since this pizza dough recipe is on the sticky side, I had to use a length of dental floss to loosen the pizza from the peel and a spatula to slide the pizza onto the stone.
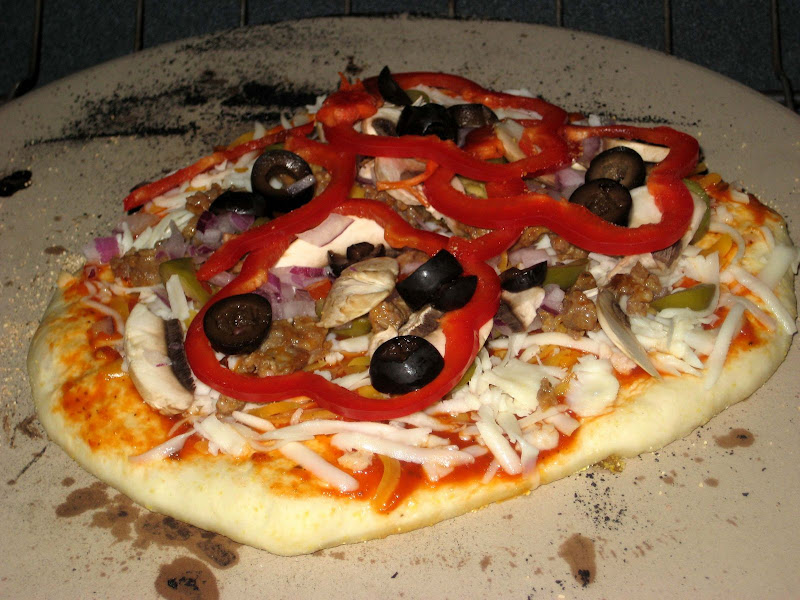

NOTE: After 2 minutes baking, take a peek. For an even baking, rotate 180°.

If the top gets done before the bottom, you will need to move the stone or jelly pane to a lower shelf before the next round. On the contrary, if the bottom crisps before the cheese caramelizes, then you will need to raise the stone or jelly.

14. Take the pizza out of the oven and transfer it to a cutting board or your plate. In order to allow the cheese to set a little, wait 3-5 minutes before slicing or serving.

Total Baking Time: 8 Minutes
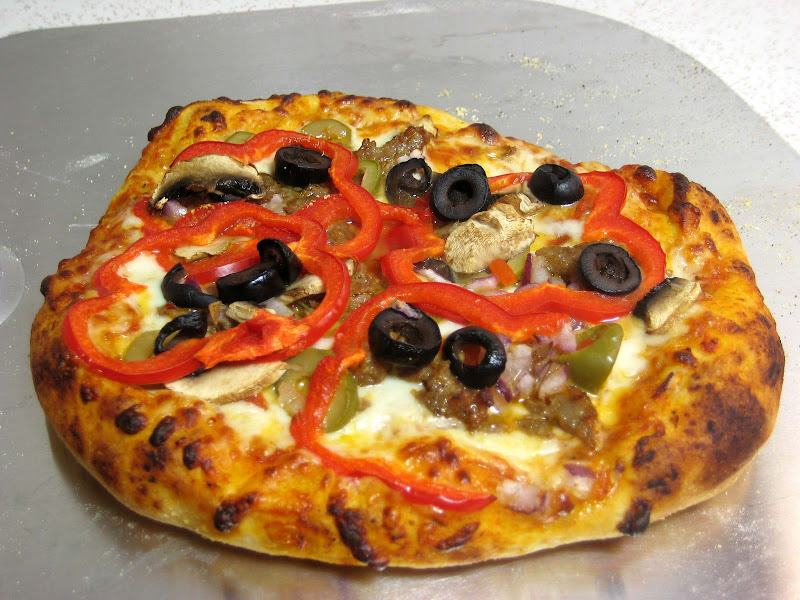

This is actually Pizza #3: My demo pizza with everything.

The first two pizza were made for quick consumption and only a couple pictures were taken. We were hungry! LOL! With this third pizza, we could spend the time taking step-by-step photos.

Pizza with everything
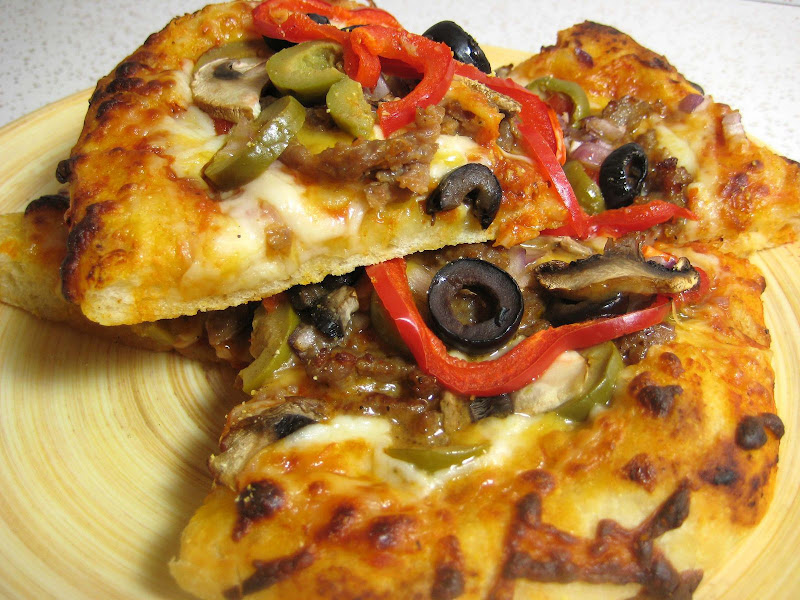

Nicely cooked crust. I purposely made this crust with a thicker crust.
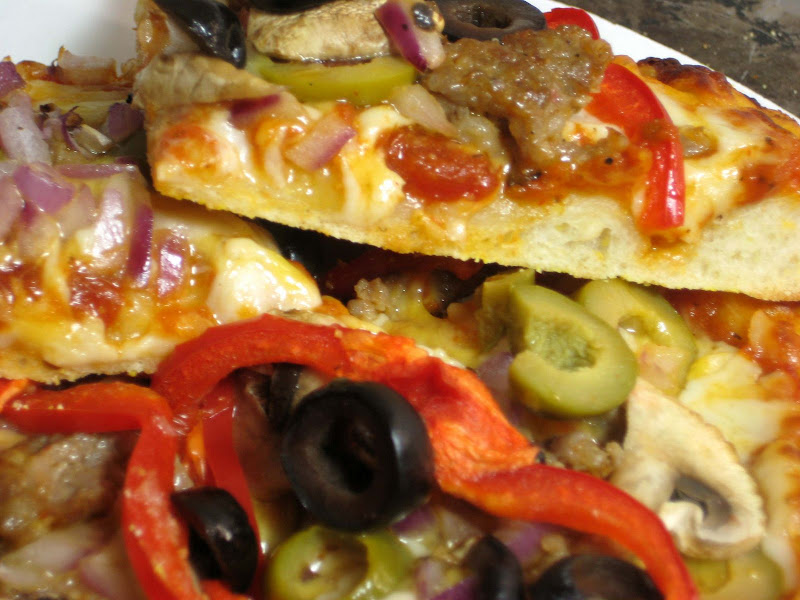

The First TWO Pizzas!
Reinhart's recipe is a wet dough using a 69% water to flour ratio. Most pizza dough recipes use a 60% water to flour ratio. Due to the higher water ratio, the crust spreads out very easily and makes for a thin pizza crust.

The resulting pizza crust turned out thin, light and airy. Almost too thin for the amount of toppings I used.

Overall, the pizza was very good.

For this challenge, here's the mandatory pizza tossing photo. Since it's so close to Halloween, I decided to wear my costume for the pizza tossing photo.

In the USA, when you flip through the phone book, Italian restaurants use a Chef Boyardee-like icon for their ads - a chef with a large handlebar mustache, wearing a chefs hats and chef's coat. Being a foodie, I couldn't go as a vampire or Frankenstein. I wanted to be a chef with a handlebar mustache! :-)

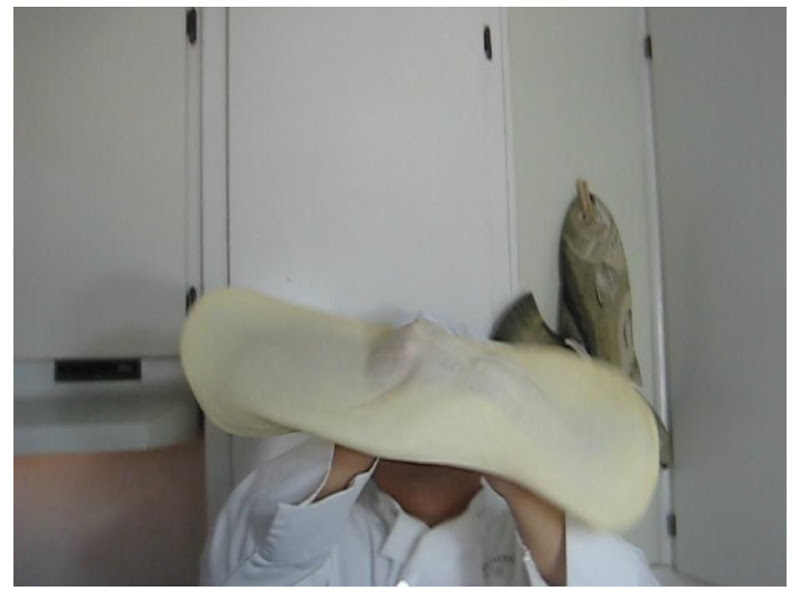
I noticed that tossing the pizza stretches the crust paper thin.
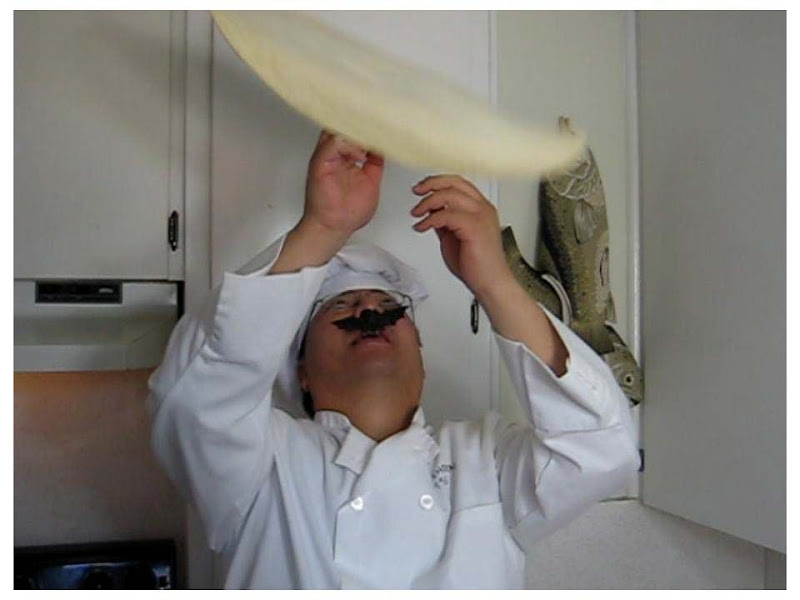

Whew! I caught it! No drop... No whole... Hat and mustache still in place.

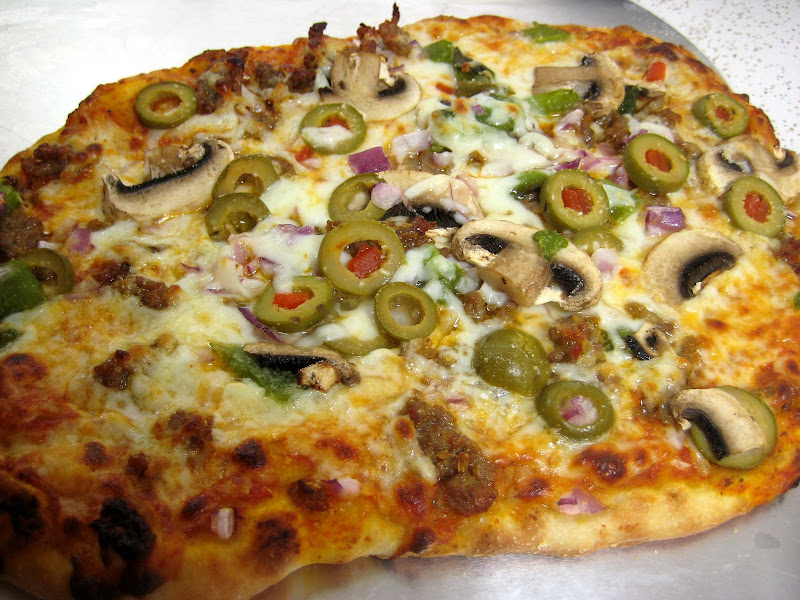
Pizza #1: green olive, sausage, mushroom, onion, roasted jalapenos and mozzarella.
Not shown: Garnished with fresh chopped tomatoes.

Pizza #2: My Jack O'Lantern Pizza: Cheddar (instead of Mozzarella), green and black olives, green and red bell peppers. The cheddar added a nice saltiness to the pizza.
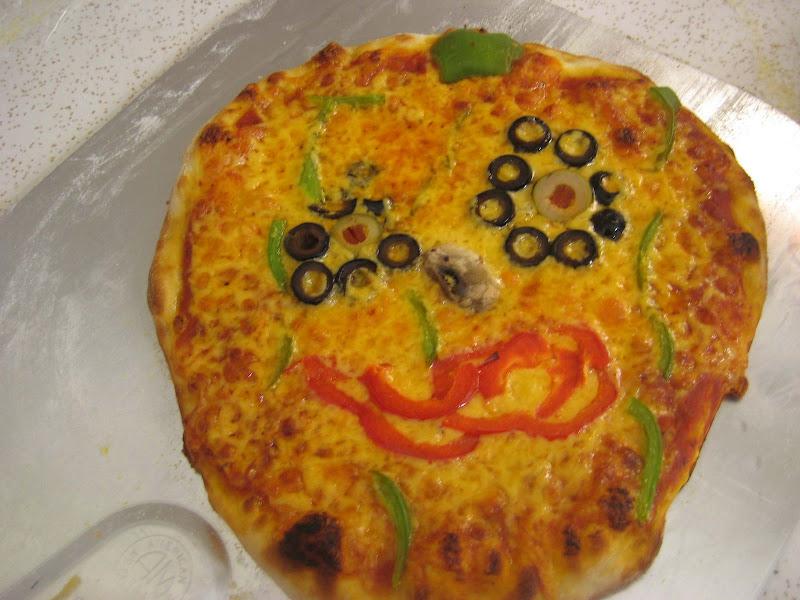

Overall, the pizza turned out delicious. The crust turned out light and not too bready. However, I'm not sure if I would use such a high water ratio the next time around, 69%. My tendency is to be around %60 or until the dough feels right.

That's this month's challenge!
Making pizza dough is pretty straight forward and the ingredients for the dough are minimal - water, flour, yeast, a little oil and some salt and sugar.

I hope you all get around to making a pizza pie.

HAPPY HALLOWEEN!