I was initially disappointed with the results of the eclairs. The choux did not puff the way I imagined and some deflated into ladyfingers... and this (I thought) was supposed to be the "easy" part of the challenge.
Seeking advice in the Daring Bakers Forum, the advice centered around baking times. The reason for the deflating eclairs is undercooking. Another factor that I wasn't sure of was the consistency of the choux before piping. The recipe called for "ribbons". Julia Childs recipe shows a stiffer scoopable choux while Alton Brown's choux was in-between - soft but no ribbons.
The flat eclairs bugged me so much that I decided to make the choux recipe one more time, but this time I'll experiment with baking times. I also tried another consistency of the dough and another piping tip.
The Dough
The basic recipe was the same as the challenge... the only difference was the amount of egg added to form the final choux dough.
Try #1 - followed the recipe to the letter. The final dough was smooth and free flowing, but viscous like honey or molasses.

Try #2 - I looked through a Julia Childs cookbook and the picture of the finished choux was firm and scoopable. I beat the eggs this time instead of adding whole unbeaten eggs. This dough is scoopable. I added about 4 eggs instead of 5.

Try #3 (about 2 1/2 weeks after tries #1 and #2) - I caught Alton Brown's show on choux pastry. His recommendation was the dough should form a "V" when lifted by the spoon and it should tear. Again, I added beaten the eggs... added about 4.5 eggs. The texture was sticky... like getting stuck in the mud. Note the jagged edges where the dough did tear.

The Tip
The recipe called for a 2cm tip (which is about 0.75 inches).
Try #1 - used a ziploc with a corner cut out. Note eclairs are flat to start out with and not really round.

Try #2 - I noticed the end of my water bottle had a 0.75" diameter opening so I used that as a tip in the ziploc. :-) A little dough did slip pass the end of the bag.

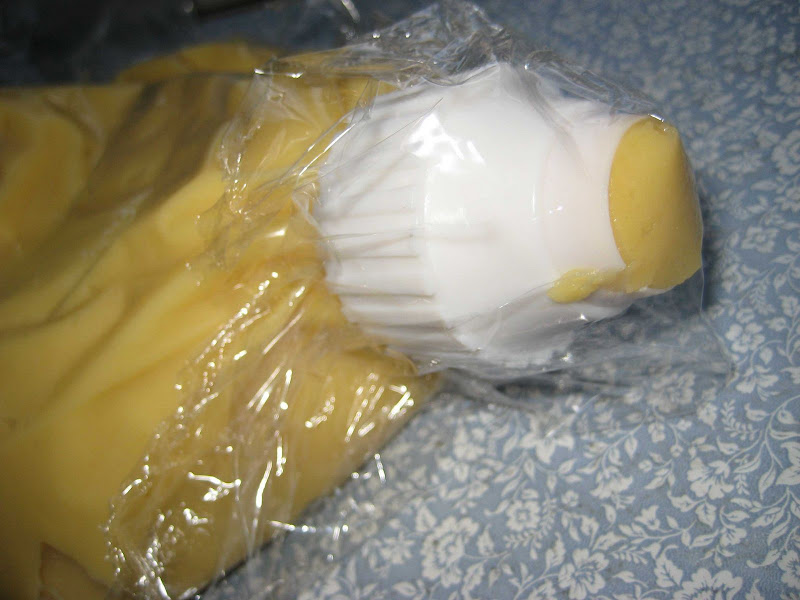
For Try #3 - I caved in and purchased a large piping coupler. I was actually looking in a craft store and there it was. Tip diameter is 0.75 inches. The coupler is two parts that screws together so there should be no problems with leakage.
The Baking Experiment
I decided on 6 baking times and temperatures
1. PH Method (Basic recipe) - 375F, with spoon, without spoon... 20 minutes total.
2. PH Method, no spoon - 375F no door propping, but rotated... 20 minutes total
3. PH Method With Water - Same as one except added a pan of water in the oven... 20 minutes total
4. CIA Method - 325F for 30 minutes (rotate at 15)
5. Alton Brown Method - 425F for 10 mins, rotate, 350F another 10 minutes... 20 minutes total
6. PH Method (Basic recipe) again to see if anything changed.
PH = Pierre Herme
CIA = Culinary Institute of America
Example: Experiment 3 - Water
A pan of water is placed in the oven while the oven is preheating. The water increases the humidity in the oven which is supposed to help the choux rise.
Note: I only baked 3 at a time.
From left to right:
W01 - as piped
W02 - scored with a fork (the lines are supposed to help the choux puff up like an accordion)
W03 - scored with a sharp paring knife (to see if a sharp cut into the dough would work better than the tines of a fork)

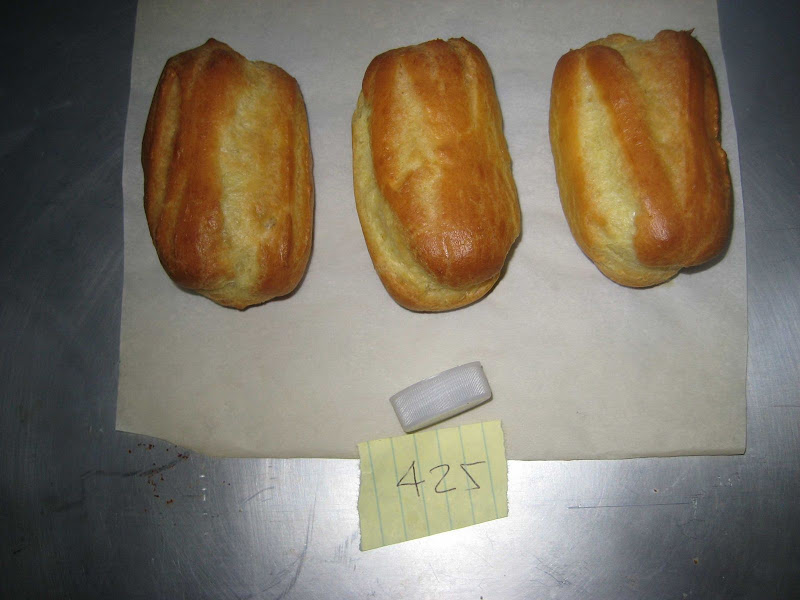
The finished results - The water bottle cap gives scale. The inner ring (dark) is 0.75 inches.
Definite puffing in this shot. Taken out of the oven. No deflating.

A top view - an increase in width too! All these sizes are about the same, but the knife slits seemed to puff the best.

These puffed the most and were baked at 425F. Makes sense. More heat gives more steam.
Comparison of all the results for Try #3.
All methods puffed really well and there was no deflating.
The water pan seemed to help with size, but the choux baked at 425F seemed to puff the most.
Using a knife to make shallow grooves seemed to help. However, using a knife to make grooves should be done on the sides so the top is thicker and uniform looking.

Try #3 - The finished eclairs. Made the chocolate pastry cream filling, but he topping this time is a ganache (because it was easier).

Conclusion - All baking methods seemed to produce good results. General rule of thumb... The hotter the oven the better.
However, I'm starting to believed dough consistency contributes a lot more to the final product size. For example, the ribbony choux produced flat eclairs (too much liquid?) while try #2 was better but still had some deflation (too little water?) and try #3 was the best. A lot of puffing and no deflation.

8 comments:
I have been waiting for this post since you mentioned it in the Daring Baker's forum. You have done a great job delineating the variables involved. Yes I found that the hotter the oven the better I baked mine at 220C for 25mins, and I scored the choux with a fork and used an egg wash also I pricked the éclairs to let steam escape and let them cool in the oven. I also tried all water (with no milk) and that seems to make a crisper and larger éclair. Great work and the amount of effort is impressive. I think you are right it is more the consistency of the choux that is the limiting factor (though this is a guess on my part). Love the idea of the bottle top. The photos are very clear and very educational to all bakers. I like your style.
Oh wow, thank you for all of that information! I too had trouble with deflating and questioned the baking time. I think I will have to give these a go again with slits, higher oven temp, and a pan of water. I really appreciate all of the work you put in to figuring out these fickle eclairs!
Great experiment. I found it was all in the consistency!!
Apu
http://annarasaessenceoffood.blogspot.com/
This is the coolest Daring Bakers write up I've ever seen. Bravo for diving into this challenge and providing TONS of information. That bottle cap idea is SO smart!!! :)
Very interesting! I'm going to save this post for if I ever make eclairs again.
It really is great that you take such care to document every detail, on every try. We all benefit from it! Thanks for sharing what you've discovered.
So much information. Its fantastic I am going to use your advice next time i make the eclairs again
Thank you SO much for doing this! I was having such fun with this month's challenge that I decided to go through the archives with my nieces and see what I've been missing (I just joined). The chocolate cream went well and the eclairs puffed nicely, but then deflated instantly when we took them out. I suspected that it might be a time thing, because we had some dough left and no room for more ribbons, so we made puff dots, and those worked out fine! anyhow, thanks again, and we'll try again, armed with your discoveries!
Post a Comment