Showing posts with label Recipe. Show all posts

Wednesday, March 26, 2008

Casserole

Tonight is casserole night.
My goal was to make something simple and have enough leftovers for lunch.

I have two recipes in mind.

The first uses cooked ingredients and the second recipe uses raw ingredients.
I was torn between doing what I know would work, the first recipe, and just wanting to throw everything in at once and not worrying about it, but I only had raw ingredients.

Recipe 1: Chicken-Broccoli Divan

Recipe 2:Campbell's® Cheesy Chicken & Rice Casserole

My attempt at a casserole... I know I wanted broccoli and I had chicken so I looked at both recipes and combined techniques.

The Fixins'
1 can of Cream of Chicken Soup
4 chicken Breast, Raw
2 C Rice, uncooked
2 C Broth
2 C Broccoli, par-boiled
Black pepper
Garlic Powder
Grated Cheddar

Mix the soup, broth and add rice.
Add broccoli
Top with chicken breast, a little black pepper and garlic powder.
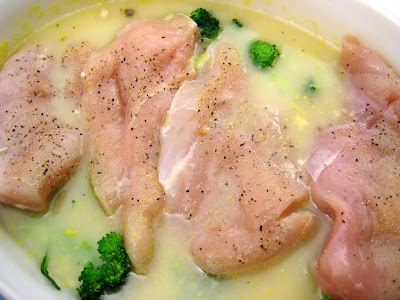

Bake 375 for about 45 minutes
Top with Cheddar and bake another 10 minutes


The Final Dish
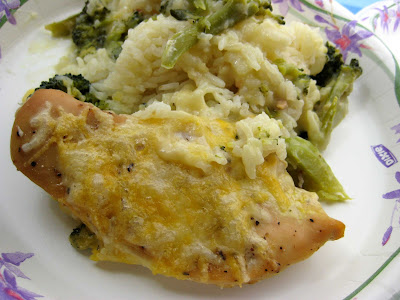

Overall, the dish was not that good in terms of texture, flavor was okay. The rice was almost rice pudding like where the texture was very soft. The chicken was a little dry. The broccoli was actually okay considering the broccoli was cooked over 45 minutes.

My plan was not to spend the time cooking, but I knew I should have cooked everything before forming the casserole. Since I went down the no-cook path, my initial thought was to place the broth and rice on the bottom, cover with a thick layer of broccoli and mix the raw chicken and cream of chicken soup together to form the top layer.

What I did instead, since I forgot my initial plan, was mixed the broth and soup with the rice to form the bottom layer. I didn't have a thick layer of broccoli and the chicken was placed on top bare. That's when I remembered my initial plan. Oh well.

Next time I'll just spend the time cooking everything separately before combining to let the flavors meld in the oven.

In terms of time, it would have worked out the same and I would have had time to do the extra dished while the casserole was baking.

Saturday, March 22, 2008

Corned Beef Hash

I had some leftover corned beef and roasted potatoes so I decided to make corned beef hash. When I go out for breakfast, corned beef hash or biscuits and gravy are my two must tries at a restaurant, but not at the same seating. lol :-P

The Fixins'
3/4 C roasted potatoes, coarse chop
3/4 C corned beef, coarse chop
2 T onion, coarse chop
1 T bell pepper, coarse chop
1.2 T parsley
1/4 t garlic powder
Pinch of tarragon
Pinch of thyme

Of course, being a guy I have to use every dish, pot and pan, plus pull out appliances to make this dish.

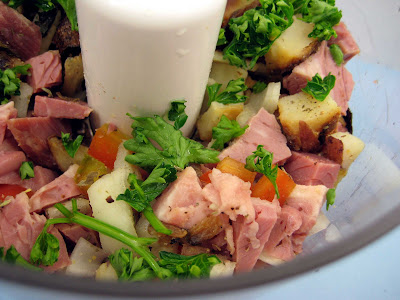
I typically just chop and fry, but this time I wanted to try a finer mince so I dumped all of the ingredients into the mini food processor and gave it a few pulses.


The ingredients after a few pulses. This looked good to me. I didn't want a mash. The mixture at this point looked a little dry, but I continued on.


Pan frying the corned beef hash in a canola oil/butter mixture, about 1 T (T = Tablespoon).
I remember watching the show, Good Eats, and Alton Brown used a weight to cook his corned beef hash recipe. I believe the weight acts to increase the contact area and help brown the hash, similar to a bacon press. I used a sauce pan filled with water as the weight. Pot #2. :-)


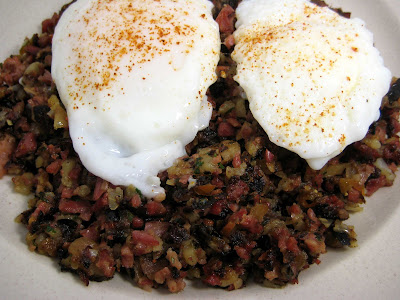
The hash did not flip as a pancake, but turned out crumbly. I also poached a couple eggs as a topper.

Corned beef hash topped with two poached eggs and a sprinkle of cayenne pepper.
I got a little distracted and didn't flip the hash sooner. The crispy bits are a little dark. :-)


The Final Dish
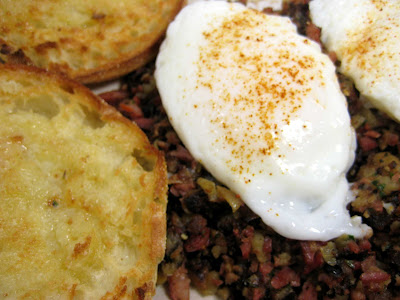
Corned beef hash, poached eggs served with a buttered English muffin. Instead of Hollandaise sauce, ketchup and Louisiana style hot sauce was used.


Overall, the dish had good flavor but was a little dry and crumbly. I was hoping for something a little more moist and cohesive.

Corned beef hash was originally based upon leftovers. I had some cabbage and carrots from the St. Patrick's Day meal, but didn't want that in this dish. However, those veggies would have added extra moisture to the dish. Also, the roasted potatoes I did use are drier than boiled potatoes.

Next time boiled potatoes will be used and that should increase the moistness of the dish. Also, increasing the veggies a little - onions, bell pepper, fresh garlic and parsley, will help too. Finally, a little broth can be added to increase moisture and flavor.

Final utensil count
Pot and Pan Count: 3 (Frying pan, weight pan and poached egg pot)
Appliance: Food processor
Other: Cutting board, knife, slotted spoon, spatula

Not bad for a simple breakfast. lol!

Friday, March 21, 2008

Shrimp Egg Fu Yung

With my home grown bean sprouts, I've decided to make the classic Chinese-American dish Egg Fu Yung.

Egg Fu Yung is essentially an omelet with lots of vegetables and a meat. I would typically use ham, but I wanted to try something different today so I picked shrimp.

Any type of vegetables will work, but bean sprouts, onion, celery are the primary veggies. You can cut the veggies anyway you like, chopped, sliced, diced, minced...etc.

The fixins:

1/2 Zucchini, chopped
1/3 carrot, chopped
1/2 onion, chopped
1 stalk celery, chopped
1/3 cup bell pepper, chopped
3 big mushrooms, rough chop
1 to 1.5 cups beans sprouts
1/2 teaspoon salt
1/4 to 1/2 teaspoon garlic powder
1 teaspoon soy sauce
1/4 teaspoon sesame oil
4 eggs, beaten

15 shrimp (31/35), deveined and split and cut into thirds
1/2 teaspoon soy sauce
dash of white pepper
pinch of salt

1. Shrimp marinaded with a little soy sauce (about 1/2 teaspoon, a dash of white pepper and a pinch of salt)

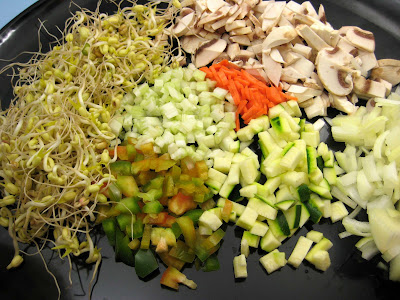
The vegetables


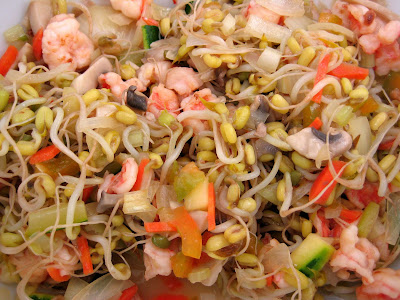
2. I like precooking the ingredients so the omelet part is mainly cooking the egg. First I partially cooked the shrimp, about 3 to 5 minutes. Afterwards the shrimp was taken out and the vegetables and the rest of the seasonings were added. I was mainly sweating the vegetables and steam with a little chicken broth, about 5 minutes. Another reason for cooking the vegetables is to get rid of the "raw" flavor from the bean sprouts.

The vegetables were taken out of the saute pan, mixed in a bowl and allowed to cool. At this point, I could have made another American classic, Chop Suey, by just making a sauce, but my goal was Egg Fu Yung.


When the mixture cooled sufficiently, I added the beaten eggs to the vegetable mixture.
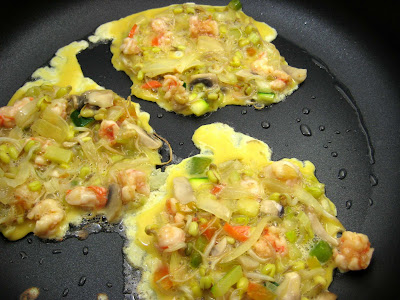
I used a measuring cup, 1/3 C, to pour the mixture into a frying pan. I, also, could have just made one big omelet but my preference is for smaller individual Egg Fu Yung.

Cooking at Medium to Medium-High


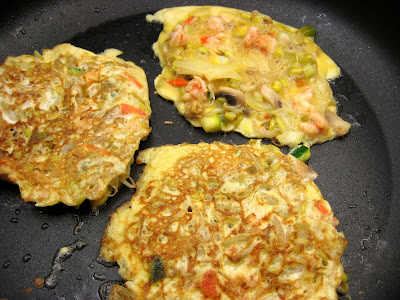
About 3 to 5 minutes, flipped the patties.


Finally when they were all done. I topped with an Egg Fu Yung sauce.

Egg Fu Yung Sauce (Ref: Sunset Oriental Cookbook, 1994)
1 cup of chicken broth
2 tsp sugar
2 tsp vinegar (I used apple cider vinegar)
1 Tbl corn starch
1 Tbl soy sauce
2 Tbl water

Bring the chicken broth to boil. Dissolve the other ingredients in a small bowl.
When the broth boils, stir in the rest of the ingredients. The mixture should be fully thick when the sauce comes to a boil

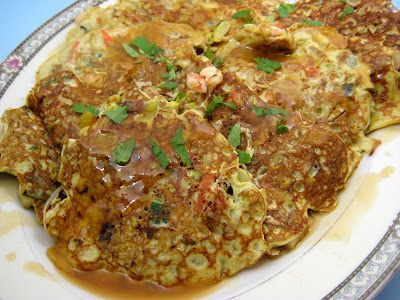
The Final Dish:
Egg Fu Yung with Sauce


Overall, the vegetables were still had a slight crunch and the taste was good. The bean sprouts turned out nice.

There was about 3 cups of the vegetable shrimp mixture. I could have used 3 eggs instead of 4 so the patties aren't as eggy. Also, the vinegar seemed pretty strong in the sauce so I will probably use 1 teaspoon instead of 2 the next time around.

I forgot to add/buy green onions. Green onions would have added a little extra flavor.

Sunday, March 16, 2008

Beef Roast

Today was a beef roast day.

Purchased a Beef Chuck Mock Tender Roast.
Chuck is from the front shoulder area of a cow/bovine. Those muscles are well worked on an animal so it is usually considered to be a "less tender" cut of beef.

I was asking myself "What is mock tender"? Mock is to imitate or pretend so does mock tender mean "pretend tender" which is tough?

It looked like a good cut - single muscle, boneless and inexpensive. Also, it had the word tender in it. Did I fall for a marketing ploy? lol :-)

I trimmed the exterior fat and membrane/silver skin. I hope I didn't over do it.
After I trimmed the roast, it clicked that maybe mock tender means "mock tenderloin"? The trimmed roast does have a tenderloin shape to it.

Sprinkled the roast with a little salt. about 1 teaspoon of kosher salt. It really wasn't too much salt.
A few grinds of black pepper and a light coating of olive oil (about 1 to 2 teaspoons). I hoped the oil would replace the fat that I cut off in terms of browning.


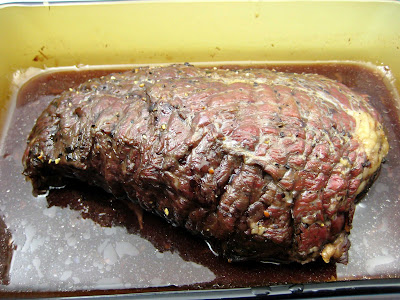
Baked at about 200F for 4 hours. I measured the temperature and it was 140F which the low end of medium. I used the philosophy for tough cuts of meat - low and slow. Low temperatures for a long time (slow). My concern was that I'd end up with beef jerky.

The roast shrank a lot and looks a little jerky like.


I chopped up about 1/2 cup of onion, 1/2 teaspoon shallot and 1 cup of mushrooms.

Sweated the onions and shallot in olive oil and a little butter. Afterwards, I added the mushrooms and a pinch of thyme.

When the mushrooms cooked down, I poured in the beef jus and a 1/4 c water to rinse out the baking dish. I, also, added a couple drops of Kitchen Bouquet

I let the mixture cook down.

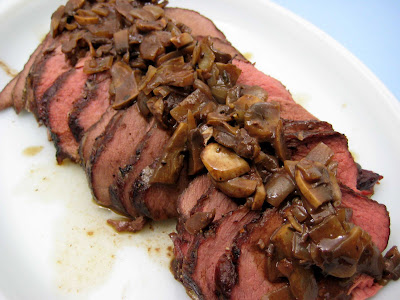
With an electric slicer, I sliced the beef thinly and topped it with the onion-mushroom mixture. The beef turned out medium/medium-well. I lucked out. The 4 hours was just the amount of time I spent at work and my drive home.


But there's more!
I had a bottle of Johnny's French Dip Au Jus so I made some per the directs.

The Final Dish:
I main craving for today was actually a French Dip Sandwich.

I toasted a ciabatta roll, dipped in the au jus, added a light coating of mustard and mayo. The onion-mushroom "relish" added an additional beefiness to the sandwich. The sliced sweet potato offered a little sweetness to counter the savory sandwich. Also, I was craving sweet potatoes instead of broccoli. lol :-)


Overall, the thinly sliced beef was good and not that tough. The slices near the fat end of the roast had some gristle that can be cut out easily.

The bottled au jus didn't really seem to contribute a lot of beefiness, but the mushroom mixture using the roast juices had a nice beefy flavor. Next time, I'll try to find a way to make more jus from the roast. :-)

Thursday, March 13, 2008

Pork Cutlets

I still had a chunk of uncooked pork loin in the refrigerator leftover from the Chile Verde recipe.

My desire was to make Pork Piccata. Pork piccata, similar to chicken piccata, is floured thinly sliced pork, fried and served in a lemon, butter, caper sauce. However, I didn't have any lemon nor capers. After work, I just wanted to go home and feed the pups so I bypassed the supermarket.

My alternative was Tonkatsu which is fried pork cutlets breaded with panko bread crumbs.
Well, when I looked through my pantry. I didn't have any panko. Where did they go? To the same place where lost socks go? I think I thrashed the panko last month since they were sitting in my pantry for over a year.

Other similar fried cutlet dishes -
Tonkatsu, Japanese
Weiner Schnitzel or Schnitzel, German
Milanesea, Portugal/Latin America

My alternative to my alternative - Simple Fried Pork Cutlets.

The fixins
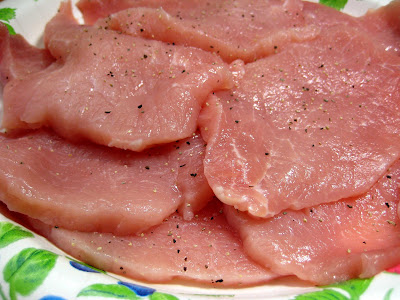
Pork sliced thinly. Typically pounded to thin out the slice, but I didn't want to put that much effort into the dish.
Flour
Salt
Pepper
Garlic powder


Mix the flour, 1/4 teaspoon (each) salt, pepper and garlic powder.
Coat the pork cutlets.


Pan fry in oil. I used an olive oil and butter mixture.
I estimate it was about 2 to 3 minutes each side.

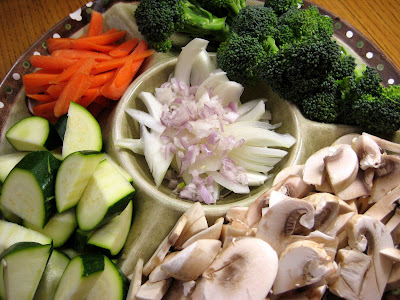
Sauteed Vegetables were served as a side dish.


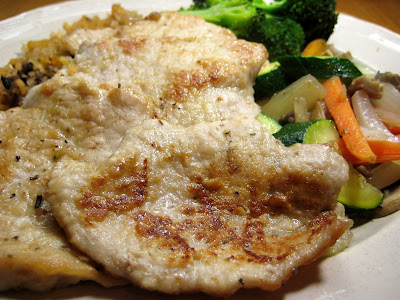
The final dish
Since the cutlets were thin and from the pork loin, I half expected the cutlets to be dry and stringy. Surprisingly, the cutlets were moist and very tender.

Monday, March 10, 2008

Mustard Cabbage with Braised Pork

A few days before my chili verde craving, I braised pork belly with fermented black beans and tofu.

Today, I was craving vegetables. I think it was my body telling me to eat some leafy greens.

What I did today was boiled some Chinese Mustard Cabbage (Gai Choy) and served it with the leftover braised tofu. The mustard cabbage has a peppery taste to it that's stronger than Boc Choy or Swiss Chard.

Braised Pork over Gai Choy.
(Note: You'll probably notice that there is no pork in the picture. The pork was eaten in previous meals. hehehe.)

Sunday, March 9, 2008

Chili Verde

Recently purchased a pork loin on sale, $1.28 per pound. To me this was a great find, pork loin has almost 100% utility. Just a little trimming removing a little fat and silver skin and you're left with a very lean chunk of meat.

The decision was made to make Chile Verde, a green chile pork stew, and Mexican Rice. I have no set recipe and generally use what I have on-hand.

Chile Verde
The fixins
3 lbs Pork - cubed into about 1" chunk. Pork loin is good, but since it is a lean cut tends to be a little dry. Country style ribs, which I believe is from the shoulder blade, is another good choice since the meat has more marbling.
1 small can of roasted green peppers
2 cloves Garlic, minced
1/4 Onion, chopped
1 T Shallot, chopped
1 T Oregano
2 teaspoons Thyme
Salt
Broth or water
Green Chile Salsa (Salsa Verde) - Optional


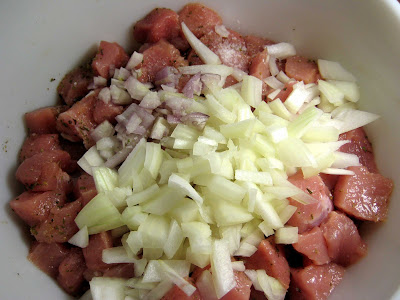
Cube the pork, season with about 1 or 2 teaspoons spoons salt, garlic, oregano, thyme, onion and shallot. Let marinade about 20 minutes.


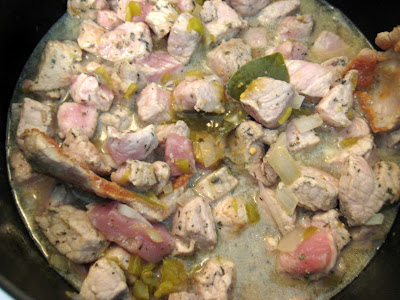
Brown the pork - You can actually skip this step and add the liquid and green chiles. About 1 cup of liquid, you want the liquid to only come 1/3rd the way up the meat. If you add more liquid (as pictured below), the stew is a little soupy, which isn't bad.


Bring to a boil and turn to medium to simmer. For the pork loin, about 45 minutes is good. For the country style ribs, about 1 hour.

At the last minute, add some green chile salsa. The green chile salsa optional but adds a little bit of spiciness to the Chile Verde. Taste to see if you need to add salt.


The side dish - Mexican Rice
2 cups of Long Grain Rice
1/2 cup Onion, chopped
1 T Shallot, chopped
1 clove garlic, minced
3 cups of Broth
Salsa
Oil and/or butter

Brown the rice with the oil. I used an oil and butter mixture. When the rice is starting to brown, I added the onions, shallots and garlic to the hot rice so the flavors will permeate the rice.


Add the liquid and salsa. Typically for rice I like using 1.25 cups to 1.5 cups of liquid per 1 cup of rice. The salsa gives the rice color and adds additional flavor.


Bring to a boil and turn down to medium, medium-low, to simmer.
Before serving, fluff the rice and taste for seasoning.


The final results
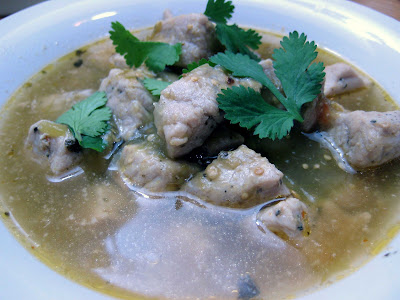
Bowl of Chile Verde


Rice, Beans and Tortillas on the side.

Saturday, January 26, 2008

My Evolving Chicken Pot Pie Recipe

Chicken was on sale at the supermarket for $0.69 a pound. Locally grown, not shipped across the country via a tractor-trailer. I couldn't pass up the bargain.

I poached the meat and made a stock with the carcass. What to do with the chicken now?

Why not make chicken pot pie?
- I have a frozen deep dish pie crust from Thanksgiving that I should use now.
- The weather has been cold and I've been eating very simple.
- I'll make something hearty and sort of healthy.

I usually just use what's in the refrigerator and I don't write down the amounts, but out of curiosity I kept track.

A deep dish pie crust holds 4 cups of filling. Let's see how close I can get.

Chicken Pot Pie

Potatoes - Chopped about 1/2 inch cubes = 3 cups
Peas - Frozen = 1 cup
Carrots - 1/4 inch dice = 1/2 cup
Onions - 1/4 inch dice = 1/2 cup
Celery - 1/4 inch dice = 1/2 cup
Bell Pepper - 1/4 inch dice = 1/3 cup
Chicken - coarse chop = 1.5 cups
Parsley - fresh, chopped = 1 to 2 tablespoon
Thyme - dried = a couple pinches
Tarragon - dried = a couple pinches
Green Onion - chopped = 1
Homemade stock = 1 cup
Salt and Pepper to taste

Saute the potatoes, carrots, onions, celery, bell pepper in butter with the thyme and tarragon.
Add the rest of the ingredients plus the stock to steam.
I used a butter and flour mixture (beurre manie) to thicken up the mixture.
Poured the filling into the pie,
Covered with the top crust.
Baked at 400F for 25 minutes.

The filling mixture turned out 6 cups and I used 4 for the pie.

Overall, my chicken pot pie was more like a potato pot pie. The pie had a nice flavor, but a bit on the mild side in terms of the herbs.

Also, it felt good to eat something homemade that's a little more hearty instead of rice and veggies or sandwiches.

Changes for the next time around.
- Increase the stock from 1 cup to 3 cups so there will be more gravy.
- Decrease the potato from 3 cups to 2. Chop the potatoes a little more smaller.
- Increase the thyme and tarragon. I didn't want to overpower the dish, but a little more would be nice.
- Add Sage. Sage and poultry is a very common combination.