Monday, July 14, 2008

Jul 14: Am I Nuts?

That's what I was thinking yesterday.

I'm working on a recipe that requires hazelnuts. In the olden days, when I was growing up, hazelnuts were called filberts. In the world of marketing, I guess hazelnut is not as nerdy sounding as filberts.

Most recipes call for skinning the hazelnut. Roasting with the skin on can result in a bitter end product. However, finding skinned hazelnuts was difficult so I ended buying whole shelled nuts.

On a raw hazelnut, the skins are difficult, if not impossible, to rub off.

Doing research on the Internet I found a few different approaches for roasting and skinning techniques. Basically, the methods boiled down to blanching or roasting.

These two sites offered good info:
Hazelnut Marketing Board These guys are the hazelnut experts - Recommends roasting 275F for 15 to 20 minutes. Wrap in a terry cloth towel for 5 to 10 minutes. Afterwards, rub filberts with the cloth.

Fine Cooking - Gives two methods - toasting and blanching, plus the pros and cons of each method.
Toasting - 375F for 10 minutes. Wrap in a towel to call for 10 minutes. Rub vigorously.
Blanching - For 1/2 C filberts, use 1.5 C water and 2T baking soda. Boil 3 minutes. Cool a few filberts in cold water to see if the skins slip off. Boil longer as needed.

With all of this information, I designed a little experiment to see which method worked the best.

HAZELNUT SKINNING EXPERIMENT
The methods:
1. Control: Boil in plain water for 3 minutes. Cool under cold running water. Peel.
2. Hazelnut Board Method: Roast 275F for 15 minutes and cool wrapped in a towel.
3. Fine Cooking Toasting Method: 375F for 10 minutes, cool wrapped in a towel.
4. Fine Cooking Blanching Method: Boil 3 minutes in 1.5 C water and 2T baking soda.

For each method, I used 1/2C (2.5 oz or 71 g). Total amount to roast 1 lb.

Method 1: Control
Boiled for 3 minutes. Cool under running water.
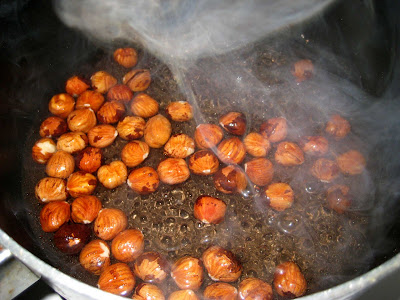

This method was time-consuming. The skins did peel off, but I ended peeling each filbert individually. Due to the handling, the many of the filberts tended to split in half which is fine since I will be chopping and sending the filberts through the food processor.

This was my first batch so I was still motivated with running my experiment. However, as the peeling continued, my thumb was starting to develop a sore spot from the rubbing/peeling. My manicured, white-collar hands just aren't used to such hard work... lol.

Unroasted skinned hazelnuts. Note the cooked layer around the edges of the nut. The nuts were damp and slightly tacky to the touch.
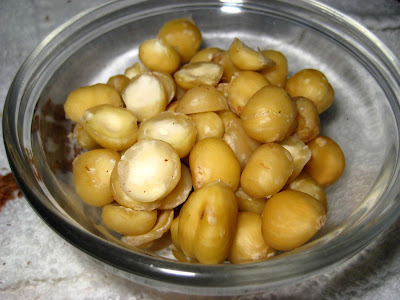

Method 2: Hazelnut Marketing Board - Roasting at 275F
Roasting at 275F, wrap in towel and cool 10 minutes. Note: I ended up cooling about 20 to 30 minutes since I was still peeling the filberts from Method 1.

While rubbing with the towel, you can hear the skin crackle and see the skin slough off.

Toasted Filberts.
About 60% of the nuts peeled cleanly. The other 40% were only partially skinned and rubbing didn't work on the stubborn ones as with the boiled. The filberts are dry and fragrant.
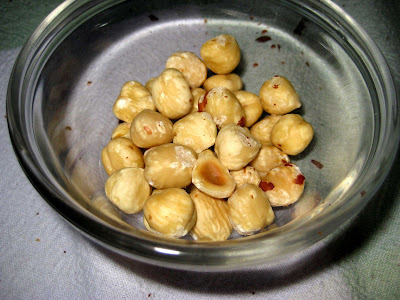

Method 3: Fine Cooking Toasting
Similar to Method 2, except 375F and 10 minutes. (No photos)
The skin was drier and cracked like dry paint. After cooling, the skin fell off a lot easier. However, only 60% to 65% were completely skinless which is the same as method 2.

Method 4: Fine Cooking Blanching
Blanching with baking soda. I was hesitant to do this step for fear that the baking soda would drastically change the flavor of the nuts. Also, my thumbs where sore from Method 1. Cleaning each filbert individually was getting old.

Much to my surprise, this turned out to be the easiest and quickest method of all. After 3 minutes of boiling and cooling under running water, the skins peeled off with just a squeeze.

One thing about the blanching/boiling method. This method is a two step method. First you skin and then you roast. The toasting/roasting method does both in one step.

Roasted blanch hazelnuts.
Roasted 375 for about 10 minutes.
The filberts towards the upper left corner were blanched with baking soda, while the filberts towards the lower right corner were boiled with only tap water.
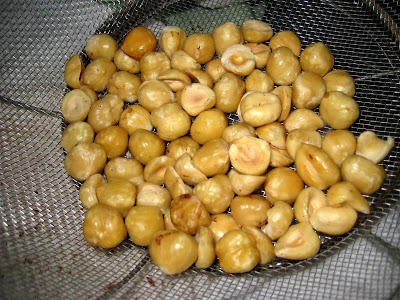

As pointed out in the Fine Cooking article, blanching will soften the nuts. When roasted the nut will not have the crunch of the roasting method.

The Taste:
The taste of the roasted nuts seemed more flavorful and were crunchy. Reminiscent of a dry roasted peanut. The blanched nuts didn't seem as flavorful nor as crunchy. The flavor difference is probably not too much of a factor if you're mixing with other ingredients and using a larger quantity, but eating out of hand the roasted nuts tasted better.

Roasting the remainder:
To finish roasting the rest of the hazelnuts, I used the 375F method, roasting for 10 minutes. This batch turned out darker than the rest and on the verge of burning. My initial gut instinct was to stop at 7 minutes, but I roasted for the full 10 minutes. Even though the skins were dark brown, brittle and cracked, I estimate that only 60% of the nuts were completely skinless after rubbing with a towel.

The method I would use for the next time...
If I were to skin hazelnuts again, I would lean towards the roasting at 275F for 20 minutes. There was no noticeable difference (taste and skinning) between methods 2 and 3. However, I believe the slow roasting will help develop the flavor with a lower chance of burning. It gives a little more room for error, if you forget that you have them in the oven. Over-toasting will result in a burnt bitter flavor.

Experiment Completed
Time to run the experiment, skin and roast 1 lb of hazelnuts: 3 hours.
Geez! I think I am nuts!

Saturday, July 5, 2008

Jul 05: Bacon Gravy

When I was growing up, I ate a typical breakfast - bacon, eggs, toast or a biscuit, but I didn't discover the joys of sausage gravy until college. A few years after that, when I met Shawn, she introduced me to bacon gravy. The whole concept of gravy for breakfast was a delicious new adventure for me.

My quest for a good sausage gravy recipe continues. I believe good sausage gravy is dependent upon the sausage being used.

Bacon gravy on the other hand is very straight forward and consistent. Bacon pretty much taste the same from name brand to name brand - smoke, salt and a little sugar. However, supermarket house brands can be iffy since it seems the house brands (I've tried) are more akin to salt pork where the bacon is mainly salty and the smoke flavor is very faint to non-existent.

Bacon Gravy
3 T Bacon Grease (I know grease has a negative connotation, but used in conjunction with bacon the results are yummy!)
3 T Flour
2 C Milk (I used 2%)
Salt and pepper to taste

After you're finished cooking the bacon reserve some bacon grease.
Add the flour and blend in and cook over medium heat for a minute or two.

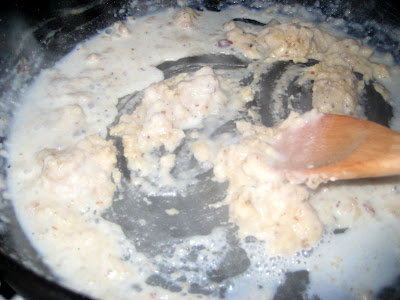
Usually I don't measure the flour, I add enough flour to form a slurry that's about the thickness of hot peanut butter on toast. I'm not trying to make a flour ball. In fact, sometimes I just add enough flour to absorb a majority of the bacon grease but mixture remains frothy as it cooks. Note the little bits of bacon fond adding to the flavor.


Slowly add 1/4 of the milk and blend together. As you continue to add the milk the "dough ball" will be transformed into gravy. Initially I used a wooden spoon to mix, but I found that a fork (or a whisk) works better at blending the milk and roux mixture.


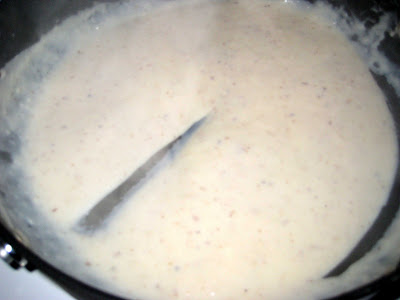
As you continue adding the milk, the paste will transform into a gravy. Eventually, you can add all of the remaining milk. If you're serving immediately, I cook until a scrape across the bottom of the pan takes about a second or two to fill in, as shown below. Salt and pepper to taste. However, if you're not serving immediately, you can leave the gravy a little loose. Flour/roux based gravies will continue to thicken when taken off the heat.


Come to think of it... I've never tried dumping all of the milk in at once. I add the milk a little at a time to minimize lumps (floury dough balls). However, if I can add all the milk at once it will save some time in the long run. In theory, a roux is supposed to mix easily with the liquid without lumping/clumping. I should try adding all the milk at once the next time I make gravy.

The Dish
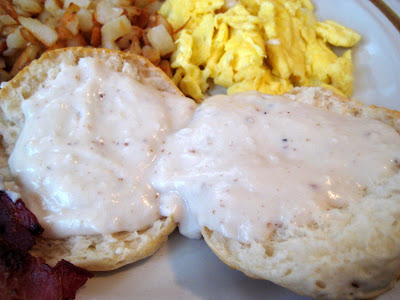
Bacon gravy over refrigerated Grands biscuits, scrambled, potatoes and bacon.

Delicious bacony goodness. :-)

Monday, June 30, 2008

Jun 30: Puff Pastry Fun

Today, more fun with puff pastry.

I have store-bought puff pastry in the freezer and Shawn purchased some black raspberries from Trader Joe's.*

Although the weather has been hot, mid-80's F inside, today was a lot cooler, mid-70's inside, I've been eager to bake a dessert using puff pastry and the berries.

Thumbing through Julia Child's The Way to Cook I spotted a couple promising recipes. Also, searching through the internet, I found a recipe for Jalousie from the Fine Cooking magazine website - Mixed Berry Jalousie.

According to Julia Child, Jalousie (Ja-la-see) is the French name for Venetian blind.

Mixed Berry Jalousie
Preheat oven: 400F

The Fixins'
12 oz Black Raspberries (Original recipe calls for 14 oz of mixed berries)
1/4 cup granulated sugar (I weighed out 50 gram of sugar)
1 tsp fresh lemon juice
Pinch cinnamon
Pinch salt
1-1/2 Tbs. cornstarch
1 large egg + 1 T water
1 sheet frozen packaged puff pastry, thawed
1 packet of turbinado sugar (I used a Sugar in the Raw packet which is about 3/4 tsp)

Cooking the berries:
1. In saucepan, stir together the berries, sugar, lemon juice, cinnamon, and salt.
2. Heat and simmer, stirring gently from time to time, until the berries release juices and soften about 8 to 10 min.
3. With a slotted spoon, scoop out the berries into a bowl, letting as much juice as possible drain through the spoon. Reserve the juices in the pan.
4. Dissolve the cornstarch in 3 Tbs. cold water. Whisk into the juices in the pan. Bring to a boil over medium-high heat, stirring with a wooden spoon, until the mixture is very thick, about 1 to 2 minutes.
5. Mix and fold the sauce into the bowl.
6. Let cool.

The puff pastry
7. Unfold the puff pastry onto parchment paper and roll with a pin. I was worried about rolling to thin since the kitchen was hot and I'm not too familiar with puff pastry. My puff pastry sheet ended up roughly 10 inch x 12 inch semi-rectangular and semi-hour glass... lol.
8. Cut the puff pastry sheet in half along the long edge.
9. Brush egg wash (1 egg + 1 T water) along the edges of one half. The other half I made slits in the dough. The recipe suggest folding the top sheet in half and making the slits. I was worried that the heat would fuse the sheet together.


10. Brush the other half with egg wash along the edges, creating a 1 inch border, and fill with the berry mixture between the egg wash border.


11. Place the slit puff pastry over the mixture.


12. I squared off the pastry by folding the extra dough over and crimping with a fork.


13. Brush the top with egg wash and sprinkle on the turbinado sugar.


14. Bake for 15 minutes and rotate and bake another 10 minutes. Since it was a hot day and the dough was soft, the pastry cooked in about 20 minutes.

15. Remove from the oven and set onto a cooling rack.


The Final Dish
Served with freshly whipped cream.
1 C heavy cream
3 T sugar
1 t of vanilla.


The puff pastry did puff and was crispy, even though the dough was soft from the very warm kitchen and the rolling. The berries were nice. Nice berry flavor and sweet, but not overly sweet. I tend to avoid berries since they can be tart.

*Note: Shawn and I had a bet on who would walk the pups. She bet that we had black berries. I claimed we had raspberries. Looking at the package, we purchased "Black Raspberries." I guess we were both right. Looks like no walk for the pups... just more treats. lol!

Sunday, June 29, 2008

Jun 29: Vegetable Garden Status

Hot! Hot! Hot! These past few days: 80's and low 90's.
I was curious how the veggies were progressing in my garden.

April 12th: planted beets and carrots.

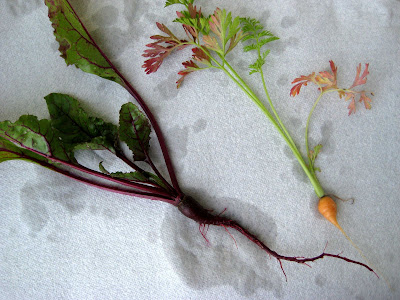
Today, I pulled a beet and a carrot to see how they're progressing. The package suggest 60 days to maturity, but during the Spring, we had only a couple days of sun per month so the plants were really growing slowly due to a low heat index.

Carrot is developing the desired spherical shape. The beet still more carrot looking than spherical looking. I'm guessing both are at least 2 to 3 week from maturity.


May 15th: started sunflowers, Thai Basil and Brussels sprouts.

The Thai Basil - flopped. A couple seed sprouted and died back. These seem very hard to grow and very slow to germinate.

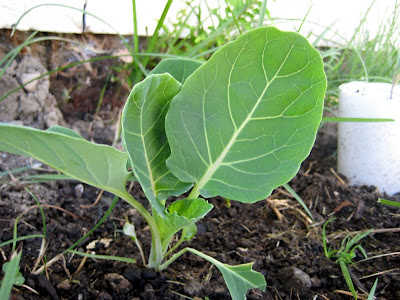
Brussels sprouts are in the ground and growing very slowly. 5 out of 10 were eaten by slugs.


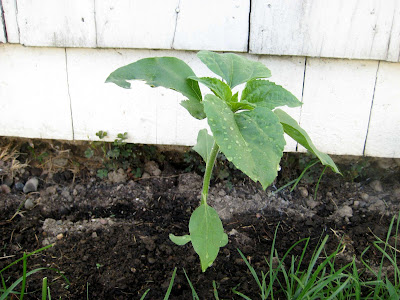
Sunflowers are in the ground, but 7 of 10 were hit by slugs and snails.
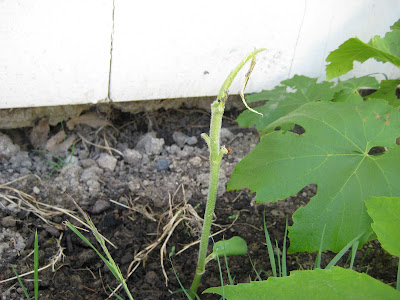
One of the few


Sunflower #7 bites the dust. Slug ate well this morning before he met Mr. Heel.


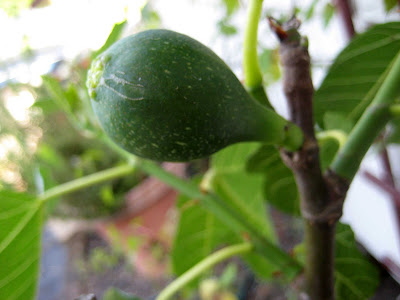
I have a little fig tree... actually more like a fig twig I purchased late in the season last year on the clearance desk.

Lone Peter's Honey Fig.

Sunday, June 22, 2008

Jun 22: Creme Brulee (Burnt Cream)

A few years ago I received a Creme Brulee Set as a present (Thanks Shawn!). The set contained four porcelain ramekins and a torch.

Since I'm a budding pyro, the torch was the first piece I used. However, I did not make the dessert until today.

The recipe contained in the set was very straight forward and simple.

Creme Brulee (Burnt Cream) is a silky smooth custard dessert with a crunchy sugar topping.

The Fixins'
3/4 C Heavy Cream... Today I used whipping cream.
1T + 2 tsp Sugar... For some reason, I had stuck in my mind 3/4 C sugar and measure it out... thinking that's a lot of sugar. Fortunately, I reread the recipe.
2 Egg Yolks
1/2 t vanilla

Preheat oven, 300F and boil some water - I used 1 cup.

1. Combine cream and sugar in a small saucepan over medium heat. Cook and stir occasionally to a simmer... about 5 to 6 minutes.

2. In a separate bowl, beat egg and vanilla until light.

3. Slowly add that hot cream mixture into the beaten egg to temper the eggs. Continue adding and beating the mixture.

4. In a baking pan, arrange ramekins. Pour in brulee mixture evenly into each ramekin.

5. Pour the boiling water into the baking dish so the brulees will bake in a water bath. Water should be halfway up the side of the ramekins.

6. Cover loosely and bake for about 25 to 30 minutes.

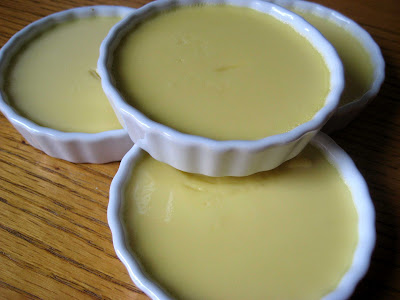
The four ramekins out of the oven and cooled. Afterwards, the individual ramekins were wrapped in cling film and refrigerated.


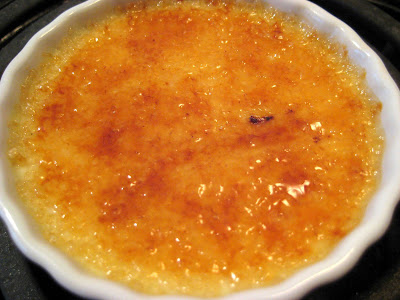
The burnt part of burnt cream.
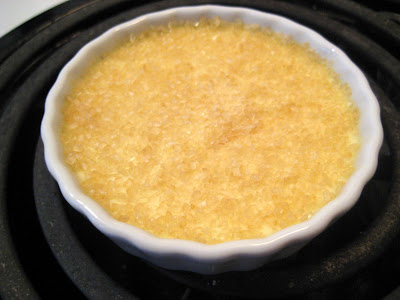
Before serving, sugar was sprinkled sugar atop the custard.
The image shows Sugar in the Raw(TM)(aka turbinado sugar).


The torch was used to melt, slightly caramelize the sugar to form a crunchy topping.


For the sugar topping, I tried granulated sugar about 1/2 to 1 tsp. The topping didn't seem to harden up properly. Shawn suggested using turbinado sugar. At the local Starbucks, I picked up a couple packets of Sugar in the Raw (TM). Don't worry I didn't steal the packets. Being a shareholder, I'm part owner so the packets are complimentary. lol.

The final dessert turned out well. Silky smooth vanilla flavored custard. The turbinado sugar did the trick for the crunchy crust.

Of course, I can't leave well enough alone.
My next try I plan to use heavy cream and use a vanilla bean instead of vanilla extract.

Wednesday, June 11, 2008

Jun 11: Rib Tips

Last night, I cut the rib ends trimmed from the spare rib slab into bite size morsels.
The rib tips were mainly meat with a little cartilage from the sternum.

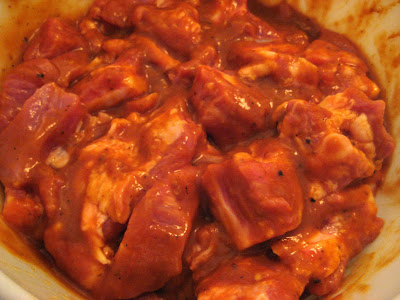
The marinade was the leftover vinegary bbq sauce, about 1 cup, plus 1/2 cup a commercial bbq sauce.

Marinade the night before...


This morning
I poured everything into the Crock Pot, set to low and went to work.

10 hours later... I got home.

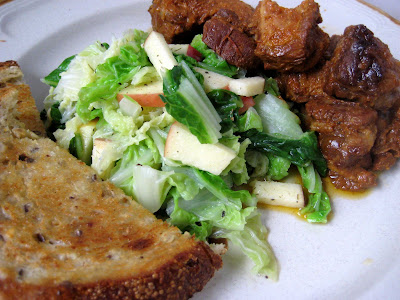
Blanched some Nappa Cabbage.
Sliced a Fuji Apple and made a light slaw.
1T Mayo, A dash of red wine vinegar, salt, pepper and a pinch of dill.

Served with a buttered pieced of multi-grain toast.


I didn't expect to be at work so long... so after 10 hours in the crock pot the rib meat was a little dry and the texture gritty. Bummer.

I didn't think to add garlic to the crock or any other herbs and spices. I'll have to work on this dish some more.

Tuesday, June 10, 2008

Jun 10: Campfire Cooking

After the smoked spare ribs hit the oven, the coals were still very hot.

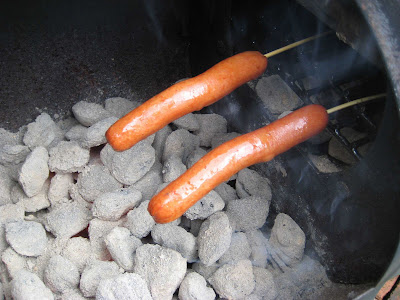
I decided to cook hot dogs on a stick like the good ol' days while camping... Not that I ever camped. lol!

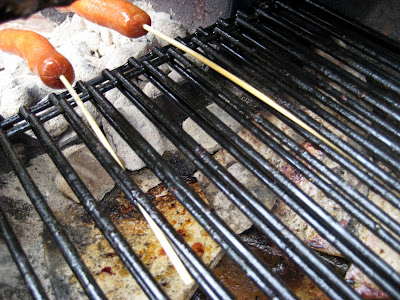
My neat idea was to suspend the hot dog over the coals.


Clamped in place with the cooking grate.


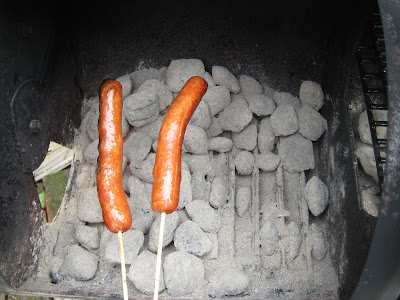
The one problem was difficulty rotating the hot dogs. One side was getting nice and toasty while the other side looked the same.

With a lot of maneuvering, coal shoveling and knuckle hair burning, I pulled the hot dogs out and just held them over the coals.
Yum! Meat on a stick.


To bad I didn't have any fixins' for s'mores.