I guess I'm a typical guy who's slow on the uptake and clueless to the obvious.
I enjoy blogs with pretty pictures (e.g. Tastespotting). For the past few months, there were occasional post entitled Daring Baker which I thought was simply someone's tagline. I finally realized it was a group of folks challenging themselves with baking challenges with all the members posting the results the same day. Duh!?!?
Being challenged, learning (and eating) something new, sharing the results with family and friends, I had to give this group a go. :-)
This is my first Daring Baker Challenge. My initial reaction upon seeing the recipe was excitement and fear, "Wow! What have I gotten myself into?" However, as with many large problems or jobs, you break it down into smaller easier to manage tasks to help accomplish the larger job. After reading through the recipe many, many times, I realized it was just a bunch of smaller recipes making the whole cake, so my fears eased.
Using the oven is nothing new to me, I bake breads, roast vegetables and meat. However, making a cake plus frosting from scratch is something new to me.
***** Start of Recipe *****
The July Challenge Recipe
Recipe provided by Daring Baker Mele Cotte
Filbert Gateau with Praline Buttercream
From Great Cakes by Carol Walter
1 Filbert Genoise
1 recipe sugar syrup, flavored with dark rum
1 recipe Praline Buttercream
½ cup heavy cream, whipped to soft peaks
1 recipe Apricot Glaze
1 recipe Ganache Glaze, prepared just before using
3 tablespoons filberts, toasted and coarsely chopped
Filbert Genoise
Because of the amount of nuts in the recipe, this preparation is different from a classic genoise.
1 ½ cups hazelnuts, toasted/skinned
2/3 cup cake flour, unsifted
2 Tbsp. cornstarch
7 large egg yolks
1 cup sugar, divided ¼ & ¾ cups
1 tsp. vanilla extract
½ tsp. grated lemon rind
5 lg. egg whites
¼ cup warm, clarified butter (100 – 110 degrees)
Position rack in the lower 3rd of the oven and preheat to 350 degrees. Grease and flour a 10” X 2” inch round cake pan.
Using a food processor, process nuts, cake flour, and cornstarch for about 30 seconds. Then, pulse the mixture about 10 times to get a fine, powdery mixture. You’ll know the nuts are ready when they begin to gather together around the sides of the bowl. While you want to make sure there aren’t any large pieces, don’t over-process. Set aside.
Put the yolks in the bowl of an electric mixer, with the whisk attachment, and beat until thick and light in color, about 3-4 minutes on med-high speed. Slowly, add ¾ cup of sugar. It is best to do so by adding a tablespoon at a time, taking about 3 minutes for this step. When finished, the mixture should be ribbony. Blend in the vanilla and grated lemon rind. Remove and set aside.
Place egg whites in a large, clean bowl of the electric mixer with the whisk attachment and beat on medium speed, until soft peaks. Increase to med-high speed and slowly add the remaining ¼ cup of sugar, over 15-20 seconds or so. Continue to beat for another ½ minute.
Add the yolk mixture to the whites and whisk for 1 minute.
Pour the warm butter in a liquid measure cup (or a spouted container). * It must be a deep bottom bowl and work must be fast.* Put the nut meal in a mesh strainer (or use your hand – working quickly) and sprinkle it in about 2 tablespoons at a time – folding it carefully for about 40 folds. Be sure to exclude any large chunks/pieces of nuts. Again, work quickly and carefully as to not deflate the mixture. When all but about 2 Tbsp. of nut meal remain, quickly and steadily pour the warm butter over the batter. Then, with the remaining nut meal, fold the batter to incorporate, about 13 or so folds.
With a rubber spatula, transfer the batter into the prepared pan, smoothing the surface with the spatula or back of a spoon. **If collected butter remains at the bottom of the bowl, do not add it to the batter! It will impede the cake rising while baking.
Tap the pan on the counter to remove air bubbles and bake in the preheated oven for 30-35 minutes. You’ll know the cake is done when it is springy to the touch and it separates itself from the side of the pan. Remove from oven and allow to stand for 5 minutes. Invert onto a cake rack sprayed with nonstick coating, removing the pan. Cook the cake completely.
*If not using the cake right away, wrap thoroughly in plastic wrap, then in a plastic bag, then in the refrigerator for up to 3 days. If freezing, wrap in foil, then the bag and use within 2-3 months.
Sugar Syrup
Makes 1 cup, good for one 10-inch cake – split into 3 layers
1 cup water
¼ cup sugar
2 Tbsp. dark rum or orange flavored liqueur
In a small, yet heavy saucepan, bring the water and sugar to a boil and simmer for 5 minutes. Remove from heat, add the liqueur. Cool slightly before using on the cake. *Can be made in advance.
Praline Buttercream
1 recipe Swiss Buttercream
1/3 cup praline paste
1 ½ - 2 Tbsp. Jamaican rum (optional)
Blend ½ cup buttercream into the paste, then add to the remaining buttercream. Whip briefly on med-low speed to combine. Blend in rum.
Swiss Buttercream
4 lg. egg whites
¾ cup sugar
1 ½ cups (3 sticks) unsalted butter, slightly firm
1 ½ -2 Tbsp. Grand Marnier or liqueur of your choice
1 tsp. vanilla
Place the egg whites in a lg/ bowl of a electric mixer and beat with the whisk attachment until the whites are foamy and they begin to thicken (just before the soft peak stage). Set the bowl over a saucepan filled with about 2 inches of simmering water, making sure the bowl is not touching the water. Then, whisk in the sugar by adding 1-2 tablespoon of sugar at a time over a minutes time. Continue beating 2-3 minutes or until the whites are warm (about 120 degrees) and the sugar is dissolved. The mixture should look thick and like whipped marshmallows.
Remove from pan and with either the paddle or whisk attachment, beat the egg whites and sugar on med-high until its a thick, cool meringue – about 5-7 minutes. *Do not overbeat*. Set aside.
Place the butter in a separate clean mixing bowl and, using the paddle attachment, cream the butter at medium speed for 40-60 seconds, or until smooth and creamy. *Do not overbeat or the butter will become toooooo soft.*
On med-low speed, blend the meringue into the butter, about 1-2 Tbsp. at a time, over 1 minute. Add the liqueur and vanilla and mix for 30-45 seconds longer, until thick and creamy.
Refrigerate 10-15 minutes before using.
Storing: Refrigerate in an airtight container for up to 5 days, or can be frozen for up to 6 months. If freezing, store in 2 16-oz. plastic containers and thaw in the refrigerator overnight or at room temperature for several hours.
Praline Paste
1 cup (4 ½ oz.) Hazelnuts, toasted/skinless
2/3 cup Sugar
Line a jelly roll pan with parchment and lightly butter.
Put the sugar in a heavy 10-inch skillet. Heat on low flame for about 10-20 min until the sugar melts around the edges. Do not stir the sugar. Swirl the pan if necessary to prevent the melted sugar from burning. Brush the sides of the pan with water to remove sugar crystals. If the sugar in the center does not melt, stir briefly. When the sugar is completely melted and caramel in color, remove from heat. Stir in the nuts with a wooden spoon and separate the clusters. Return to low heat and stir to coat the nuts on all sides. Cook until the mixture starts to bubble. **Remember – extremely hot mixture.** Then onto the parchment lined sheet and spread as evenly as possible. As it cools, it will harden into brittle. Break the candied nuts into pieces and place them in the food processor. Pulse into a medium-fine crunch or process until the brittle turns into a powder. To make paste, process for several minutes. Store in an airtight container and store
in a cook dry place. Do not refrigerate.
Apricot Glaze
Good for one 10-inch cake
2/3 cup thick apricot preserves
1 Tbsp. water
In a small, yet heavy saucepan, bring the water and preserves to a slow boil and simmer for 2-3 minutes. If the mixture begins to stick to the bottom of the saucepan, add water as needed.
Remove from heat and, using a strainer, press the mixture through the mesh and discard any remnants. With a pastry brush, apply the glaze onto the cake while the cake is still warm. If the glaze is too thick, thin to a preferred consistency with drops of water.
Ganache Glaze
Makes about 1 cup, enough to cover the top and sides of a 9 or 10 inch layer or tube cake
**Ganache can take on many forms. While warm – great fudge sauce. While cool or lukewarm – semisweet glaze. Slightly chilled – can be whipped into a filling/frosting. Cold & solid – the base of candied chocolate truffles.
6 oz. (good) semisweet or bittersweet chocolate, like Lindt
6 oz. (¾ cup heavy cream
1 tbsp. light corn syrup
1 Tbsp. Grand Marnier, Cointreau, or dark Jamaican rum (optional)
¾ tsp. vanilla
½ - 1 tsp. hot water, if needed
Blend vanilla and liqueur/rum together and set aside.
Break the chocolate into 1-inch pieces and place in the basket of a food processor and pulse until finely chopped. Transfer into a medium sized bowl and set aside.
Heat the cream and corn syrup in a saucepan, on low, until it reached a gentle boil. Once to the gently boil, immediately and carefully pour over the chocolate. Leave it alone for one minute, then slowly stir and mix the chocolate and cream together until the chocolate is melted and incorporated into the cream. Carefully blend in vanilla mixture. If the surface seems oily, add ½ - 1 tsp hot water. The glaze will thicken, but should still be pourable. If it doesn’t thicken, refrigerate for about 5 minutes, but make sure it doesn’t get too cold!
Assembling Cake
Cut a cardboard disk slightly smaller than the cake. Divide the cake into 3 layers and place the first layer top-side down on the disk. Using a pastry brush, moisten the layer with 3-4 Tbsp. of warm sugar syrup. Measure out 1 cup of praline buttercream and set aside.
Spread the bottom layer with a ¼-inch thickness of the remaining buttercream. Cover with ½ of the whipped cream, leaving ¼-inch border around the edge of the cake. Place the middle layer over the first, brush with sugar syrup, spreading with buttercream. Cover with the remaining whipped cream.
Moisten the cut side of the third layer with additional sugar syrup and place cut side down on the cake. Gently, press the sides of the cake to align the layers. Refrigerate to chill for at least 30 minutes.
Lift the cake by sliding your palm under the cardboard. Holding a serrated or very sharp night with an 8-inch blade held parallel to the sides of the cake, trim the sides so that they are perfectly straight. Cut a slight bevel at the top to help the glaze drip over the edge. Brush the top and sides of the cake with warm apricot glaze, sealing the cut areas completely. Chill while you prepare the ganache.
Place a rack over a large shallow pan to catch the ganache drippings. Remove the gateau from the refrigerator and put it the rack. With a metal spatula in hand, and holding the saucepan about 10 inches above the cake, pour the ganache onto the cake’s center. Move the spatula over the top of the ganache about 4 times to get a smooth and mirror-like appearance. The ganache should cover the top and run down the sides of the cake. When the ganache has been poured and is coating the cake, lift one side of the rack and bang it once on the counter to help spread the ganache evenly and break any air bubbles. (Work fast before setting starts.) Patch any bare spots on the sides with a smaller spatula, but do not touch the top after the “bang”. Let the cake stand at least 15 minutes to set after glazing.
To garnish the cake, fit a 12 – 14-inch pastry bag with a #114 large leaf tip. Fill the bag with the reserved praline cream. Stating ½ inch from the outer edge of the cake, position the pastry tube at a 90 degree angle with the top almost touching the top of the cake. Apply pressure to the pastry bag, moving it slightly toward the center of the cake. As the buttercream flows on the cake, reverse the movement backward toward the edge of the cake and finish by pulling the bag again to the center. Stop applying pressure and press the bag downward, then quickly pull the tip up to break the flow of frosting. Repeat, making 12 leaves evenly spaced around the surface of the cake.
Make a second row of leaves on the top of the first row, moving the pastry bag about ¾ inch closer to the center. The leaves should overlap. Make a 3rd row, moving closer and closer to the center. Add a 4th row if you have the room. But, leave a 2-inch space in the center for a chopped filbert garnish. Refrigerate uncovered for 3-4 hours to allow the cake to set. Remove the cake from the refrigerator at least 3 hours before serving.
Leftover cake can be covered with foil and kept in the refrigerator for up to 5 days.
***** End of Recipe *****
Photos of my little adventure. :-)
Swiss Buttercream - beating the sugar into the egg whites over a double boiler. I thought buttercream was just butter and sugar, but this is a fancy buttercream using egg whites! lol...
After the sugar is incorporated and the egg whites reached the goal temperature, 120F - based upon my calibrated pinkie finger. :-)
The egg whites were taken off the heat and whipped to a thick meringue.
(Not shown is the incorporation of the butter and liqueur to complete the Swiss buttercream).
Completed Swiss buttercream - before the addition of the praline (hazelnut brittle) paste.
Making the Cake
Blending the egg yolks and sugar.
The egg yolk -sugar mixture after a few minutes of blending. Note the color change. Also, I stopped at what I thought was the ribbon stage. However, looking at photos of the ribbon stage, I'm probably 30 seconds to 1 minute away from a true ribbon. However, this didn't seem to effect the final results.
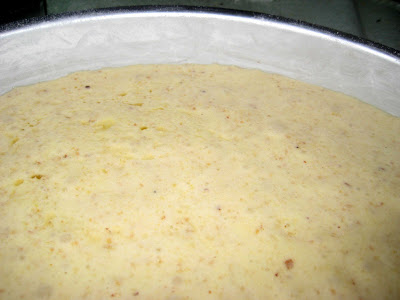
Since this cake does not use baking powder or baking soda as a leavening, egg whites whipped to soft peaks is used to give the cake some leavening.
Whew! I've made it this far! Hopefully, I didn't deflate the cake too much when I combined the egg whites and the batter, plus finishing with the addition of clarified butter. Off to a 350F oven for 30 minutes.
While the cake is baking... time to clean up.
Initially, I started this day with the intention of just skinning the hazelnuts. Even though, the forecast was for high-70's to low-80's, making it warmer inside I continued on making the full recipe.
Recipe at my side I continued beyond skinning the filberts.
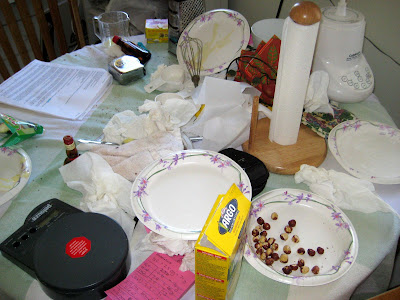
Of course, being a guy, I have to use every gadget I can find.
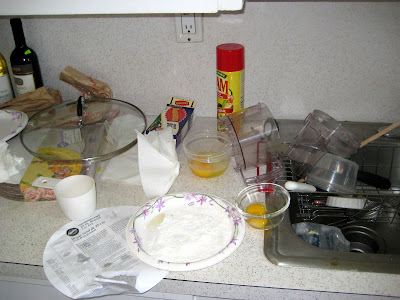
Also, being a guy, I'm not familiar with the phrase, "Cleaning up as you go." Huh?
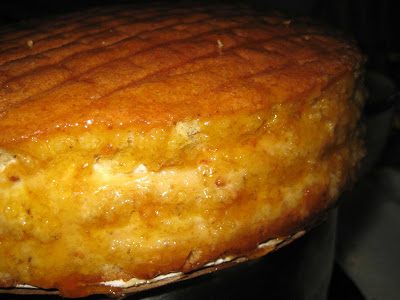
The cake was cooled inverted on a wire rack. (Note the grid pattern on the image.)
The height was about 1.5". I'm supposed to make get three layers out of this cake?
Toothpicks, a tape measure and a serrated knife were used to slice the cake into approximately 3 even layers.
Between the layers is praline buttercream and whipped cream.
I trimmed the sides to square off sides.
To seal the cake, for the ganache, a coating of apricot glaze was applied. I wasn't sure how thick of a coating so I went heavy. Afterwards, into the refrigerator for 30 minutes and more "cleaning as I go".
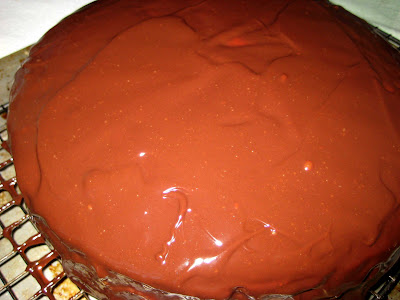
After 30 mintues, the cake was coated with warm ganache.
For the ganache, I used good ol' Nestles semi-sweet chocolate chips.
I think I let the ganache cool a little to much or I kept working it since the coating wasn't perfectly slick. Back to the refrigerator again to allow the chocolate set.
More cleaning as I go.
The chocolate covered ganache cake reminded me of a Hostess Ding Dong. lol :-)
Finally, after spending a long time in the kitchen, the end is in sight.
Frosting the cake. I had a difficult time finding the #114 leaf tip so I used what I had/what I could find.
The final product (of course, I had to use the big photo):
Filbert Gateau with Praline Buttercream
A top view of the frosting. (I need to work piping straight lines that go through the center of the cake. Somehow I ended up off center. lol!)
A slice of cake.
Overall, the cake tasted very good! It wasn't overly sweet and not too boozy. I'm not used to using liqueur so I was worried that the liqueur would overpower. The hazelnut buttercream was very good.
The texture was slightly gritty (to me), but I'm not familiar with using ground nuts in my batter. Also, I was screening the nut-flour mixture into the batter when I came to the last bits which was mostly sand grain sized bits of hazelnuts, about 1 or 2 tablespoons. After all the time skinning the nuts by hand, heck no, I'm not about to thrown any of the nut mixture away so I just added it all to the batter. I should have used the coffee grinder for that last bit... just to pulverize it some more and use another kitchen gadget.
As I mentioned earlier, I originally planned a hazelnut skinning experiment, but ended up completing the full challenge.
Time spent to complete the full recipe, including the hazelnut skinning experiment... 11 hours, but I am now a (slow) Daring Baker. :-) Cheers!
The Daring Baker Blogroll
Wednesday, July 30, 2008
Tuesday, July 29, 2008
Jul 29: Cherry Turnovers
Had a craving for cherry turnovers so I slapped some turnovers together with a sheet of puff pastry and a can of cherry filling.
Cherry Turnovers
Preheat oven 400F
The Fixins'
1 Can of cherry pie filling, drained over a colander.
1 sheet of puff pastry, rolled to about 10" x 10"
1 egg, beaten with 1 tsp of water
Turbinado sugar
Icing
1/2 C powdered sugar
1/4 t vanilla
1 tsp milk - I used 2%.
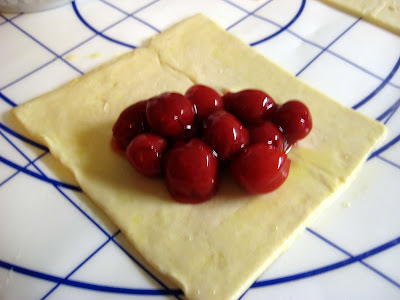
The puff pastry sheet was cut into four 5" x 5" squares.
Egg wash was brushed along the edges and about 1/4 C of pie filling was placed into the center.
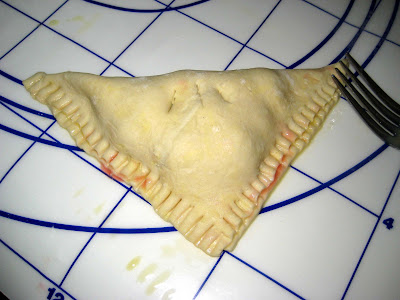
The puff pastry is folded over to form a triangle.
A fork was used to crimp the edges and three steam vents were cut into the top.
The crimping helps with handling/transfering to a parchment lined baking sheet.
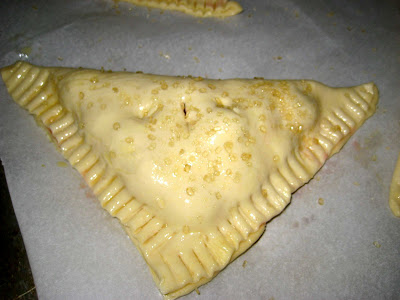
The top of the turnover is brushed with and egg wash and turbinado sugar is sprinkled on top.
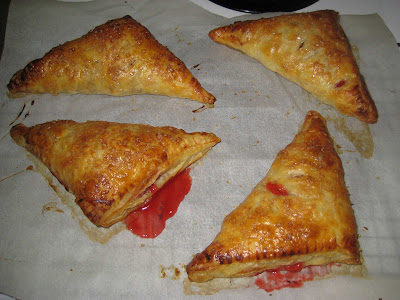
Bake at 400F for about 20 to 30 minutes. Check after 15 minutes and rotate baking sheet.
Fresh out of the oven. Place on a rack to cool.
While the turnovers are cooling, make the icing.
In a sandwich ziploc baggie, combine the sugar and vanilla and mix. Slowly add the milk to form a thick icing.
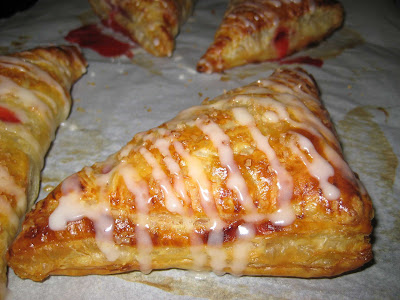
Apply icing on the cooled turnovers. The icing I made was a little thinner than I imagined or wanted. I added the liquids by sight and added a touch too much.
The Results:
The turnovers turned out nice. They weren't overly sweet. The crunch of the puff pastry was there. The cherries still had a little texture/firmness and were still juicy. The texture was similar to canned lychees.
My conspiracy theory...
I looked at the Pepperidge Farm website for a turnover recipe, just to confirm oven temps. However, no recipe was found. Why no simple turnover recipe? My theory is Pepperidge Farm sells ready-to-bake turnover in the freezer case. If they taught us to make our own, they would lose turnover sales. Oops! I think I hear a black, unmarked helicopter flying over. Time to sign out. :-) lol!
Monday, July 28, 2008
Jul 28: Eggplant Parmigiana
A couple things today...
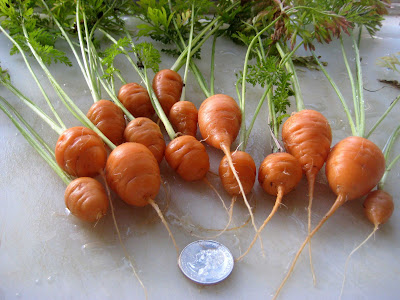
First, I finally pulled some carrots from my container garden to see what they looked like. Decent size. The seed directions recommended eating the carrots when they're the diameter of a nickel, 0.85" D. Some are slightly larger, quarter shown, but they tasted fine... like a carrot. Maybe slightly sweeter. I do like the funky ball/bell shape.
Second, S loves M's Eggplant Parmigiana and I've been trying to do a decent version. I believe M received the recipe from a Greek neighbor so it's seems to be a combo eggplant parm and moussaka recipe since this recipe contains potatoes.
The Fixins'
1 eggplant cut into round about 3/8" thick (See note about the eggplant)
1 russet potato, large, cut into 1/4"thick rounds
Spaghetti sauce - I made one with canned tomatoes, ground beef and Italian sausage
Shredded whole milk mozzarella
The Doin'
Fry the eggplant rounds with olive oil until browned on both sides. I used a pastry brush to brush the eggplants with olive oil. Also, after they're browned, season with salt, garlic powder and onion powder.
Fry the potato rounds until browned on both sides. Remove from pan season with salt, garlic powder and onion powder.
The layering: used an 8" x 8" Pyrex dish.
Bottom - a light coating sauce.
A layer of potatoes
A layer of eggplant
Sauce and cheese on top.
I had enough for another partial layer...
Top with sauce
Bake 350 for about 30 - 45 minutes.
Add final cheese topping at the last minute to melt and slightly brown the cheese.
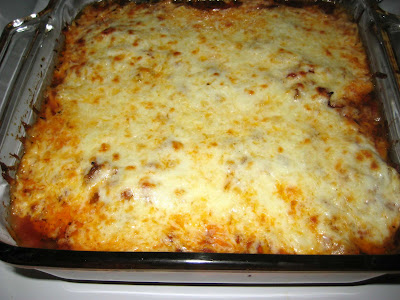
Right out of the oven...
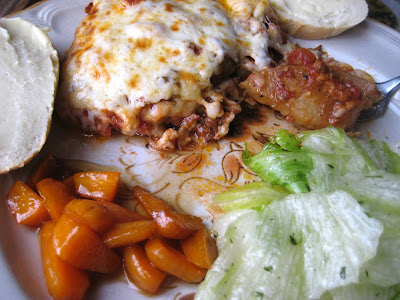
On the plate, eggplant parm, a salad with a simple oil/vinegar dressing, garden fresh carrots glazed with butter and a little brown sugar and bread slathered with garlic butter.
Today's version was much better than my previous attempts. I asked M how it was made and during her explanation I realized I was probably using too much sauce which water downed the flavor of the eggplant and potatoes.
Note - I used a male eggplant since they contain less seeds and less bitter than a female eggplant. Male eggplants have a flat blossom end while a female eggplant's blossom end looks like an innie (bellybutton).
Also, there's no need to salt the eggplant. I believe the salting (to remove the bittern juices) is a food myth.
Sunday, July 27, 2008
Jul 27: Ballard Seafood Fest
Ballard is the Scandinavian neighborhood located in North Seattle.
The early Scandinavians worked lumber and fishing. Due to Ballard's location to the water, fishing was the local industry and Salmon was king.
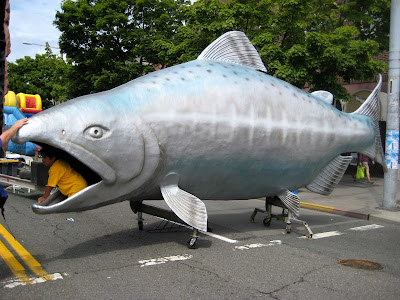
This is the one that got away.
The Seafood Fest is a celebration of Ballard's history and we are here to celebrate by eating.
A not so subliminal subliminal message.
The traditional smoked salmon of the festival.
Alderwood logs are started in a sand "pit" and metal cookers/smokers are over the burning logs.
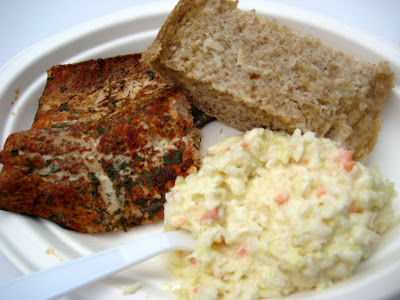
The smoked salmon meal - smoked salmon, cole slaw and garlic bread.
Salmon is tasty with a heavy smoke. S thought the smoke took away from the taste of the salmon. Coleslaw is rich and creamy. A good slaw. The garlic bread has a lot of garlic flavor. Those Norwegians aren't afraid of using garlic... lol.
Each of the food booths must have at least one seafood option.
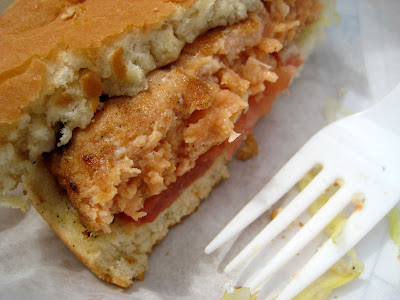
This is a salmon patty from the fish processor, Trident.
Typical patty... nothing special.
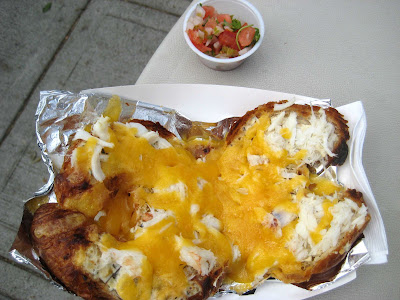
A crab melt over a croissant. Good, but the cheese and salsa seems too strong for the crab.
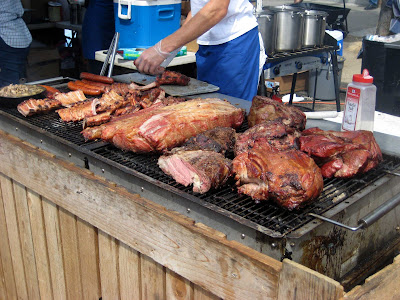
For the non-seafood eaters, a glorious image of some bbq meat.
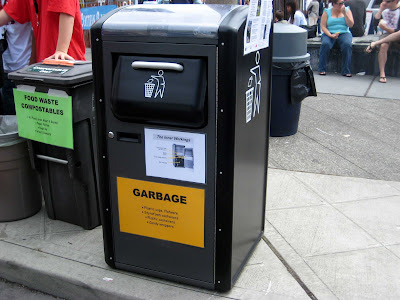
Here in Seattle, a green city, trash is separated from the recycles. For the fest, automatic trash compactor were set out for the crowds.
Saturday, July 26, 2008
Jul 26: Southern BBQ in Seattle?
PK clipped a coupon for a new barbeque place in North Seattle that advertises itself as "A taste of the South" and "We have a wide range of true Southern dishes to make your mouth beg for more."
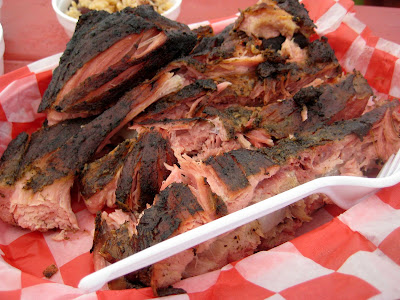
The slow smoked rib supper plate - four ribs and two sides.
Ribs are definitely smoked and "falling off the bone".
There's always a debate with rib aficionados about whether the meat should "fall of the bones" or the meat still should have some "bite" or firmness. Personally, as long as the food is good, I don't care.
These ribs were nice. Just slightly smokey and a light-tasting dry rub.
Two sides - cole slaw and red beans and rice.
Barbeque sauce was requested on the side. To me, the sauce tasted mainly like catsup. I'll pass on the sauce.
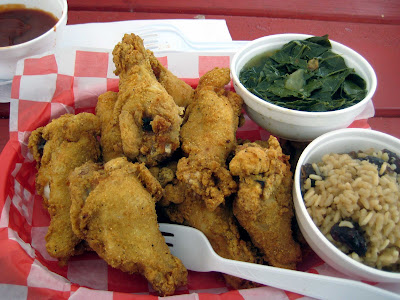
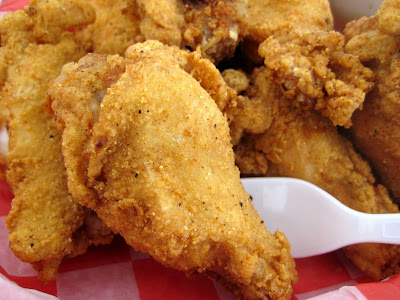
Chicken - 10 piece supper plate. My two sides were greens and red beans and rice.
Chicken drumettes fried in Fish Fry (Paul asked). Fish fry is mainly a mixture of corn meal and corn flour (finely ground corn meal).
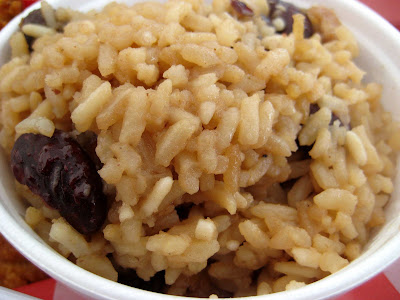
Red beans and rice... Hmmm... I'm used to a different version where the red beans is more saucy and served over white rice.
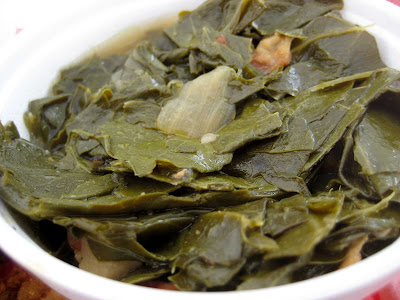
Greens - with smoked meats and onions. No sugar! In the South, everyone has a way of cooking greens. Some people add sugar to their greens while others add vinegar. This one was straight forward. Greens and smoked meats.
Of course, you have to wash everything down with sweet tea.
When I lived in New Orleans and being a Yankee, sweet tea was something new to me. In fact, I remember one of my first lunches with coworkers and ordering iced tea. The tea I got was very sweet. I thought I was drinking out of someone else's cup. My coworkers set me straight about the sweet tea. In fact, it was difficult to find places that served unsweetened iced tea.
This version of sweet tea was actually only slightly sweet. Toned down for the Yankee locals?
Overall, I thought the food decent but toned down just like the sweet tea. For example, the greens weren't bad, but the liquor was on the plain side. Red beans and rice did not have the flavor of smoked ham that I was expecting.
I would go there again to sample more of their food.*
*Note: A couple reasons why I don't review restaurants.
1. I usually don't have a camera to take pictures.
2. I seem to focus on the misses which would lead someone to think I hate the place.
Sunday, July 20, 2008
Jul 20: Baseball Mariners
S, K and myself are off to Safeco to watch the Mariners.
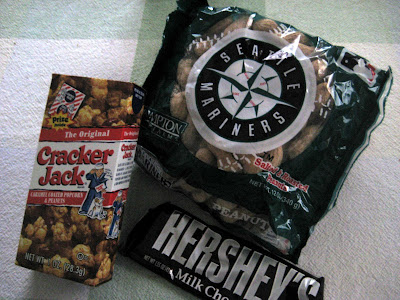
To save a little cash we bring in some standard snaks. Our goody bags consists of a shared item - peanuts, sunflower seeds and red vines - and individual snacks - Cracker Jacks and a candy bar. Due to security restrictions (or a concessions monopoly), no bottled drinks are allowed.
While at the game, the must haves are garlic fries, hot dogs and a drink. As I mentioned in previous post, I forget to take pictures of our food. :-)
There were high hopes for the Mariners at the beginning of the season. They've been contenders in a weak AL West, but this season they are the cellar dwellers who are not even at 500. This season they're around .375 (winning 3 out of 8 games). Poor pitching and lack of hitting?
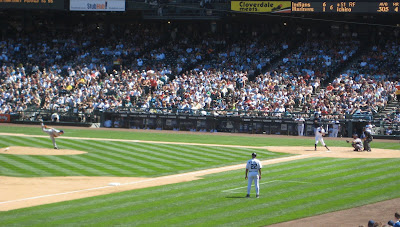
Ichiro taking a swing. Typically, a mid to high 300 hitter is currently hovering around 300. He went 0-4 this game. On the bright side, he's the only Mariner to make it to the All-Star game.
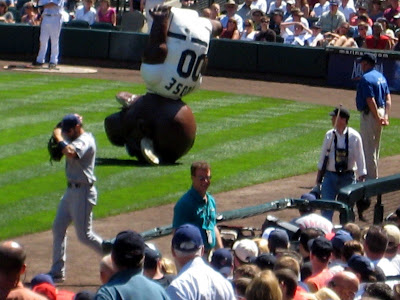
The Mariner Moose entertaining the fans while the game is slipping away.
Seattle lost to Cleveland (6-2), but we still had a good time.
With such a great season, the no fans are turning out for the game. (J/K) Official attendance: 32,230. A shot of Safeco after the game. Just experimenting with the stitch function* on my camera.
*Note to self...
Start from the brightest area. The camera locks the exposure based upon the first shot.
Friday, July 18, 2008
Jul 18: Bite of Seattle
Today is the first day for the Bite of Seattle. The weather this morning was perfect-overcast but predicted to clear up by the afternoon.
The Bite of Seattle is an annual three-day food festival held at Seattle Center. The original purpose of The Bite was to provide a forum for local restaurants to present themselves to a larger audience by offering $2 bites of their specialty. However, last year, the $2 bite concept was eliminated which makes it difficult to sample the wares of many restaurants.
So far for us, S, K and myself, this has become a yearly tradition. The draw is the different types of foods and cuisines and the festive atmosphere with companies offering free samples, coupons and other comps. Who doesn't like free stuff?
A few things we've learned over the years is to go early to avoid the crowds, to find better parking and to enjoy cooler weather. The weather cooperated with us and we found free parking a few blocks from Seattle Center which was an extra bonus!
The calm before the storm... A view from atop Fisher Pavilion.
The first place we hit up is "The Alley". The Alley is where local fine dining restaurants offer a sample of their specialty. The proceeds raised will benefit Food Lifeline. Food Lifeline is a local hunger-relief organization.
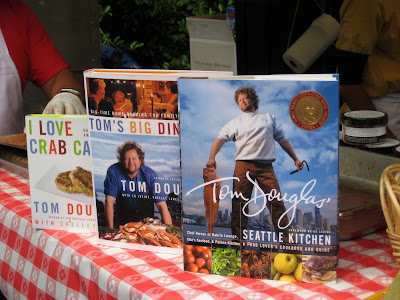
This year, and the previous two years, The Alley is hosted by Tom Douglas.
Tom Douglas is the local celebrity chef who has a published cookbooks, multiple restaurants, a Saturday late afternoon AM radio food show and was a chef challenger on Iron Chef America where he won his battle against Iron Chef Morimoto. The secret ingredient was Wild Chinook Salmon.
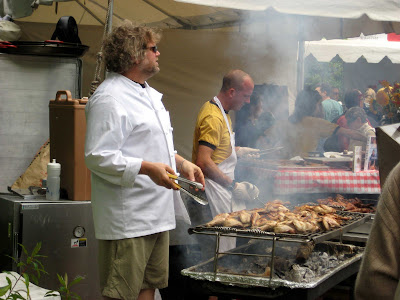
All that work and he still has time to cook at the event.
The tasting menu for today.
Restaurant: The Palace Kitchen
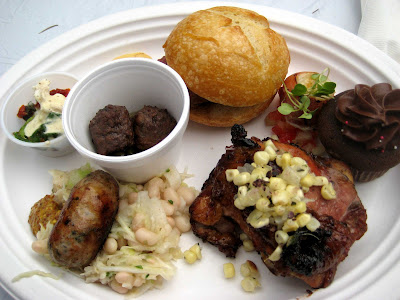
Taste: Cherry Glazed Washington Chicken with Theo’s Cocoa Nibs
Restaurant: Szmania
Taste: Homemade Bratwurst with Mustard and a White Bean and Cabbage Salad
Restaurant: Seastar
Taste: Proscuitto Wrapped Diver Scallop with Heirloom Melon Relish and Honey Vinaigrette
Restaurant: Daily Grill
Taste: Hand-carved Steak Sandwich – 28 day aged Culotte Steak charbroiled and served with creamy horseradish sauce and spicy mustard
Restaurant: Portage Bay Café
Taste: Prawn-stuffed Halibut – All organic – halibut stuffed with prawns, spinach and sun dried tomatoes finished with a Dijon cream sauce
Restaurant: Al Boccalino
Taste: “Ancient” Roman Meatballs – Meatballs with red wine, honey, cumin, celery and fresh peas
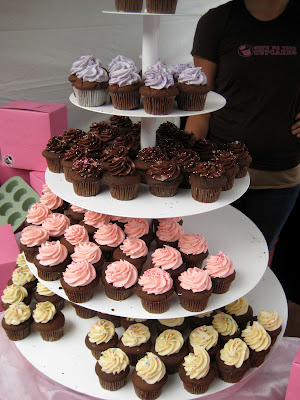
Restaurant: Cupcake Royale
Taste: Cupcakes – Vanilla and chocolate baby cakes
The mini-cupcakes... I mean baby cakes. The display was beautiful, but I don't think the photo did it justice.
The meal from The Alley.
After The Alley, we walked around the festival and tried different free samples.
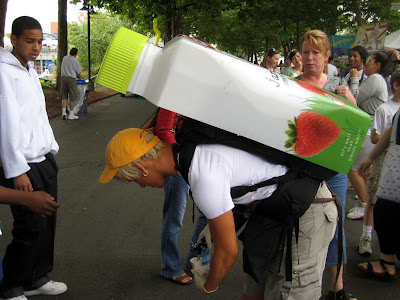
Unique way of pouring out samples with a backpack "keg".
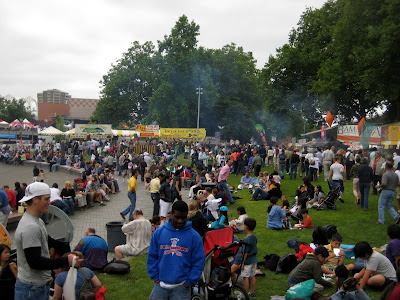
The crowd is starting to build... This is Friday. Saturday and Sunday are usually packed to the point where you would see no lawn at all. People sitting on the lawn would become people trampled on the lawn... lol.
Two Seattle landmarks. The Space Needle and the International Fountain.
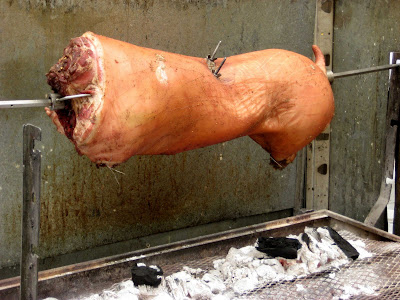
Pig on a rotisserie. Hmmm... make a mental note to come back.
After a few hours walking around Seattle Center, we hopped on the Monorail to downtown Seattle and caught a movie - Mama Mia! After the movie we were ready for supper.
Back at The Bite of Seattle...
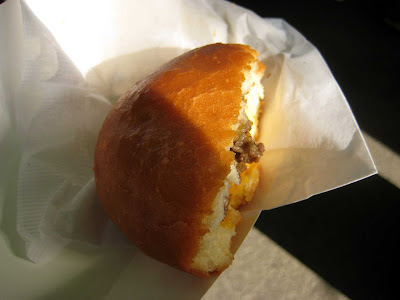
Another traditional item I buy every year is pirosky - beef and cheese.
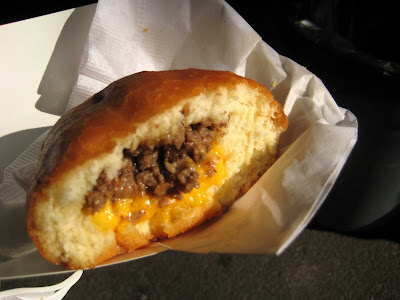
Pirosky is a Russian deep fried bread ball filled with ground beef and cheese. During the busy weekends, there are usually 3 or 4 grandma-types making rolling and forming the piroskys in the booth.
Crispy on the outside with a nice fluffy, soft bready interior.
Beefy and cheesy filling.... Yumm!
Other dishes we tried... (No photos since I still haven't gotten into the habit of taking pictures while eating)
Deep fried mac and cheese (Unknown, the booth was not clearly marked) - deep fried and tasty.
Blackened salmon burger (Ballard Brothers Seafood and Burgers) - a good blackened salmon sandwich
Roasted pork (Divine) - Can't go wrong with pork. The garlic sauce complemented the very well.
Salmon Cakes (Scotty's Northwest) - Good, but was more like a salmon patty.
Music is also a draw at The Bite. Local radio stations have stages where people camp out on the lawn and enjoy the music.
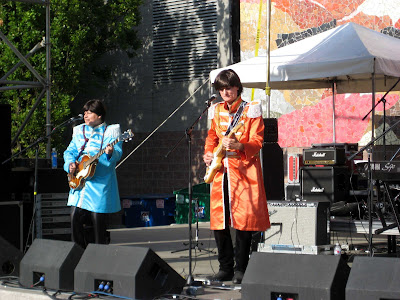
A Beatles tribute band.
The two surviving Beatles?
A fun day in Seattle.
Different view of the Space Needle
Subscribe to:
Posts (Atom)