Showing posts with label cake. Show all posts

Friday, August 27, 2010

Aug 27, 2010: Daring Bakers - Ice Cream Petit Fours


The August 2010 Daring Bakers’ challenge was hosted by Elissa of 17 and Baking. For the first time, The Daring Bakers partnered with Sugar High Fridays for a co-event and Elissa was the gracious hostess of both. Using the theme of beurre noisette, or browned butter, Elissa chose to challenge Daring Bakers to make a pound cake to be used in either a Baked Alaska or in Ice Cream Petit Fours. The sources for Elissa’s challenge were Gourmet magazine and David Lebovitz’s “The Perfect Scoop”.

Recipe Source: The brown butter pound cake recipe is adapted from the October 2009 edition of Gourmet. The vanilla ice cream is from ice cream genius David Lebovitz, adapted from The Perfect Scoop. The chocolate glaze for the petit fours is a larger adapted version of this ganache from Godiva Chocolate and the meringue for the Baked Alaska is a larger version of this meringue from Gourmet, May 1995.

Mandatory: Whether you make the Baked Alaska, the petit fours, or both, you must make the brown butter pound cake as written and the ice cream from scratch.

Variations Allowed: Both desserts can be made in any size or shape, and the ice cream can be any flavor you can think of! For the Baked Alaska, you can flavor the meringue however you want. For the petit fours, you are not required to use the chocolate glaze, or you can add additional flavors. You can also brush the cake with a simple syrup if desired.

[My Comments in Red: Alright now! Another chance to use my ice cream maker I purchased for the previous Daring Baker Challenge!]

Vanilla Ice Cream

1 cup (250ml) whole milk
A pinch of salt
3/4 cup (165g) sugar
1 vanilla bean, split lengthwise OR 2 teaspoons (10ml) pure vanilla extract [No Vanilla Bean - all gone from last month's challenge]
2 cups (500ml) heavy (approx 35% butterfat) cream
5 large egg yolks [I'm bold and daring... pushing the salmonella envelope! lol]
1 teaspoon (5ml) pure vanilla extract

1. Heat the milk, salt, and sugar in a medium saucepan until the liquid steams. Scrape out the seeds of the vanilla bean with a paring knife and add to the milk, along with the bean pod. Cover, remove from heat, and let infuse for an hour. (If you do not have a vanilla bean, simply heat the milk, salt, and sugar in a medium saucepan until the liquid steams, then let cool to room temperature.)

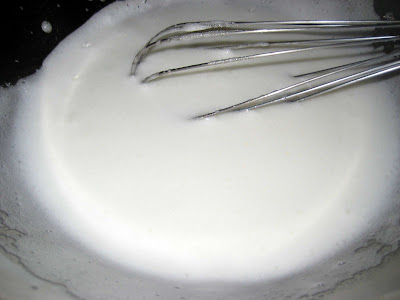
[Dissolving the sugar and salt in the milk.]


2. Set up an ice bath by placing a 2-quart (2 litre) bowl inside a large bowl partially filled with water and ice. Put a strainer on top of the smaller bowl and pour in the cream.

[Straining the heavy cream... making sure no chunky bits of butter end up in the ice cream?]


3. In another bowl, lightly beat the egg yolks together. Reheat the milk in the medium saucepan until warmed, and then gradually pour ¼ cup warmed milk into the yolks, constantly whisking to keep the eggs from scrambling. Once the yolks are warmed, scrape the yolk and milk mixture back into the saucepan of warmed milk and cook over low heat. Stir constantly and scrape the bottom with a spatula until the mixture thickens into a custard which thinly coats the back of the spatula.

[Five yolks ready to mixing! One yolk jumped the gun and is ahead of his buddies :-) ]


[Tempering the yolks with the hot milk... adding a little at a time to raise the temperature of the yolks slowly.]


4. Strain the custard into the heavy cream and stir the mixture until cooled. Add the vanilla extract (1 teaspoon [5ml] if you are using a vanilla bean; 3 teaspoons [15ml] if you are not using a vanilla bean) and refrigerate until thoroughly chilled, preferably overnight.

[The milk-yolk mixture was cooked until thickened to a thin pourable custard. Strained while adding to the heavy cream. Again, we don't want chunks of in our ice cream.]


[Lastly, 1 T of vanilla was added to the ice cream base. The base was refrigerated 4 hours before adding to the ice cream maker]


5. Remove the vanilla bean and freeze in an ice cream maker.

[20 minutes later... Ice Cream!]


Brown Butter Pound Cake

19 tablespoons (9.5 oz) (275g) unsalted (sweet) butter
2 cups (200g) sifted cake flour (not self-rising; sift before measuring)
1 teaspoon (5g) baking powder
1/2 teaspoon (3g) salt
1/2 cup (110g) packed light brown sugar
1/3 (75g) cup granulated sugar
4 large eggs
1/2 teaspoon pure vanilla extract

1. Preheat the oven to 325°F/160°C and put a rack in the center. Butter and flour a 9”x9” (23cmx23cm) square pan.

2. Place the butter in a 10” (25cm) skillet over medium heat. Brown the butter until the milk solids are a dark chocolate brown and the butter smells nutty. (Don’t take your eyes off the butter in case it burns.) Pour into a shallow bowl and chill in the freezer until just congealed, 15-30 minutes.

[Browning the butter]


[The finished butter ready for a quick freeze to firm up. Looks like I made beurre noir (black butter) instead of beurre noisette (brown butter). A quick taste of the butter I found no bitterness. Whew!]


3. Whisk together cake flour, baking powder, and salt.

4. Beat the brown butter, light brown sugar, and granulated sugar in an electric mixer until light and fluffy, about 2 minutes. Beat in the eggs one at a time, mixing well, and then the vanilla extract.

[I left the butter a little to long in the freezer. I had to break it down a little with the sugar before mixing.]


[Finally, the butter and sugar fluffed up with the hand mixer. At this point an egg was added one at a time until thoroughly incorporated.]


5. Stir in the flour mixture at low speed until just combined.

6. Scrape the batter into the greased and floured 9”x9” (23cmx23cm) square pan. Smooth the top with a rubber spatula and rap the pan on the counter. Bake until golden brown on top and when a toothpick inserted into the center comes out clean, about 25 minutes.

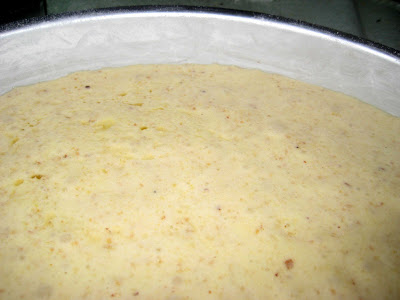
[A very thick batter was poured (actually scraped into a floured baking dish.
Bake 325 F for 25 minutes... Reality - it took 45 minutes.]


7. Cool in the pan 10 minutes. Run a knife along the edge and invert right-side-up onto a cooling rack to cool completely.

[Out of the oven... the pound caked domed a little in the center. I'll just have to trim it off to level the cake. Personally, the crust is the best part of any cake. :-) ]


Chocolate Glaze (For the Ice Cream Petit Fours)

9 ounces (250g) dark chocolate, finely chopped
1 cup (250 ml) heavy (approx 35% butterfat) cream
1 1/2 tablespoons (32g) light corn syrup, Golden syrup, or agave nectar
2 teaspoons (10ml) vanilla extract

Stir the heavy cream and light corn syrup in a small saucepan over medium heat until it comes to a boil. Remove from heat and add the dark chocolate. Let sit 30 seconds, then stir to completely melt the chocolate. Stir in the vanilla and let cool until tepid before glazing the petit fours.

[Chocolate and the hot cream mixture... before mixing. ]


Assembly Instructions – Ice Cream Petit Fours

1. Line a 9”x9” (23cmx23cm) pan with plastic wrap, so that no sides of the pan are exposed and so there is some extra plastic wrap hanging off the sides. Spread 1 ¾ to 2 cups (450ml to 500ml) ice cream into the pan. Cover with more plastic wrap and freeze several hours.

[Two cups of ice cream spread out into a thin layer on a baking dish. Wrapped and placed in the freezer]


2. Once the brown butter pound cake has completely cooled, level the top with a cake leveler or a serrated knife. Then split the cake in half horizontally to form two thin layers.

3. Unwrap the frozen ice cream. Flip out onto one of the layers of cake and top with the second layer of cake. Wrap well in plastic wrap and return to the freezer overnight.

[A large ice cream sandwich is made.]


[Wrapped and frozen... overnight]


4. Make the chocolate glaze (see above.)

5. While the glaze cools, trim ¾” (2cm) off each side of the ice cream cake to leave a perfectly square 7.5” (19cm) ice cream cake. Cut the cake into twenty five petit fours, each 1.5”x1.5” (4cmx4cm).

[Squaring off the edges. Note - only three edges are shown. The forth went towards a quality control taste test. Me!]


[Eyeballed the cutting... not too bad. The pieces are sort of square... lol]


[Ready for more... but first a little freezer time to firm up.]


6. Glaze the petit fours one at a time: place a petit four on a fork and spoon chocolate glaze over it.

7. Place the petit fours on a parchment-lined baking sheet and return to the freezer for one hour.

[Some pieces were dunked in the chocolate glaze. Wow!]


The Finished Petit Fours

[I'm not that good at piping, but I used melted white chocolate with a little cream.
From Left to Right: Unglazed/Nekkid Ice Cream Petit Fours, Chocolate Glazed Petit Fours and Wedges dipped in chocolate... I call them Petit Threes. :-) ]


I had fun making the Petit Fours. I'm not sure if the freezing did the brown butter pound cake justice. Freezing dulls flavors. The beurre noisette (in my case beurre noir) did not offer up a strong flavor.

Warm pound cake served with vanilla ice cream and chocolate sauce is probably a better dessert. :-)

Thursday, August 27, 2009

Aug 27: Daring Baker's Dobos


The August 2009 Daring Bakers' challenge was hosted by Angela of A Spoonful
of Sugar and Lorraine of Not Quite Nigella. They chose the spectacular Dobos
Torte based on a recipe from Rick Rodgers' cookbook Kaffeehaus: Exquisite
Desserts from the Classic Caffés of Vienna, Budapest, and Prague.

So, what is the Dobos Torta (or Torte)?

The Dobos Torta is a five-layer sponge cake, filled with a rich chocolate buttercream and topped with thin wedges of caramel. (You may come across recipes which have anywhere between six and 12 layers of cake; there are numerous family variations!) It was invented in 1885 by József C. Dobos, a Hungarian baker, and it rapidly became famous throughout Europe for both its extraordinary taste and its keeping properties. The recipe was a secret until Dobos retired in 1906 and gave the recipe to the Budapest Confectioners' and Gingerbread Makers' Chamber of Industry, providing that every member of the chamber can use it freely.

Thank you Angela (A Spoonful of Sugar) and Lorraine (Not Quite Nigella) for hosting this month's challenge.

For me, the challenge is broken down into three components - the sponge cake, the frosting and the topper.

I started with the buttercream since it could be kept in the fridge.

**************** The Recipe ***********************
Chocolate Buttercream
* 4 large eggs, at room temperature
* 1 cup (200g) caster sugar
* 4oz (110g) bakers chocolate or your favourite dark chocolate, finely chopped [I used 4 oz of 72% Dark Chocolate.]
* 2 sticks plus 2 tablespoons (250g) unsalted butter, at room temperature.

Directions for the chocolate buttercream:

NOTE: This can be prepared in advance and kept chilled until required.

1.Prepare a double-boiler: quarter-fill a large saucepan with water and bring it to a boil.

2.Meanwhile, whisk the eggs with the sugar until pale and thickened, about five minutes. You can use a balloon whisk or electric hand mixer for this.

Eggs and sugar... the next two photos illustrate the change in color.


Initial mixing... kind of yolky colored.
I hope my color balance isn't off in this photo... lol


As air is incorporated into the egg sugar the mixture begins to pale.


Now cooking over a double-boiler.


Whisk in the finely chopped chocolate and cook, stirring, for a further 2-3 minutes.


4.Scrape the chocolate mixture into a medium bowl and leave to cool to room temperature. It should be quite thick and sticky in consistency.

5.When cool, beat in the soft butter, a small piece (about 2 tablespoons/30g) at a time. An electric hand mixer is great here, but it is possible to beat the butter in with a spatula if it is soft enough. You should end up with a thick, velvety chocolate buttercream. Chill while you make the caramel topping.

After the mixture has cooled, the softened butter is whipped into the chocolate mixture.


The finished buttercream... I'm not a cake maker and don't have that much experience with buttercream. I was surprised how light the chocolate buttercream became after the butter was mixed in. I'm assuming the air from the mixing process paled the dark, luscious chocolate mixture. However, don't let the color deceive. The frosting is chocolatey without being too sweet.


Lorraine's note: If you're in Winter just now your butter might not soften enough at room temperature, which leads to lumps forming in the buttercream. Male sure the butter is of a very soft texture I.e. running a knife through it will provide little resistance, before you try to beat it into the chocolate mixture. Also, if you beat the butter in while the chocolate mixture is hot you'll end up with more of a ganache than a buttercream!


Sponge Cake Layers

* 6 large eggs, separated, at room temperature
* 1 1/3 cups (162g) confectioner's (icing) sugar, divided
* 1 teaspoon (5ml) vanilla extract
* 1 cup plus 2 tablespoons (112g) sifted cake flour (SUBSTITUTE 95g plain flour + 17g cornflour (cornstarch) sifted together)
* pinch of salt

Directions for the sponge layers:

NOTE: The sponge layers can be prepared in advance and stored interleaved with parchment and well-wrapped in the fridge overnight.

1. Position the racks in the top and centre thirds of the oven and heat to 400F (200C).

2. Cut six pieces of parchment paper to fit the baking sheets. Using the bottom of a 9" (23cm) springform tin as a template and a dark pencil or a pen, trace a circle on each of the papers, and turn them over (the circle should be visible from the other side, so that the graphite or ink doesn't touch the cake batter.)

I don't have a springform pan so I looked around the kitchen for a 9" diameter circle. I didn't find anything so I looked around the house. I found that my party lampshade hat... woooo-hooo! was 9" in diameter. Let's Par-taaay!


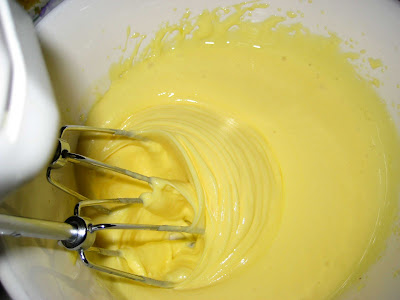
3. Beat the egg yolks, 2/3 cup (81g) of the confectioner's (icing) sugar, and the vanilla in a medium bowl with a mixer on high speed until the mixture is thick, pale yellow and forms a thick ribbon when the beaters are lifted a few inches above the batter, about 3 minutes. (You can do this step with a balloon whisk if you don't have a mixer.)

The egg yolk, sugar and vanilla ready to be mixed.


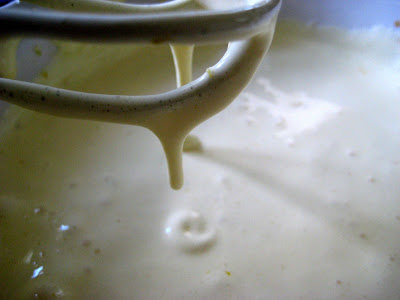
The mixture was beaten until a stream/ribbon was formed when the mixer was lifted out of the batter.


4. In another bowl, using clean beaters, beat the egg whites until soft peaks form. Gradually beat in the remaining 2/3 cup (81g) of confectioner's (icing) sugar until the whites form stiff, shiny peaks.

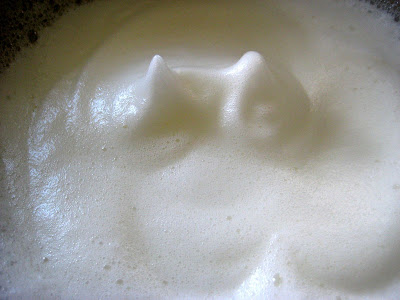
Sugar mixed into the whipped egg whites (soft peaks). Note: You can see the soft peaks... the peaks are slumped over.


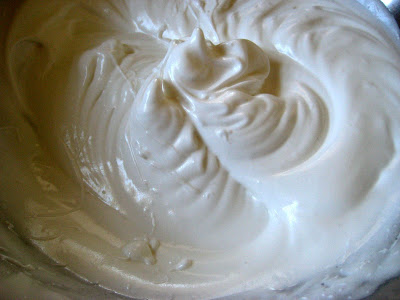
Eggs are now shiny and stiff peaks are formed. Stiff peaks you see the peaks are pointing straight up (with minimal slumping).


Using a large rubber spatula, stir about 1/4 of the beaten whites into the egg yolk mixture, then fold in the remainder, leaving a few wisps of white visible.


Combine the flour and salt.
Sift half the flour over the eggs, and fold in; repeat with the remaining flour.


5. Line one of the baking sheets with a circle-marked paper. Using a small offset spatula, spread about 3/4cup of the batter in an even layer, filling in the traced circle on one baking sheet.

The batter was spread out to the edges using an offset spatula.
I also used the flat bottom of the measuring cup to push the batter out in an even layer.


Bake on the top rack for 5 minutes, until the cake springs back when pressed gently in the centre and the edges are lightly browned. While this cake bakes, repeat the process on the other baking sheet, placing it on the centre rack. When the first cake is done, move the second cake to the top rack. Invert the first cake onto a flat surface and carefully peel off the paper.

Slide the cake layer back onto the paper and let stand until cool. Rinse the baking sheet under cold running water to cool, and dry it before lining with another parchment. Continue with the remaining papers and batter to make a total of six layers. Completely cool the layers. Using an 8" springform pan bottom or plate as a template, trim each cake layer into a neat round. (A small serrated knife is best for this task.)

I opted to bake the layers one at a time.
After the layer comes out of the oven, the parchment is peeled away.


Back onto the parchment paper to allow for more cooling.


Caramel topping
* 1 cup (200g) caster sugar
* 12 tablespoons (180 ml) water
* 8 teaspoons (40 ml) lemon juice
* 1 tablespoon neutral oil (e.g. grapeseed, rice bran, sunflower)

Directions for the caramel topping:

1. Choose the best-looking cake layer for the caramel top. To make the caramel topping: Line a jellyroll pan with parchment paper and butter the paper. Place the reserved cake layer on the paper. Score the cake into 12 equal wedges. Lightly oil a thin, sharp knife and an offset metal spatula.

2. Stir the sugar, water and lemon juice in a small saucepan. Bring to a boil over a medium heat, stirring often to dissolve the sugar. Once dissolved into a smooth syrup, turn the heat up to high and boil without stirring, swirling the pan by the handle occasionally and washing down any sugar crystals on the sides of the pan with a wet brush until the syrup has turned into an amber-coloured caramel.

3. The top layer is perhaps the hardest part of the whole cake so make sure you have a oiled, hot offset spatula ready. I also find it helps if the cake layer hasn't just been taken out of the refrigerator. I made mine ahead of time and the cake layer was cold and the toffee set very, very quickly—too quickly for me to spread it. Immediately pour all of the hot caramel over the cake layer. You will have some leftover most probably but more is better than less and you can always make nice toffee pattern using the extra to decorate. Using the offset spatula, quickly spread the caramel evenly to the edge of the cake layer. Let cool until beginning to set, about 30 seconds. Using the tip of the hot oiled knife (keep re-oiling this with a pastry brush between cutting), cut through the scored marks to divide the caramel layer into 12 equal wedges. Cool another minute or so, then use the edge of the knife to completely cut and separate the wedges using one firm slice movement (rather than rocking back and forth which may produce toffee strands). Cool completely.

This part actually turned out to be the tough part.
I burned the sugar the first time. When the sugar starts browning, the sugar darkens rapidly. I got distracted for a few seconds and when I turned back; the sugar syrup was black.

I pre-cut the the sponge into wedges. I was hoping that the sides would be coated with the caramel.


The caramel turned out teeth-pulling chewy and sticky. I had to use shears (oiled the blades) to trim off the extra caramel.

I should have used a thermometer, but the instructions didn't have any temperature recommendations. The main thing I know is that above 320F the sugar syrup will begin to brown.


Angela's note: I recommend cutting, rather than scoring, the cake layer into wedges before covering in caramel (reform them into a round). If you have an 8” silicon round form, then I highly recommend placing the wedges in that for easy removal later and it also ensures that the caramel stays on the cake layer. Once set, use a very sharp knife to separate the wedges.

Finishing touches
* a 7” cardboard round
* 12 whole hazelnuts, peeled and toasted
* ½ cup (50g) peeled and finely chopped hazelnuts


Assembling the Dobos

1.Divide the buttercream into six equal parts.

2.Place a dab of chocolate buttercream on the middle of a 7 1/2” cardboard round and top with one cake layer. Spread the layer with one part of the chocolate icing. Repeat with 4 more cake layers. Spread the remaining icing on the sides of the cake.

3.Optional: press the finely chopped hazelnuts onto the sides of the cake.

4.Propping a hazelnut under each wedge so that it sits at an angle, arrange the wedges on top of the cake in a spoke pattern. If you have any leftover buttercream, you can pipe rosettes under each hazelnut or a large rosette in the centre of the cake. Refrigerate the cake under a cake dome until the icing is set, about 2 hours. Let slices come to room temperature for the best possible flavour.

Storage
I (Angela) am quite happy to store this cake at room temperature under a glass dome, but your mileage may vary. If you do decide to chill it, then I would advise also using a glass dome if you have done. I should also note that the cake will cut more cleanly when chilled.

Variations
Shape: The traditional shape of a Dobos Torta is a circular cake, but you can vary the shape and size if you want. Sherry Yard in Desserts By The Yard makes a skyscraper Dobos by cutting a full-size cake into four wedges and stacking them to create a tall, sail-shaped cake. Mini Dobos would be very cute, and you could perch a little disc of caramel on top.

Flavour: While we both love the dark chocolate buttercream and this is traditional, we think it would be fun to see what fun buttercreams you all come up with! So, go wild! Or, you could brush each layer with a flavoured syrup if you just want a hint of a second flavour. Cointreau syrup would be divine!

Nuts: These are optional for decoration, so no worries if you're allergic to them. If you don't like hazelnuts, then substitute for another variety that you like.

Egg concerns

The cooking process for the buttercream will produce lightly cooked eggs. If you fall into a vulnerable health group then you may wish to use an egg-less buttercream.

The Finished Cake:
During the process of assembling the cake, I was so engrossed with leveling, layering, coating and topping the cake that I forgot to take pictures.

The caramel layer looks pretty cool, like the blades of a turbine engine.


Coarsely smashed roasted hazelnuts (Filberts) pressed onto the side of the cake.


You know the cake is good when the frosting layer is as thick as the cake layer. :-)
The nut angles the caramel turbine blades to the proper angle of attack. No stalling on these blades. lol... Engineering joke.


A view from the other side.


Overall, this was a fun challenge and a learning experience.

I'm not a cake maker so buttercream turning out is always a nice thing. However, I don't know about the caramel layer. The caramel was very lemony and very chewy. It seemed out of place with the rest of the cake. The chocolate and the cake itself was quite good. Yum! Hazelnuts and chocolate!


The next day, after I parsed out the remaining cake, I heard that the sugar layer softened up quite a bit in the refrigerator - makes sense since sugar is hygroscopic (water loving/water absorbing). A thumbs-up on the leftovers. The caramel softened up quite a bit. :-)
Wednesday, July 30, 2008

Jul 30: My First Daring Bakers Challenge

I guess I'm a typical guy who's slow on the uptake and clueless to the obvious.

I enjoy blogs with pretty pictures (e.g. Tastespotting). For the past few months, there were occasional post entitled Daring Baker which I thought was simply someone's tagline. I finally realized it was a group of folks challenging themselves with baking challenges with all the members posting the results the same day. Duh!?!?

Being challenged, learning (and eating) something new, sharing the results with family and friends, I had to give this group a go. :-)
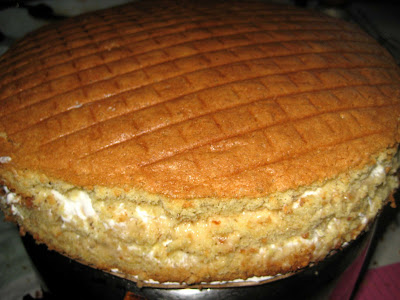
This is my first Daring Baker Challenge. My initial reaction upon seeing the recipe was excitement and fear, "Wow! What have I gotten myself into?" However, as with many large problems or jobs, you break it down into smaller easier to manage tasks to help accomplish the larger job. After reading through the recipe many, many times, I realized it was just a bunch of smaller recipes making the whole cake, so my fears eased.

Using the oven is nothing new to me, I bake breads, roast vegetables and meat. However, making a cake plus frosting from scratch is something new to me.

***** Start of Recipe *****
The July Challenge Recipe
Recipe provided by Daring Baker Mele Cotte

Filbert Gateau with Praline Buttercream
From Great Cakes by Carol Walter

1 Filbert Genoise
1 recipe sugar syrup, flavored with dark rum
1 recipe Praline Buttercream
½ cup heavy cream, whipped to soft peaks
1 recipe Apricot Glaze
1 recipe Ganache Glaze, prepared just before using
3 tablespoons filberts, toasted and coarsely chopped

Filbert Genoise

Because of the amount of nuts in the recipe, this preparation is different from a classic genoise.

1 ½ cups hazelnuts, toasted/skinned
2/3 cup cake flour, unsifted
2 Tbsp. cornstarch
7 large egg yolks
1 cup sugar, divided ¼ & ¾ cups
1 tsp. vanilla extract
½ tsp. grated lemon rind
5 lg. egg whites
¼ cup warm, clarified butter (100 – 110 degrees)

Position rack in the lower 3rd of the oven and preheat to 350 degrees. Grease and flour a 10” X 2” inch round cake pan.

Using a food processor, process nuts, cake flour, and cornstarch for about 30 seconds. Then, pulse the mixture about 10 times to get a fine, powdery mixture. You’ll know the nuts are ready when they begin to gather together around the sides of the bowl. While you want to make sure there aren’t any large pieces, don’t over-process. Set aside.

Put the yolks in the bowl of an electric mixer, with the whisk attachment, and beat until thick and light in color, about 3-4 minutes on med-high speed. Slowly, add ¾ cup of sugar. It is best to do so by adding a tablespoon at a time, taking about 3 minutes for this step. When finished, the mixture should be ribbony. Blend in the vanilla and grated lemon rind. Remove and set aside.

Place egg whites in a large, clean bowl of the electric mixer with the whisk attachment and beat on medium speed, until soft peaks. Increase to med-high speed and slowly add the remaining ¼ cup of sugar, over 15-20 seconds or so. Continue to beat for another ½ minute.
Add the yolk mixture to the whites and whisk for 1 minute.

Pour the warm butter in a liquid measure cup (or a spouted container). * It must be a deep bottom bowl and work must be fast.* Put the nut meal in a mesh strainer (or use your hand – working quickly) and sprinkle it in about 2 tablespoons at a time – folding it carefully for about 40 folds. Be sure to exclude any large chunks/pieces of nuts. Again, work quickly and carefully as to not deflate the mixture. When all but about 2 Tbsp. of nut meal remain, quickly and steadily pour the warm butter over the batter. Then, with the remaining nut meal, fold the batter to incorporate, about 13 or so folds.

With a rubber spatula, transfer the batter into the prepared pan, smoothing the surface with the spatula or back of a spoon. **If collected butter remains at the bottom of the bowl, do not add it to the batter! It will impede the cake rising while baking.

Tap the pan on the counter to remove air bubbles and bake in the preheated oven for 30-35 minutes. You’ll know the cake is done when it is springy to the touch and it separates itself from the side of the pan. Remove from oven and allow to stand for 5 minutes. Invert onto a cake rack sprayed with nonstick coating, removing the pan. Cook the cake completely.

*If not using the cake right away, wrap thoroughly in plastic wrap, then in a plastic bag, then in the refrigerator for up to 3 days. If freezing, wrap in foil, then the bag and use within 2-3 months.

Sugar Syrup
Makes 1 cup, good for one 10-inch cake – split into 3 layers

1 cup water
¼ cup sugar
2 Tbsp. dark rum or orange flavored liqueur

In a small, yet heavy saucepan, bring the water and sugar to a boil and simmer for 5 minutes. Remove from heat, add the liqueur. Cool slightly before using on the cake. *Can be made in advance.

Praline Buttercream
1 recipe Swiss Buttercream
1/3 cup praline paste
1 ½ - 2 Tbsp. Jamaican rum (optional)

Blend ½ cup buttercream into the paste, then add to the remaining buttercream. Whip briefly on med-low speed to combine. Blend in rum.

Swiss Buttercream
4 lg. egg whites
¾ cup sugar
1 ½ cups (3 sticks) unsalted butter, slightly firm
1 ½ -2 Tbsp. Grand Marnier or liqueur of your choice
1 tsp. vanilla

Place the egg whites in a lg/ bowl of a electric mixer and beat with the whisk attachment until the whites are foamy and they begin to thicken (just before the soft peak stage). Set the bowl over a saucepan filled with about 2 inches of simmering water, making sure the bowl is not touching the water. Then, whisk in the sugar by adding 1-2 tablespoon of sugar at a time over a minutes time. Continue beating 2-3 minutes or until the whites are warm (about 120 degrees) and the sugar is dissolved. The mixture should look thick and like whipped marshmallows.
Remove from pan and with either the paddle or whisk attachment, beat the egg whites and sugar on med-high until its a thick, cool meringue – about 5-7 minutes. *Do not overbeat*. Set aside.

Place the butter in a separate clean mixing bowl and, using the paddle attachment, cream the butter at medium speed for 40-60 seconds, or until smooth and creamy. *Do not overbeat or the butter will become toooooo soft.*

On med-low speed, blend the meringue into the butter, about 1-2 Tbsp. at a time, over 1 minute. Add the liqueur and vanilla and mix for 30-45 seconds longer, until thick and creamy.

Refrigerate 10-15 minutes before using.

Storing: Refrigerate in an airtight container for up to 5 days, or can be frozen for up to 6 months. If freezing, store in 2 16-oz. plastic containers and thaw in the refrigerator overnight or at room temperature for several hours.

Praline Paste
1 cup (4 ½ oz.) Hazelnuts, toasted/skinless
2/3 cup Sugar
Line a jelly roll pan with parchment and lightly butter.

Put the sugar in a heavy 10-inch skillet. Heat on low flame for about 10-20 min until the sugar melts around the edges. Do not stir the sugar. Swirl the pan if necessary to prevent the melted sugar from burning. Brush the sides of the pan with water to remove sugar crystals. If the sugar in the center does not melt, stir briefly. When the sugar is completely melted and caramel in color, remove from heat. Stir in the nuts with a wooden spoon and separate the clusters. Return to low heat and stir to coat the nuts on all sides. Cook until the mixture starts to bubble. **Remember – extremely hot mixture.** Then onto the parchment lined sheet and spread as evenly as possible. As it cools, it will harden into brittle. Break the candied nuts into pieces and place them in the food processor. Pulse into a medium-fine crunch or process until the brittle turns into a powder. To make paste, process for several minutes. Store in an airtight container and store
in a cook dry place. Do not refrigerate.

Apricot Glaze
Good for one 10-inch cake

2/3 cup thick apricot preserves
1 Tbsp. water

In a small, yet heavy saucepan, bring the water and preserves to a slow boil and simmer for 2-3 minutes. If the mixture begins to stick to the bottom of the saucepan, add water as needed.

Remove from heat and, using a strainer, press the mixture through the mesh and discard any remnants. With a pastry brush, apply the glaze onto the cake while the cake is still warm. If the glaze is too thick, thin to a preferred consistency with drops of water.

Ganache Glaze
Makes about 1 cup, enough to cover the top and sides of a 9 or 10 inch layer or tube cake

**Ganache can take on many forms. While warm – great fudge sauce. While cool or lukewarm – semisweet glaze. Slightly chilled – can be whipped into a filling/frosting. Cold & solid – the base of candied chocolate truffles.

6 oz. (good) semisweet or bittersweet chocolate, like Lindt
6 oz. (¾ cup heavy cream
1 tbsp. light corn syrup
1 Tbsp. Grand Marnier, Cointreau, or dark Jamaican rum (optional)
¾ tsp. vanilla
½ - 1 tsp. hot water, if needed

Blend vanilla and liqueur/rum together and set aside.

Break the chocolate into 1-inch pieces and place in the basket of a food processor and pulse until finely chopped. Transfer into a medium sized bowl and set aside.

Heat the cream and corn syrup in a saucepan, on low, until it reached a gentle boil. Once to the gently boil, immediately and carefully pour over the chocolate. Leave it alone for one minute, then slowly stir and mix the chocolate and cream together until the chocolate is melted and incorporated into the cream. Carefully blend in vanilla mixture. If the surface seems oily, add ½ - 1 tsp hot water. The glaze will thicken, but should still be pourable. If it doesn’t thicken, refrigerate for about 5 minutes, but make sure it doesn’t get too cold!

Assembling Cake

Cut a cardboard disk slightly smaller than the cake. Divide the cake into 3 layers and place the first layer top-side down on the disk. Using a pastry brush, moisten the layer with 3-4 Tbsp. of warm sugar syrup. Measure out 1 cup of praline buttercream and set aside.

Spread the bottom layer with a ¼-inch thickness of the remaining buttercream. Cover with ½ of the whipped cream, leaving ¼-inch border around the edge of the cake. Place the middle layer over the first, brush with sugar syrup, spreading with buttercream. Cover with the remaining whipped cream.

Moisten the cut side of the third layer with additional sugar syrup and place cut side down on the cake. Gently, press the sides of the cake to align the layers. Refrigerate to chill for at least 30 minutes.

Lift the cake by sliding your palm under the cardboard. Holding a serrated or very sharp night with an 8-inch blade held parallel to the sides of the cake, trim the sides so that they are perfectly straight. Cut a slight bevel at the top to help the glaze drip over the edge. Brush the top and sides of the cake with warm apricot glaze, sealing the cut areas completely. Chill while you prepare the ganache.

Place a rack over a large shallow pan to catch the ganache drippings. Remove the gateau from the refrigerator and put it the rack. With a metal spatula in hand, and holding the saucepan about 10 inches above the cake, pour the ganache onto the cake’s center. Move the spatula over the top of the ganache about 4 times to get a smooth and mirror-like appearance. The ganache should cover the top and run down the sides of the cake. When the ganache has been poured and is coating the cake, lift one side of the rack and bang it once on the counter to help spread the ganache evenly and break any air bubbles. (Work fast before setting starts.) Patch any bare spots on the sides with a smaller spatula, but do not touch the top after the “bang”. Let the cake stand at least 15 minutes to set after glazing.

To garnish the cake, fit a 12 – 14-inch pastry bag with a #114 large leaf tip. Fill the bag with the reserved praline cream. Stating ½ inch from the outer edge of the cake, position the pastry tube at a 90 degree angle with the top almost touching the top of the cake. Apply pressure to the pastry bag, moving it slightly toward the center of the cake. As the buttercream flows on the cake, reverse the movement backward toward the edge of the cake and finish by pulling the bag again to the center. Stop applying pressure and press the bag downward, then quickly pull the tip up to break the flow of frosting. Repeat, making 12 leaves evenly spaced around the surface of the cake.

Make a second row of leaves on the top of the first row, moving the pastry bag about ¾ inch closer to the center. The leaves should overlap. Make a 3rd row, moving closer and closer to the center. Add a 4th row if you have the room. But, leave a 2-inch space in the center for a chopped filbert garnish. Refrigerate uncovered for 3-4 hours to allow the cake to set. Remove the cake from the refrigerator at least 3 hours before serving.

Leftover cake can be covered with foil and kept in the refrigerator for up to 5 days.
***** End of Recipe *****

Photos of my little adventure. :-)
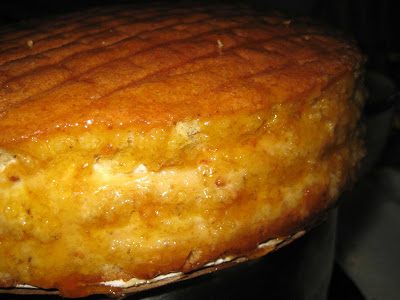
Swiss Buttercream - beating the sugar into the egg whites over a double boiler. I thought buttercream was just butter and sugar, but this is a fancy buttercream using egg whites! lol...


After the sugar is incorporated and the egg whites reached the goal temperature, 120F - based upon my calibrated pinkie finger. :-)
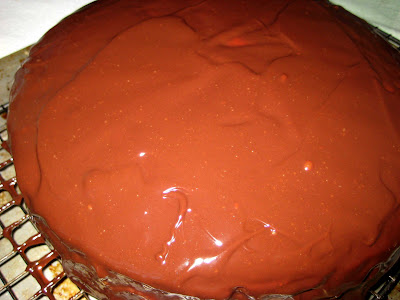
The egg whites were taken off the heat and whipped to a thick meringue.
(Not shown is the incorporation of the butter and liqueur to complete the Swiss buttercream).
Completed Swiss buttercream - before the addition of the praline (hazelnut brittle) paste.


Making the Cake
Blending the egg yolks and sugar.


The egg yolk -sugar mixture after a few minutes of blending. Note the color change. Also, I stopped at what I thought was the ribbon stage. However, looking at photos of the ribbon stage, I'm probably 30 seconds to 1 minute away from a true ribbon. However, this didn't seem to effect the final results.


Since this cake does not use baking powder or baking soda as a leavening, egg whites whipped to soft peaks is used to give the cake some leavening.


Whew! I've made it this far! Hopefully, I didn't deflate the cake too much when I combined the egg whites and the batter, plus finishing with the addition of clarified butter. Off to a 350F oven for 30 minutes.


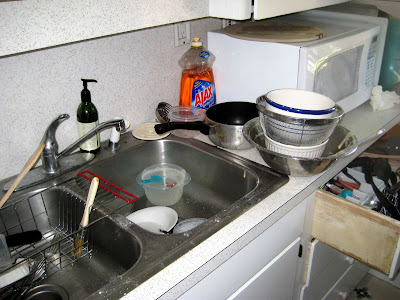
While the cake is baking... time to clean up.
Initially, I started this day with the intention of just skinning the hazelnuts. Even though, the forecast was for high-70's to low-80's, making it warmer inside I continued on making the full recipe.

Recipe at my side I continued beyond skinning the filberts.


Of course, being a guy, I have to use every gadget I can find.


Also, being a guy, I'm not familiar with the phrase, "Cleaning up as you go." Huh?


The cake was cooled inverted on a wire rack. (Note the grid pattern on the image.)
The height was about 1.5". I'm supposed to make get three layers out of this cake?
Toothpicks, a tape measure and a serrated knife were used to slice the cake into approximately 3 even layers.

Between the layers is praline buttercream and whipped cream.
I trimmed the sides to square off sides.


To seal the cake, for the ganache, a coating of apricot glaze was applied. I wasn't sure how thick of a coating so I went heavy. Afterwards, into the refrigerator for 30 minutes and more "cleaning as I go".


After 30 mintues, the cake was coated with warm ganache.
For the ganache, I used good ol' Nestles semi-sweet chocolate chips.
I think I let the ganache cool a little to much or I kept working it since the coating wasn't perfectly slick. Back to the refrigerator again to allow the chocolate set.


More cleaning as I go.

The chocolate covered ganache cake reminded me of a Hostess Ding Dong. lol :-)


Finally, after spending a long time in the kitchen, the end is in sight.
Frosting the cake. I had a difficult time finding the #114 leaf tip so I used what I had/what I could find.

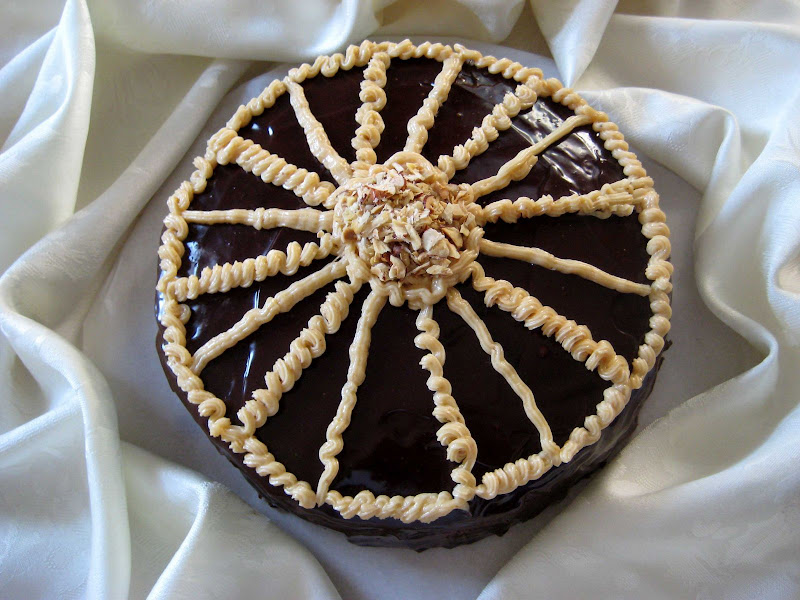
The final product (of course, I had to use the big photo):
Filbert Gateau with Praline Buttercream

A top view of the frosting. (I need to work piping straight lines that go through the center of the cake. Somehow I ended up off center. lol!)
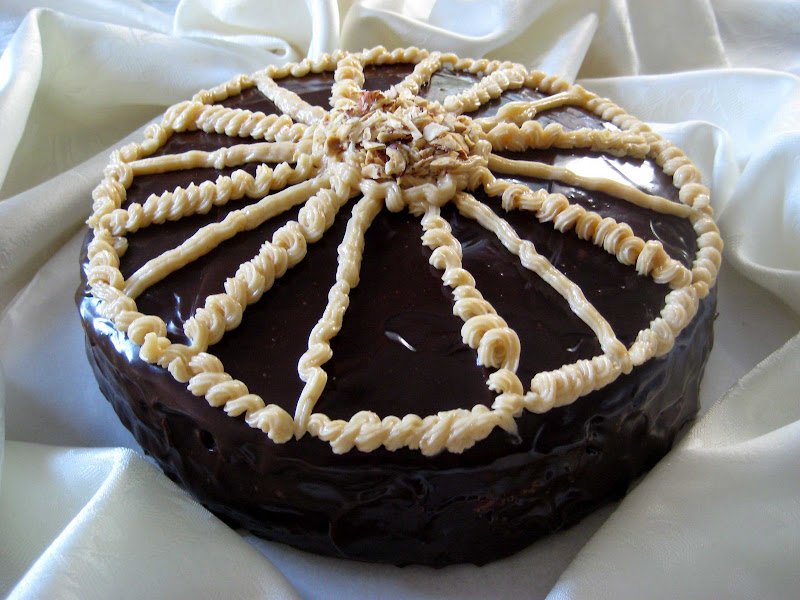
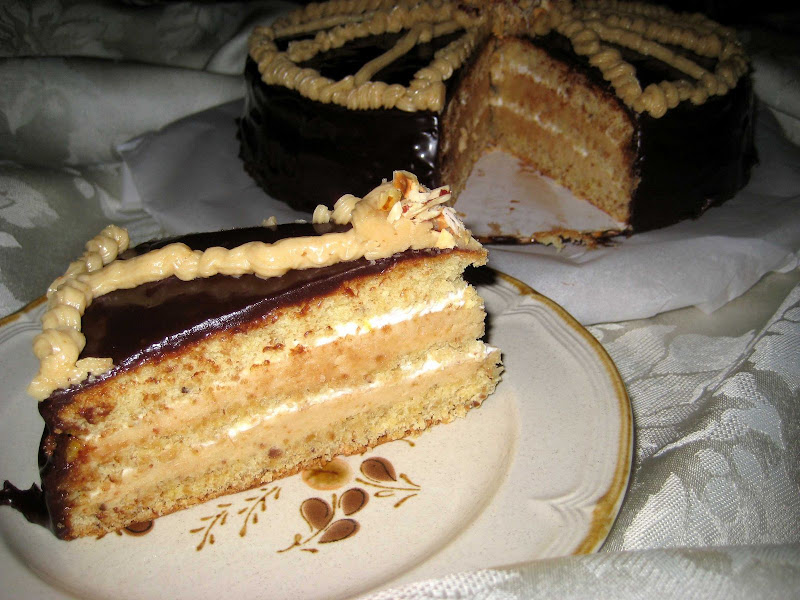
A slice of cake.


Overall, the cake tasted very good! It wasn't overly sweet and not too boozy. I'm not used to using liqueur so I was worried that the liqueur would overpower. The hazelnut buttercream was very good.

The texture was slightly gritty (to me), but I'm not familiar with using ground nuts in my batter. Also, I was screening the nut-flour mixture into the batter when I came to the last bits which was mostly sand grain sized bits of hazelnuts, about 1 or 2 tablespoons. After all the time skinning the nuts by hand, heck no, I'm not about to thrown any of the nut mixture away so I just added it all to the batter. I should have used the coffee grinder for that last bit... just to pulverize it some more and use another kitchen gadget.

As I mentioned earlier, I originally planned a hazelnut skinning experiment, but ended up completing the full challenge.

Time spent to complete the full recipe, including the hazelnut skinning experiment... 11 hours, but I am now a (slow) Daring Baker. :-) Cheers!


The Daring Baker Blogroll