Sunday, March 30, 2008

Slow Roasted Corned Beef - Snow again!?!?

Snowing again today and today, Sunday, I was called into work.

I decided to slow roast a corned beef I purchased at Costco.

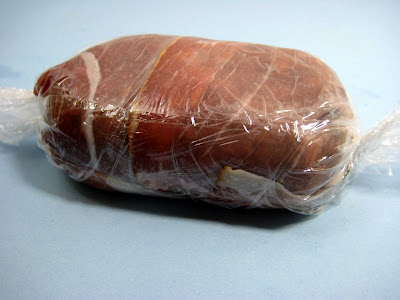
First, I washed off the corned beef and let the corned beef soak in clean water for about 30 minutes, usually I would soak overnight to draw out any excess salt. I don't know if a 30 minutes soak does a lot or not, but I gave it a shot.


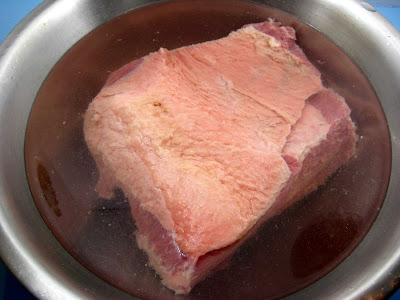
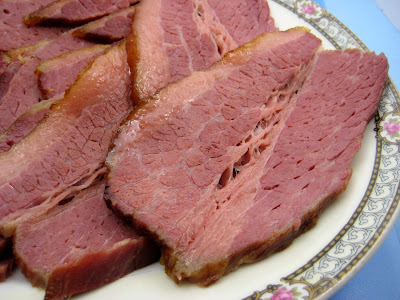
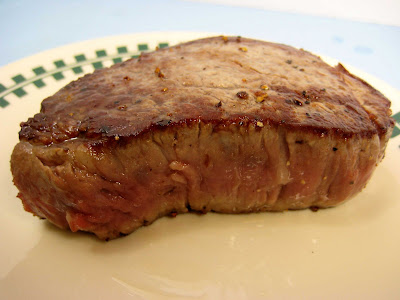
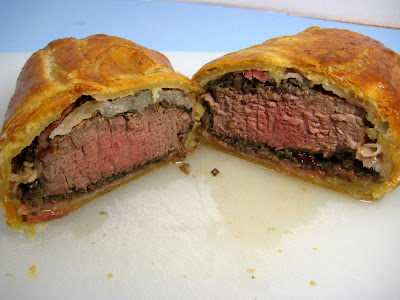
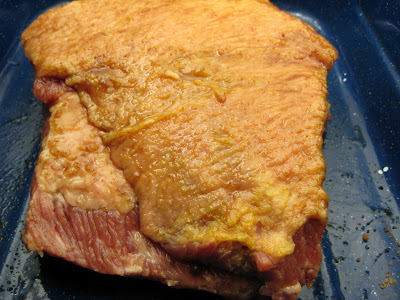
The Costco corned beef is a USDA Choice brisket and usually not overly salty. Also, looking at the cross-section, it's nicely colored, lean and not tough looking (plump, not dry and stringy).


When I bake brisket, I usually give it a light mustard coating. This is a technique I picked up in a barbecuing class for smoked ribs, since I'm cooking the brisket low and slow I used mustard on the brisket.


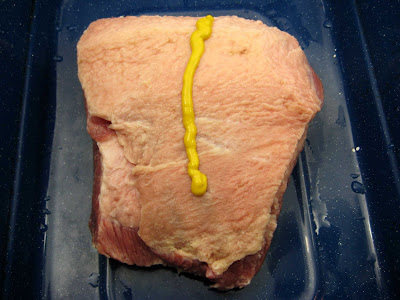
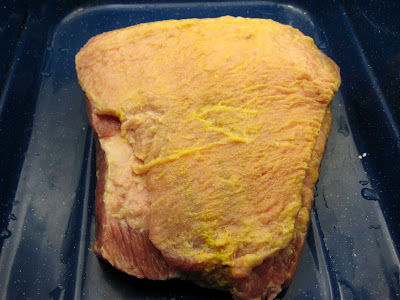
The mustard was rubbed on all surfaces on the corned beef. Also, when cooked you don't get a mustard flavor in the meat, but it adds a little layer of flavor that's not overpowering.


Afterwards, I used 3 T of brown sugar.


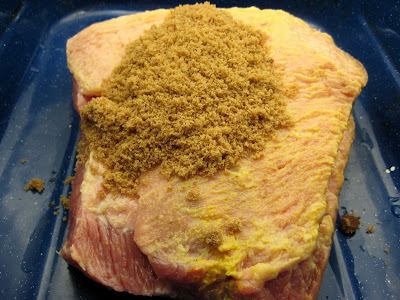
The brown sugar is rubbed into all surfaces of the corned beef. The sugar gives a little sweetness and helps with browning. Of course you can use more sugar, but I tend to use less since I'm not looking for a heavy glaze as you would with a ham.


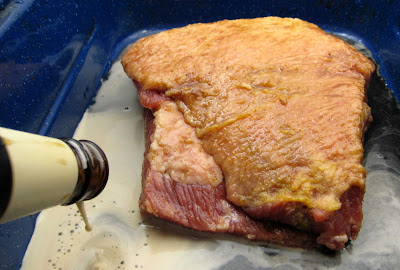
This is my first time using Guinness. I was looking in the fridge and found an old bottle of Guinness. Usually when I bake corned beef, I don't add any liquid but I wanted to try something different to see if the extra liquid would help tenderize the meat.


The brisket was placed in a 200F oven and allowed to cook slowly while I was at work.

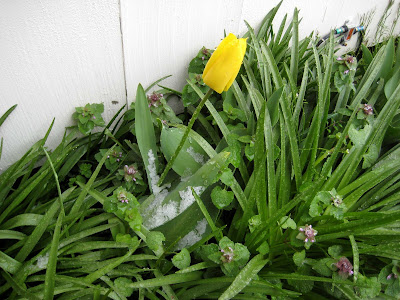
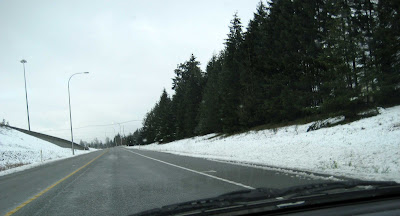
Driving to work, I was amazed that there was snow on the road. This is more snow than we had during winter.


After 7 hours, the corned beef was taken out of the oven.


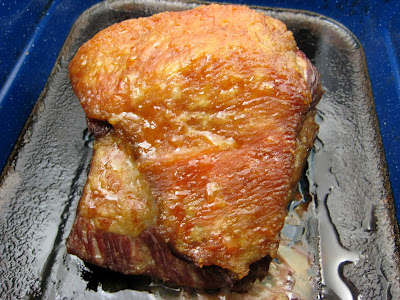
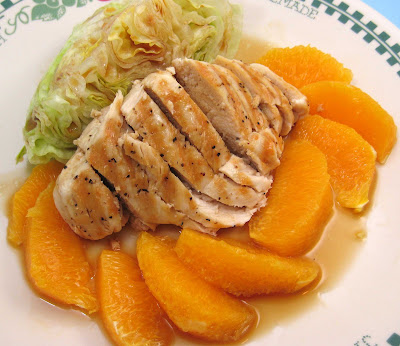
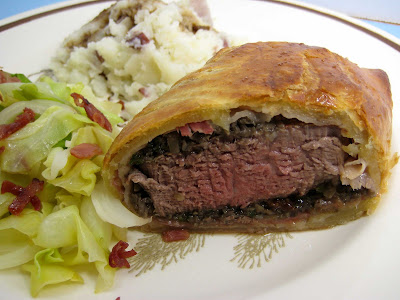
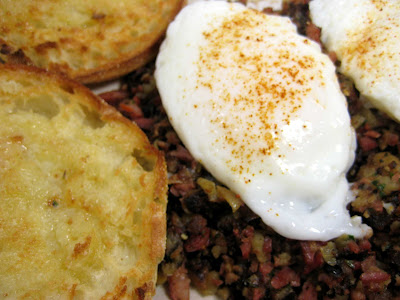
After a 10-15 minute rest, the corned beef was sliced.


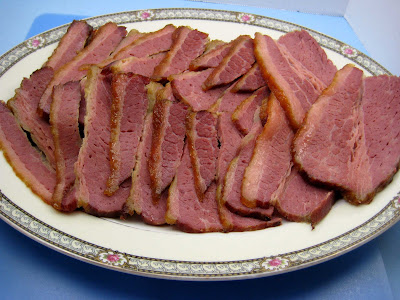
Overall, the beef was good. Reminded me of deli counter lunch meat, but not as salty as luncheon meat. Also, no strong taste of pickling spice as you would get from boiling. The corned beef was firmer than a boiled corned beef.

I don't think the Guinness made a difference in flavor and the extra liquid did not change the texture of the slow roasted corned beef. Maybe the extra liquid helped draw out salt, but Costco corned beefs are generally more flavorful while less salty.

Friday, March 28, 2008

Spring +8 days = Snow ?

It's 8 days into spring and it's been snowing all day.
The ground temperature and surround is above 32F so nothing is sticking.

Spring Tulips are starting to bloom, but snow this late in the year?
Intersting that this year the tulips are a solid bright yellow... last year the tulips where pink and yellow. Must have to do with the pH of the soil.


For dinner I had one fresh chicken breast remaining... quickly made fajita tacos.

1/2 onion, sliced
1/3 bell pepper, sliced into strips
1 clove garlic, minced
salt and pepper
1/3 C Salsa
1 T oil

Heated oil and sauteed the onions, garlic, bell pepper and chicken together with a few sprinkles of salt and a couple grinds of black pepper, about 5 to 7 minutes.

Added the salsa, stirred and covered to let the chicken finish cooking, about 3 to 5 minutes.


The Final Dish

Steamed the tortillas in the chicken mixture for about 30 seconds.

Dressed with green chile salsa, lettuce and the chicken "fajita" mixture.
Sprinkled a little shredded cheddar cheese for flavor.


Overall, very simple, quick and delicious. :-)

Thursday, March 27, 2008

Casserole - Leftovers

Since the casserole from last night was sort of rice pudding like, I wondered if I can pan-fry the rice sort of like pan-frying polenta.

Pan-frying the rice - used a little oil and butter.


The Final Dish
The pan-fried rice cakes


The rest of the dish.
The chicken was cubed and mixed with cream of mushroom soup (that's all I had) so the chicken wouldn't be as dry. Also, I steamed more broccoli since I wanted more veggies.


Overall, the dish was okay. Nothing to rave about.

Wednesday, March 26, 2008

Casserole

Tonight is casserole night.
My goal was to make something simple and have enough leftovers for lunch.

I have two recipes in mind.

The first uses cooked ingredients and the second recipe uses raw ingredients.
I was torn between doing what I know would work, the first recipe, and just wanting to throw everything in at once and not worrying about it, but I only had raw ingredients.

Recipe 1: Chicken-Broccoli Divan

Recipe 2:Campbell's® Cheesy Chicken & Rice Casserole

My attempt at a casserole... I know I wanted broccoli and I had chicken so I looked at both recipes and combined techniques.

The Fixins'
1 can of Cream of Chicken Soup
4 chicken Breast, Raw
2 C Rice, uncooked
2 C Broth
2 C Broccoli, par-boiled
Black pepper
Garlic Powder
Grated Cheddar

Mix the soup, broth and add rice.
Add broccoli
Top with chicken breast, a little black pepper and garlic powder.


Bake 375 for about 45 minutes
Top with Cheddar and bake another 10 minutes


The Final Dish


Overall, the dish was not that good in terms of texture, flavor was okay. The rice was almost rice pudding like where the texture was very soft. The chicken was a little dry. The broccoli was actually okay considering the broccoli was cooked over 45 minutes.

My plan was not to spend the time cooking, but I knew I should have cooked everything before forming the casserole. Since I went down the no-cook path, my initial thought was to place the broth and rice on the bottom, cover with a thick layer of broccoli and mix the raw chicken and cream of chicken soup together to form the top layer.

What I did instead, since I forgot my initial plan, was mixed the broth and soup with the rice to form the bottom layer. I didn't have a thick layer of broccoli and the chicken was placed on top bare. That's when I remembered my initial plan. Oh well.

Next time I'll just spend the time cooking everything separately before combining to let the flavors meld in the oven.

In terms of time, it would have worked out the same and I would have had time to do the extra dished while the casserole was baking.

Tuesday, March 25, 2008

Light Dinner - Grilled Chicken with Ponzu Dressing

After a week of beef and "fancy" eating, I was in the mood for a light meal.

I remembered I had a bottle of Ponzu Sauce I found while walking through the aisles of a local Asian market.

Citrus seasoned soy sauce. Hmm... That sounds interesting. I like a squeeze of lemon or lime in my food. Also, I must be a sucker for pretty packages. I wonder if the kanji means "Buy me" or some other subliminal messages. :-)


I pulled out the George Foreman.
A few dashes of salt and a couple grinds, plus a couple drops of olive oil on a chicken breast.
Grilled about 5 minutes and done.


I dipped a piece of chicken breast in the Ponzu sauce and the other Kikkoman soy sauce.
The soy sauce is definately saltier and has a stronger malty aroma and taste.
The ponzu sauce is about half as strong as the soy sauce, but it also has a tartness to the flavor, from the citrus. Not bad. Would make a good dipping sauce for potstickers or tempura. However, for stronger flavored foods, I believe the subtle tartness would be washed out.

The Final Dish
Grilled chicken breast, a wedge of iceberg lettuce and orange segments (in fancy restaurants known as orange supremes - orange segments with the skin, pith, membrane and seeds removed)... dressed with a Ponzu dressing.


The taste was like a Chinese-style chicken salad without the puffy noodles and toasted almond slivers. A light soy sauce flavor was enhanced by the nuttiness of the toasted sesame seeds.

For the dressing, I just kept it simple.
1 T Ponzu
1/2 t olive oil
a drop or two of toasted sesame seed oil

Whisk

Monday, March 24, 2008

Playing with Puff Pastry 2

I had a partial sheet of puff pastry dough leftover from my Beef Wellington dinner. The leftover bits of puff pastry dough measured roughly 3 inch x 9 inch, plus a 2" x 9 inch trim piece.

I made butterfly cookies which are also known as palmier cookies.

Butterfly cookies were popular when I was younger when we'd go to Chinatown. A local bakery sold these treats that were easily the size of a saucer. The cookies were flaky, crispy, slightly sweet and had a light glaze.

The leftover bits are too small to make gigantic saucer-size treats, but large enough for a small palm-size cookies.

The method:
1. Lay the flat sheets on the counter, sprinkle sugar on both sides, as if you were making cinnamon toast. In fact, I sprinkled some cinnamon sugar on the "inside".

2. Roll the sheets forming a roll or roll from both ends so the spiral meets in the middle.

3. Cut the spirals to about a 1/4" thickness.

4. I used parchment paper so the the cookies wouldn't stick. Would they stick without parchment paper? I'm not sure.


5. Bake 425F for about 12 minutes. I checked at 10 minutes and let the cookies bake until golden brown.


Close-up: Before baking


Close-up: After baking (same cookie) :-)

Sunday, March 23, 2008

Happy Easter - Playing with Puff Pastry

Happy Easter!

What am I going to make for dinner?
I wanted to try something different, unique and special.

I've decided to do Beef Wellington.
Beef Wellington is a beef tenderloin, layered with sauteed mushrooms (the fancy name is mushroom duxelles), pate and wrapped in puff pastry.

I enjoy watching reality cooking shows and one common dish seen on Gordon Ramsay's show is Beef Wellington.

Gordon Ramsay making Beef Wellington


I've had Salmon en Croute, salmon in puff pastry, but not Beef Wellington. My curiosity has motivated me to try making the dish, but on a smaller scale.

My version of Beef Wellington Steak

1 beef Filet Mignon about 1.5 inches thick - 6 to 8 ounces
Salt and Pepper

8 ounces of mushrooms, finely chopped
1 shallot, finely chopped (about the size of a 1/4 onion)
2 pinches thyme
Salt and pepper

2 slices Prosciutto.
My original goal was to make the Beef Wellington with pate, but pate is difficult to find so I used Ramsay's video as a guide.

1 Sheet Puff Pastry

Step 1.
Salt and pepper the steak


Step 2:
Chop the mushrooms and shallot


Step 3:
Brown the steak on both sides about 2 minutes per side. The main reason for browning is to develop some flavor. Note that the steak is not thoroughly cooked. Afterwards, the steak was placed in the refrigerator to cool down.


Step 4:
While the steak is cooling down, the mushrooms were sauteed with a little oil and butter. Salt and pepper plus the thyme was added at this time. The head was medium-low. We're sweating the mixture and drying it out, not browning. Also, looking at many recipes for mushroom duxelle some call for red wine/Madeira while others called for cream.

The mixture after cooking. The taste is nice. A little red wine in the saute would have been nice too.


Step 5:
The prosciutto and mushroom mixture are laid out on plastic wrap.


Step 6:
The cooled steak is wrapped with the ham and mushroom mixture. Again refrigerated to ensure the product is cool


Step 7:
Setting up the steak on the puff pastry


Step 8:
Trimming the puff pastry leaving about 1" overlap.
The puff pastry was unwrapped and a little egg wash was brushed along the edges to help glue the edges together.


Step 9:
Wrapped like a Christmas present (I'm terrible at wrapping) and ready for baking.


Step 10:
Baked 425F for about 25 minutes.
The Wellington was allowed to rest on a wire rack for about 10 minutes.


Cut in half... The beef filet is cooked to medium. Just the way I like it. I lucked out. :-)


The Final Dish
The steak is enough for two.
Served with smashed red potatoes infused with garlic and horseradish with a couple spoonfuls of beef jus. The cabbage is steamed and lightly sauteed and topped fried prosciutto.


Overall the dish was nice.
The puff pastry will become soggy if allowed to rest too long which this dish was on the verge. I've read on different websites that you can put a layer of bread or a pancake between the puff pastry and the meat mixture. This would seem like too much breading for my liking.

The prosciutto I used turned out to be smoked which overpowered some mushroom mixture.

The mushroom mixture was good. A splash of red wine would have improved it especially when served with beef.

Would I order this dish in a restaurant?
Probably not. I like the steak to be simple with a good sauce. Although a sauce can be made for this dish, it just seems that the sauce would want to ruin the puff pastry.


Saturday, March 22, 2008

Corned Beef Hash

I had some leftover corned beef and roasted potatoes so I decided to make corned beef hash. When I go out for breakfast, corned beef hash or biscuits and gravy are my two must tries at a restaurant, but not at the same seating. lol :-P

The Fixins'
3/4 C roasted potatoes, coarse chop
3/4 C corned beef, coarse chop
2 T onion, coarse chop
1 T bell pepper, coarse chop
1.2 T parsley
1/4 t garlic powder
Pinch of tarragon
Pinch of thyme

Of course, being a guy I have to use every dish, pot and pan, plus pull out appliances to make this dish.

I typically just chop and fry, but this time I wanted to try a finer mince so I dumped all of the ingredients into the mini food processor and gave it a few pulses.


The ingredients after a few pulses. This looked good to me. I didn't want a mash. The mixture at this point looked a little dry, but I continued on.


Pan frying the corned beef hash in a canola oil/butter mixture, about 1 T (T = Tablespoon).
I remember watching the show, Good Eats, and Alton Brown used a weight to cook his corned beef hash recipe. I believe the weight acts to increase the contact area and help brown the hash, similar to a bacon press. I used a sauce pan filled with water as the weight. Pot #2. :-)


The hash did not flip as a pancake, but turned out crumbly. I also poached a couple eggs as a topper.

Corned beef hash topped with two poached eggs and a sprinkle of cayenne pepper.
I got a little distracted and didn't flip the hash sooner. The crispy bits are a little dark. :-)


The Final Dish
Corned beef hash, poached eggs served with a buttered English muffin. Instead of Hollandaise sauce, ketchup and Louisiana style hot sauce was used.


Overall, the dish had good flavor but was a little dry and crumbly. I was hoping for something a little more moist and cohesive.

Corned beef hash was originally based upon leftovers. I had some cabbage and carrots from the St. Patrick's Day meal, but didn't want that in this dish. However, those veggies would have added extra moisture to the dish. Also, the roasted potatoes I did use are drier than boiled potatoes.

Next time boiled potatoes will be used and that should increase the moistness of the dish. Also, increasing the veggies a little - onions, bell pepper, fresh garlic and parsley, will help too. Finally, a little broth can be added to increase moisture and flavor.

Final utensil count
Pot and Pan Count: 3 (Frying pan, weight pan and poached egg pot)
Appliance: Food processor
Other: Cutting board, knife, slotted spoon, spatula

Not bad for a simple breakfast. lol!

Friday, March 21, 2008

Shrimp Egg Fu Yung

With my home grown bean sprouts, I've decided to make the classic Chinese-American dish Egg Fu Yung.

Egg Fu Yung is essentially an omelet with lots of vegetables and a meat. I would typically use ham, but I wanted to try something different today so I picked shrimp.

Any type of vegetables will work, but bean sprouts, onion, celery are the primary veggies. You can cut the veggies anyway you like, chopped, sliced, diced, minced...etc.

The fixins:

1/2 Zucchini, chopped
1/3 carrot, chopped
1/2 onion, chopped
1 stalk celery, chopped
1/3 cup bell pepper, chopped
3 big mushrooms, rough chop
1 to 1.5 cups beans sprouts
1/2 teaspoon salt
1/4 to 1/2 teaspoon garlic powder
1 teaspoon soy sauce
1/4 teaspoon sesame oil
4 eggs, beaten

15 shrimp (31/35), deveined and split and cut into thirds
1/2 teaspoon soy sauce
dash of white pepper
pinch of salt

1. Shrimp marinaded with a little soy sauce (about 1/2 teaspoon, a dash of white pepper and a pinch of salt)

The vegetables


2. I like precooking the ingredients so the omelet part is mainly cooking the egg. First I partially cooked the shrimp, about 3 to 5 minutes. Afterwards the shrimp was taken out and the vegetables and the rest of the seasonings were added. I was mainly sweating the vegetables and steam with a little chicken broth, about 5 minutes. Another reason for cooking the vegetables is to get rid of the "raw" flavor from the bean sprouts.

The vegetables were taken out of the saute pan, mixed in a bowl and allowed to cool. At this point, I could have made another American classic, Chop Suey, by just making a sauce, but my goal was Egg Fu Yung.


When the mixture cooled sufficiently, I added the beaten eggs to the vegetable mixture.
I used a measuring cup, 1/3 C, to pour the mixture into a frying pan. I, also, could have just made one big omelet but my preference is for smaller individual Egg Fu Yung.

Cooking at Medium to Medium-High


About 3 to 5 minutes, flipped the patties.


Finally when they were all done. I topped with an Egg Fu Yung sauce.

Egg Fu Yung Sauce (Ref: Sunset Oriental Cookbook, 1994)
1 cup of chicken broth
2 tsp sugar
2 tsp vinegar (I used apple cider vinegar)
1 Tbl corn starch
1 Tbl soy sauce
2 Tbl water

Bring the chicken broth to boil. Dissolve the other ingredients in a small bowl.
When the broth boils, stir in the rest of the ingredients. The mixture should be fully thick when the sauce comes to a boil

The Final Dish:
Egg Fu Yung with Sauce


Overall, the vegetables were still had a slight crunch and the taste was good. The bean sprouts turned out nice.

There was about 3 cups of the vegetable shrimp mixture. I could have used 3 eggs instead of 4 so the patties aren't as eggy. Also, the vinegar seemed pretty strong in the sauce so I will probably use 1 teaspoon instead of 2 the next time around.

I forgot to add/buy green onions. Green onions would have added a little extra flavor.

Thursday, March 20, 2008

Home Grown Bean Sprouts

We must be getting close to Spring. I think the gray and wet winter is causing me to get a little restless. I'm wanting to grow my own food or at least make an attempt to grow my own food. I'm eager to get outside and enjoy a little sunshine.

Presently, it's raining and the forecast is for rain and cloudy weather for the next few days.

Here's a project I can do indoors and supposedly it only takes four days, growing bean sprouts.

Refs:
Walton Feed - Sprout Information

Oregon State University - Bean Sprout Info

Bean sprouts, the whitish sprouts often found in the supermarket and used in Chinese food, are sprouted mung beans. Mung beans are little green beans about the size of a bb.

March 14, 2008 - Evening
I don't know if these will work since it isn't seed stock. It's just a bag of beans I bought at the store. I figure they should work since they are dried beans.


I sorted out the beans that were broken and looked too dry or wrinkly.
I measured out 1/4 cup which weighed 1.7 ounces (50 grams).


The next step is to soak the beans overnight.


March 15, 2008:
Morning - After a night of soaking, the mung beans were placed in a strainer and rinsed.
Morning Photo - Soaked overnight


I water filled ziploc bag, 2.33 cups of water, on top of the beans. Supposedly, the weight helps the sprouts grow bigger and thicker. According to the OSU website the pressure should be 0.5 ounce per sq in.

Doing the math!
The strainer I'm using is about 7" diameter at the base so that works out to 38.5 sq. inches at 0.5 ounce per sq. inch gives a total weight of 19.4 ounces. 1 cup of water is about 8 ounces in weight so it works out to 2.4 cups (2.33 is close enough).


Evening - I've rinsed twice today since placing the soaked beans in a strainer. Once in the afternoon and once this evening.

Much to my surprise, the beans are sprouting! This is just a little over 24 hours since I started this project.

Evening Photo - Sprouting!


March 16, 2008:
Continued the soak and rinse regimen - morning, early evening and evening.

Evening - Sprouts getting longer (1/4" to 3/8" long)


March 17, 2008:
Same watering schedule

Evening - Roots are about 3/4" to 1" long. Also the greenish hulls are falling off.


March 18, 2008:
Morning - Allowing the sprouts to soak about 5 to 10 minutes. Also, picked out the empty mung bean hulls.

Evening - Roots are about 1.5" to 2" long.
I may be over watering. I've been soaking the sprouts a little longer in the morning instead of just rinsing. The roots seem to be browning.


March 19, 2008:

Twice a day watering. Morning and Evening. Also, added a paper towel between the sprouts and the water bag.

Evening - Roots are about 2" long.


March 20, 2008:

Morning: Light soak to float out the hulls.

Evening: Washed the bean sprouts and aired out to dry a little. I don't have a salad spinner. Afterwards, the sprouts were refrigerated.

Sprouts are long, maybe 3", but the thick, meaty portion of the roots are about 1" to 1.5". I let the sprouts go 6 days to see if they would plump up a little more, but felt that this was long enough. Any longer I was concerned the roots would damp out.


The Numbers:
Initial: Dry Seeds used was 1/4 cup which weighed 1.7 ounces or 50 grams.
Final: Washed and drained spouts weighed 7.9 ounces or 223 grams.

Rereading the reference websites, I'll eventually give it another try to see if I can increase the plumpness. However, the first batch is sitting in the fridge until I figure out what to do with them.