Showing posts with label Pate a Choux. Show all posts

Thursday, May 27, 2010

May 27, 2010: Daring Baker's Piece Montee

The May 2010 Daring Bakers’ challenge was hosted by Cat of Little Miss Cupcake. Cat challenged everyone to make a piece montée, or croquembouche, based on recipes from Peter Kump’s Baking School in Manhattan and Nick Malgieri.


This month’s challenge recipe is for a Piece Montée, which means literally “mounted piece.” You may know this dessert by another name – Croquembouche (“crunch in the mouth”). I have been fascinated by this dessert for a loooong time. In fact, I saw Martha Stewart make one on her TV show about 15 years ago and have always wanted to try my hand at one, though never had a good enough excuse…until now! In all seriousness, the piece montée is the traditional wedding cake here in France. They are often served at baptisms and communions as well.

The classic piece montée is a high pyramid/cone made of profiteroles (cream-filled puff pastries) sometimes dipped in chocolate, bound with caramel, and usually decorated with threads of caramel, sugared almonds, chocolate, flowers, or ribbons. Modern pastry chefs have taken to assembling this dessert in all manners of shapes and sizes, and you should feel free to express your creativity too!

Recipe Source: The recipes for this month’s challenge come from Peter Kump’s Baking School in Manhattan and were originally created by famed pastry chef, Nick Malgieri. Please note you must make your own pate a choux (puff pastry) and crème patissiere. And your piece montée needs to be a mounted structure with some height to it.

Note: This recipe has 3 main components: the pate a choux, the crème patissiere, and the glaze used to mount/decorate it. While you can purchase or make a cardboard conical structure to build your piece montée or use toothpicks as an aid, it is relatively easy to assemble it using just the baked pate a choux as the main building blocks and the glaze as the glue.

[Oh, No!
Pate a Choux is my archnemesis from a previous Daring Baker's Eclair Challenge. Pate a Choux is easy in terms of concept and making, but for some reason I had a difficult time getting the rise while baking in the oven. Hopefully this time around things will be different.]


[I made the Chocolate Pastry Cream.]
Vanilla Crème Patissiere (Half Batch)
1 cup (225 ml.) whole milk
2 Tbsp. cornstarch
6 Tbsp. (100 g.) sugar
1 large egg
2 large egg yolks
2 Tbsp. (30 g.) unsalted butter
1 Tsp. Vanilla

Ingredients are pretty straight forward...


Directions:
1. Dissolve cornstarch in ¼ cup of milk. Combine the remaining milk with the sugar in a saucepan; bring to boil; remove from heat.

2. Beat the whole egg, then the yolks into the cornstarch mixture. Pour 1/3 of boiling milk into the egg mixture, whisking constantly so that the eggs do not begin to cook.

[Here I'm tempering the egg yolk mixture with a little of the hot milk. This slowly warms up the egg mixture so we don't end up with scrambled eggs.]


3. Return the remaining milk to boil. Pour in the hot egg mixture in a stream, continuing whisking.

4. Continue whisking (this is important – you do not want the eggs to solidify/cook) until the cream thickens and comes to a boil. Remove from heat and beat in the butter and vanilla. [Since I'm adding chocolate, I held off on the butter until the end.]

For Chocolate Pastry Cream (Half Batch Recipe):
¼ cup (about 50 cl.) milk
3 ounces (about 80 g.) semisweet chocolate, finely chopped

5. Milk and chocolate were heated in the microwave... about 30 to 45 seconds. I waited about a minute before mixing.


6. Mix until smooth. [Note: I also added the butter here from step 4.]


7. Whisk into pastry cream when you add the butter and vanilla.

[At this stage, the chocolate is smooth, but seem loose. However, the pastry cream is pretty thick.]


8. Pour cream into a stainless steel/ceramic bowl. Press plastic wrap firmly against the surface. Chill immediately and until ready to use.
[Note: For some reason, the pastry cream did not thicken in the fridge, it turned out like a soft pudding sauce.

My solution: I recooked the pastry cream and added another 1 T of cornstarch/1T water to thicken the pastry cream. Below are the lumpy results. I chilled the pastry cream and pressed through a fine sieve to mash out the lumps.]


Pate a Choux (Yield: About 28)
¾ cup (175 ml.) water
6 Tbsp. (85 g.) unsalted butter
¼ Tsp. salt
1 Tbsp. sugar
1 cup (125 g.) all-purpose flour
4 large eggs

For Egg Wash: 1 egg and pinch of salt

Pre-heat oven to 425◦F/220◦C degrees. Line two baking sheets with parchment paper.

Preparing batter:
1. Combine water, butter, salt and sugar in a saucepan over medium heat. Bring to a boil and stir occasionally. At boil, remove from heat and sift in the flour, stirring to combine completely.

[Sifting the flour into the hot liquid.]


2. Return to heat and cook, stirring constantly until the batter dries slightly and begins to pull away from the sides of the pan.

[Note to self: Try making pate a choux in a steel pan. I'm using a non-stick pan so it's hard to gage when the pate a choux is pulling away from the sides. Instead, I cooked about 5 minutes.]


3. Transfer to a bowl and stir with a wooden spoon 1 minute to cool slightly.

4. Add 1 egg. The batter will appear loose and shiny.

5. As you stir, the batter will become dry-looking like lightly buttered mashed potatoes.

6. It is at this point that you will add in the next egg. Repeat until you have incorporated all the eggs.

[Patiently mix the egg in. You want the dough to form soft peaks when you pull the spoon out of the batter... so you may not need all of the last egg. However, I did use the entire fourth egg.]


Piping:
7. Transfer batter to a pastry bag fitted with a large open tip (I piped directly from the bag opening without a tip). Pipe choux about 1 inch-part in the baking sheets. Choux should be about 1 inch high about 1 inch wide.


8. Using a clean finger dipped in hot water, gently press down on any tips that have formed on the top of choux when piping. You want them to retain their ball shape, but be smoothly curved on top.

9. Brush tops with egg wash (1 egg lightly beaten with pinch of salt).

[The egg wash will give the baked choux a nice brown appearance.]


Baking:
10. Bake the choux at 425◦F/220◦C degrees until well-puffed and turning lightly golden in color, about 10 minutes.

11. Lower the temperature to 350◦F/180◦C degrees and continue baking until well-colored and dry, about 20 minutes more. Remove to a rack and cool.

[Out of the oven... looking good.]


[I have a couple flat choux which will probably puff up when I fill, but most likely they'll just be eaten as samples/quality control. lol]


12. Can be stored in a airtight box overnight.

Filling:
When you are ready to assemble your piece montée, using a plain pastry tip, pierce the bottom of each choux. Fill the choux with pastry cream using either the same tip or a star tip, and place on a paper-lined sheet. Choux can be refrigerated briefly at this point while you make your glaze.

Use one of these to top your choux and assemble your piece montée.


Hard Caramel Glaze:
1 cup (225 g.) sugar
½ teaspoon lemon juice

[Warning! Be careful when working with hot sugar... This stuff is 300F. I absentmindedly tried to knock a drop of this stuff off a bowl and it stuck to my finger. HOT!]

1. Combine sugar and lemon juice in a saucepan with a metal kitchen spoon stirring until the sugar resembles wet sand.

2. Place on medium heat; heat without stirring until sugar starts to melt around the sides of the pan and the center begins to smoke. Begin to stir sugar. Continue heating, stirring occasionally until the sugar is a clear, amber color.

3. Remove from heat immediately; place bottom of pan in ice water to stop the cooking. Use immediately. [I did not do this step... If I cooled too quickly the sugar would solidify before I could get to it.]

Assembly of your Piece Montée:

You may want to lay out your unfilled, unglazed choux in a practice design to get a feel for how to assemble the final dessert. For example, if making a conical shape, trace a circle (no bigger than 8 inches) on a piece of parchment to use as a pattern. Then take some of the larger choux and assemble them in the circle for the bottom layer. Practice seeing which pieces fit together best.

Once you are ready to assemble your piece montée, dip the top of each choux in your glaze (careful it may be still hot!), and start assembling on your cake board/plate/sheet. Continue dipping and adding choux in levels using the glaze to hold them together as you build up. (You may want to use toothpicks to hold them in place – see video #4 below).

When you have finished the design of your piece montée, you may drizzle with remaining glaze or use ribbons, sugar cookie cut-outs, almonds, flowers, etc. to decorate.

[The finished Piece Montee, Croquembouche]


The pate a choux turned out. The chocolate pastry cream was a problem so I'll probably use a different recipe next time. I thought the hard caramel would be chewy, but as the name "croquemboche" implies there was a nice crunch to the cream puffs.

Overall, flavors were good. The pate a choux and the spun sugar/hard caramel worked together to give a crunchy cream puff.

Tuesday, September 2, 2008

Sep 02: Eclair Follow-Up (The Experiment)

This is a follow-up/continuation of the Daring Bakers Challenge - Chocolate Eclairs which I posted Sept 31st.

I was initially disappointed with the results of the eclairs. The choux did not puff the way I imagined and some deflated into ladyfingers... and this (I thought) was supposed to be the "easy" part of the challenge.

Seeking advice in the Daring Bakers Forum, the advice centered around baking times. The reason for the deflating eclairs is undercooking. Another factor that I wasn't sure of was the consistency of the choux before piping. The recipe called for "ribbons". Julia Childs recipe shows a stiffer scoopable choux while Alton Brown's choux was in-between - soft but no ribbons.

The flat eclairs bugged me so much that I decided to make the choux recipe one more time, but this time I'll experiment with baking times. I also tried another consistency of the dough and another piping tip.

The Dough
The basic recipe was the same as the challenge... the only difference was the amount of egg added to form the final choux dough.

Try #1 - followed the recipe to the letter. The final dough was smooth and free flowing, but viscous like honey or molasses.


Try #2 - I looked through a Julia Childs cookbook and the picture of the finished choux was firm and scoopable. I beat the eggs this time instead of adding whole unbeaten eggs. This dough is scoopable. I added about 4 eggs instead of 5.


Try #3 (about 2 1/2 weeks after tries #1 and #2) - I caught Alton Brown's show on choux pastry. His recommendation was the dough should form a "V" when lifted by the spoon and it should tear. Again, I added beaten the eggs... added about 4.5 eggs. The texture was sticky... like getting stuck in the mud. Note the jagged edges where the dough did tear.


The Tip
The recipe called for a 2cm tip (which is about 0.75 inches).

Try #1 - used a ziploc with a corner cut out. Note eclairs are flat to start out with and not really round.


Try #2 - I noticed the end of my water bottle had a 0.75" diameter opening so I used that as a tip in the ziploc. :-) A little dough did slip pass the end of the bag.


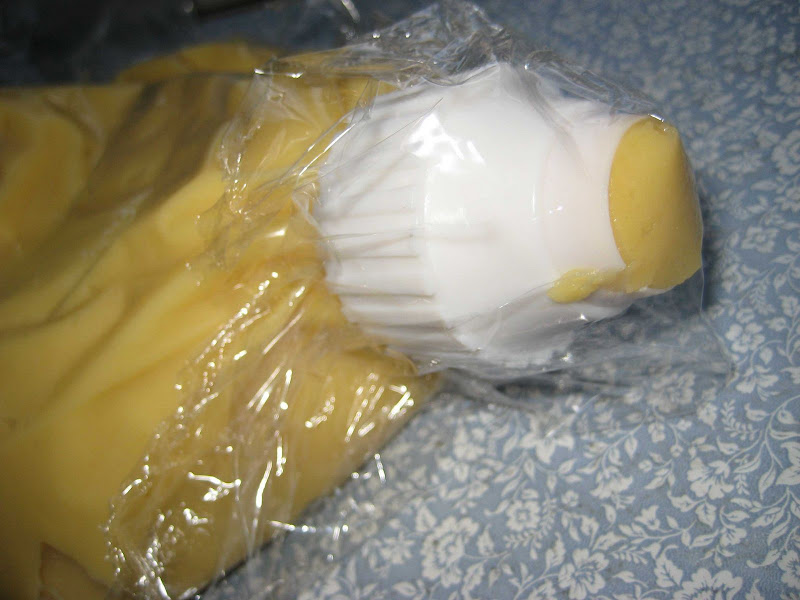
For Try #3 - I caved in and purchased a large piping coupler. I was actually looking in a craft store and there it was. Tip diameter is 0.75 inches. The coupler is two parts that screws together so there should be no problems with leakage.


The Baking Experiment
I decided on 6 baking times and temperatures
1. PH Method (Basic recipe) - 375F, with spoon, without spoon... 20 minutes total.
2. PH Method, no spoon - 375F no door propping, but rotated... 20 minutes total
3. PH Method With Water - Same as one except added a pan of water in the oven... 20 minutes total
4. CIA Method - 325F for 30 minutes (rotate at 15)
5. Alton Brown Method - 425F for 10 mins, rotate, 350F another 10 minutes... 20 minutes total
6. PH Method (Basic recipe) again to see if anything changed.

PH = Pierre Herme
CIA = Culinary Institute of America

Example: Experiment 3 - Water
A pan of water is placed in the oven while the oven is preheating. The water increases the humidity in the oven which is supposed to help the choux rise.

Note: I only baked 3 at a time.
From left to right:
W01 - as piped
W02 - scored with a fork (the lines are supposed to help the choux puff up like an accordion)
W03 - scored with a sharp paring knife (to see if a sharp cut into the dough would work better than the tines of a fork)


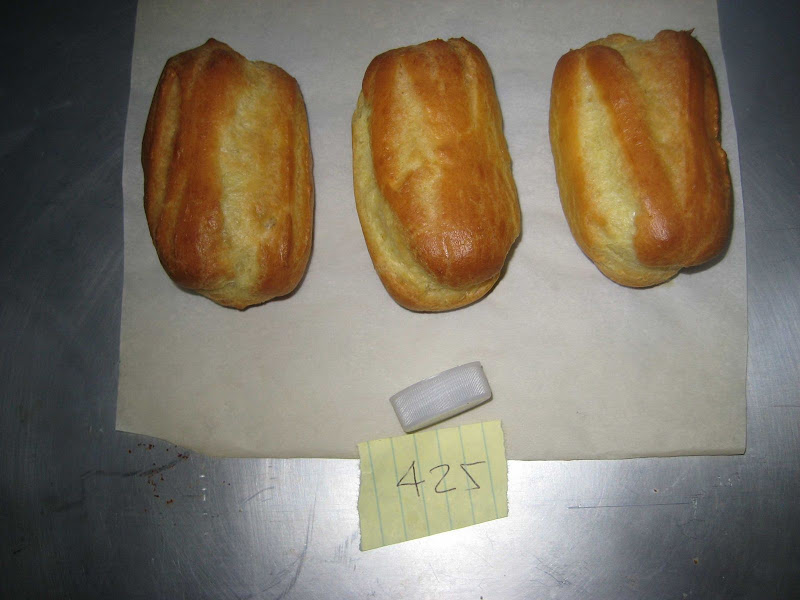
The finished results - The water bottle cap gives scale. The inner ring (dark) is 0.75 inches.
Definite puffing in this shot. Taken out of the oven. No deflating.


A top view - an increase in width too! All these sizes are about the same, but the knife slits seemed to puff the best.


These puffed the most and were baked at 425F. Makes sense. More heat gives more steam.


Comparison of all the results for Try #3.
All methods puffed really well and there was no deflating.
The water pan seemed to help with size, but the choux baked at 425F seemed to puff the most.
Using a knife to make shallow grooves seemed to help. However, using a knife to make grooves should be done on the sides so the top is thicker and uniform looking.


Try #3 - The finished eclairs. Made the chocolate pastry cream filling, but he topping this time is a ganache (because it was easier).


Conclusion - All baking methods seemed to produce good results. General rule of thumb... The hotter the oven the better.

However, I'm starting to believed dough consistency contributes a lot more to the final product size. For example, the ribbony choux produced flat eclairs (too much liquid?) while try #2 was better but still had some deflation (too little water?) and try #3 was the best. A lot of puffing and no deflation.

Sunday, August 31, 2008

Aug 31: Daring Bakers Challenge - Eclairs

Time for another Daring Baker Challenge!


This is my second challenge!

Last month's challenge, I never made a cake from scratch or Swiss meringue frosting so as long as the kitchen didn't burn down and everything tasted good, which it did, I chalked it up as a success.

For this challenge, I think the saying, "Ignorance is Bliss" applies. I buy eclairs from the local French bakery and made pastry cream for other desserts so when it came to this eclair challenge, I had a preconceived notion of what the final results should be like. I was expecting eclairs the size of a hot dog bun with a crispy pastry shell, a rich, chocolate filling and a wonderful chocolate glaze. The eclairs I made had the delicious filling and glaze, but the size was more akin to a high-lighter marker and not as crispy as I had imagined.

I posed the question to the other Daring Bakers about what to expect - size and texture... Many reassured me that my results (especially the size) were on par with the recipe. Once I accepted those facts I erased my preconceived image and accepted my results. However, I did make a few more runs to try to get the Pate a Choux to puff up and crisp up some more in the oven. Those results of my experiments will be discussed in another post.

For this month's challenge, the hosts are Tony Tahhan and MeetaK.
The Challenge is Chocolate Éclairs from the cookbook Chocolate Desserts By Pierre Hermé written by Dorie Greenspan.

Éclairs consist of 3 elements:

- Pâte à Choux, also known as Choux Pastry or Cream Puff Dough
- Pastry Cream
- Chocolate glaze

For the Daring Bakers challenges, we are to bake the recipe as given. The host does allow for some modifications and variations.

These are the allowed variations for this month's challenge.
In terms of modifications of this recipe, the possibilities are endless. In order to maintain some sort of cohesiveness throughout the challenge, here are a couple general guidelines for eclair month at the Daring Bakers.

1. The dough used for the eclairs must be a pâte à choux from the recipe given below.
2. Keep one chocolate element in the challenge. The recipe below is for a chocolate glaze and a chocolate pastry cream. You choose which chocolate element you want to keep. Then feel free to mix and match flavors to the base recipe.
3. Everything else is fair game. Enjoy!

Forward to the challenge recipe!

Pierre Hermé’s Chocolate Éclairs
Recipe from Chocolate Desserts by Pierre Hermé

Pierre Hermé’s Cream Puff Dough
• ½ cup (125g) whole milk
• ½ cup (125g) water
• 1 stick (4 ounces; 115g) unsalted butter, cut into 8 pieces
• ¼ teaspoon sugar
• ¼ teaspoon salt
• 1 cup (140g) all-purpose flour
• 5 large eggs, at room temperature

The ingredients - the yellow rectangle is my template for the pastry (4.5" x 0.75").


1) In a heavy bottomed medium saucepan, bring the milk, water, butter, sugar and salt to the boil.

2) Once the mixture is at a rolling boil, add all of the flour at once, reduce the heat to medium and start to stir the mixture vigorously with a wooden spoon. The dough comes together very quickly. Do not worry if a slight crust forms at the bottom of the pan, it’s supposed to. You need to carry on stirring for a further 2-3 minutes to dry the dough. After this time the dough will be very soft and smooth.

Add all the flour and mix


Mix for 2 to 3 minutes


3) Transfer the dough into a bowl of a mixer fitted with the paddle attachment, or using your hand mixer or if you still have the energy, continue by hand. Add the eggs one at a time, beating after each egg has been added to incorporate it into the dough. You will notice that after you have added the first egg, the dough will separate, once again do not worry. As you keep working the dough, it will come back all together again by the time you have added the third egg. In the end the dough should be thick and shiny and when lifted it should fall back into the bowl in a ribbon.

4) The dough should be still warm. It is now ready to be baked for the éclairs.

The finished cream puff dough (pate a choux).


Notes:
1) Once the dough is made you need to shape it immediately.
2) You can pipe the dough and the freeze it. Simply pipe the dough onto parchment-lined baking sheets and slide the sheets into the freezer. Once the dough is completely frozen, transfer the piped shapes into freezer bags. They can be kept in the freezer for up to a month.

Baking the cream puff dough
1) Preheat your oven to 375 degrees F (190 degrees C). Divide the oven into thirds by
positioning the racks in the upper and lower half of the oven. Line two baking sheets with
waxed or parchment paper.

2) Fill a large pastry bag fitted with a 2/3 (2cm) plain tip nozzle with the warm cream puff dough. Pipe the dough onto the baking sheets in long, 4 to 41/2 inches (about 11 cm) chubby fingers. Leave about 2 inches (5 cm) space in between each dough strip to allow them room to puff. The dough should give you enough to pipe 20-24 éclairs.

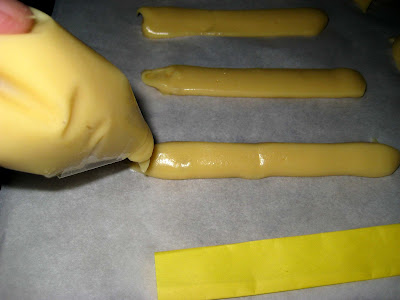
I used a zipper top freezer bag with the tip cutoff. The yellow template aided me in making consistent lengths.


Two trays ready for the oven...


3) Slide both the baking sheets into the oven and bake for 7 minutes. After the 7 minutes, slip the handle of a wooden spoon into the door to keep in ajar. When the éclairs have been in the oven for a total of 12 minutes, rotate the sheets top to bottom and front to back. Continue baking for a further 8 minutes or until the éclairs are puffed, golden and firm. The total baking time should be approximately 20 minutes.

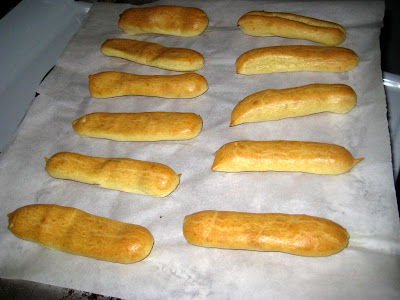
The finished eclair shells. (Hmmm... This isn't what I expected. I thought the shells would have puffed up a lot more. Some of the shells look like ladyfingers. I am confused.)


Notes:
1) The éclairs can be kept in a cool, dry place for several hours before filling.


Eclair Filling - Chocolate Pastry Cream
2 cups (500g) whole milk
4 large egg yolks
6 tbsp (75g) sugar
3 tablespoons cornstarch, sifted
7 oz (200g) bittersweet chocolate, preferably Velrhona Guanaja, melted
2½ tbsp (1¼ oz: 40g) unsalted butter, at room temperature

1) In a small saucepan, bring the milk to a boil. In the meantime, combine the yolks, sugar and cornstarch together and whisk in a heavy‐bottomed saucepan.

2) Once the milk has reached a boil, temper the yolks by whisking a couple spoonfuls of the hot milk into the yolk mixture.Continue whisking and slowly pour the rest of the milk into the tempered yolk mixture.

3) Strain the mixture back into the saucepan to remove any egg that may have scrambled. Place the pan over medium heat and whisk vigorously (without stop) until the mixture returns to a boil. Keep whisking vigorously for 1 to 2 more minutes (still over medium heat). Stir in the melted chocolate and then remove the pan from the heat.

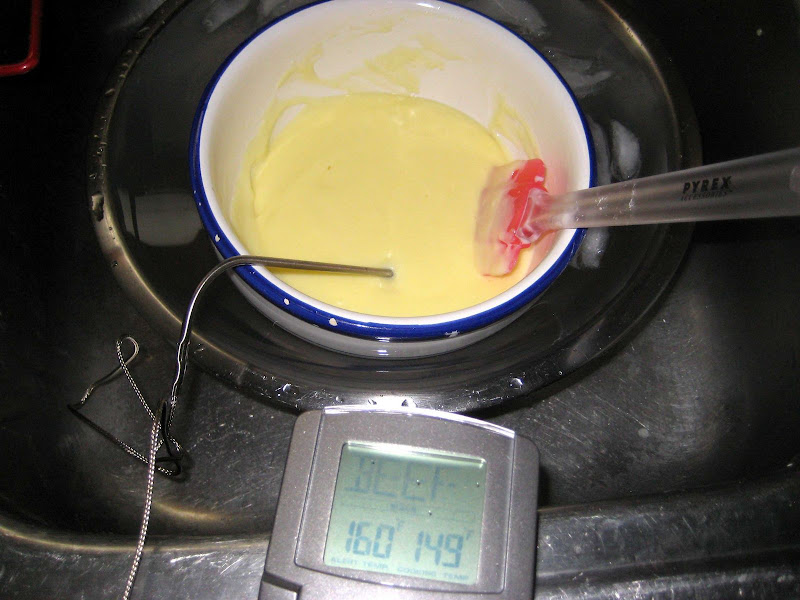
4) Scrape the pastry cream into a small bowl and set it in an ice‐water bath to stop the cooking process. Make sure to continue stirring the mixture at this point so that it remains smooth.

(Side Note: You may be wondering... that doesn't look like chocolate? You are correct. I was flustered by the way the eclair shells turned out that I forgot add the melted chocolate. After this photo, I realized my mistake and did add the melted chocolate... which flustered/frustrated me even more that I missed adding the chocolate.)


5) Once the cream has reached a temperature of 140 F remove from the ice‐water bath and stir in the butter in three or four installments. Return the cream to the ice‐water bath to continue cooling, stirring occasionally, until it has completely cooled. The cream is now ready to use or store in the fridge.

Notes:
1) The pastry cream can be made 2‐3 days in advance and stored in the refrigerator.
2) In order to avoid a skin forming on the pastry cream, cover with plastic wrap pressed onto the cream.
3) Tempering the eggs raises the temperature of the eggs slowly so that they do not scramble.

Eclair Topping - Chocolate Glaze
(makes 1 cup or 300g)
1/3 cup (80g) heavy cream
3½ oz (100g) bittersweet chocolate, finely chopped
4 tsp (20 g) unsalted butter, cut into 4 pieces, at room temperature
7 tbsp (110 g) Chocolate Sauce (recipe below), warm or at room temperature

I used Ghirardelli 60% Cacao Bittersweet.


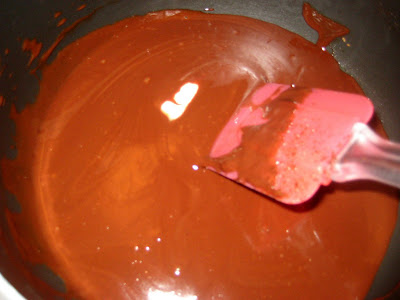
1)In a small saucepan, bring the heavy cream to a boil. Remove from the heat and slowly begin to add the chocolate, stirring with a wooden spoon or spatula.

2) Stirring gently, stir in the butter, piece by piece followed by the chocolate sauce.

Stirring in the last bits of butter and chocolate sauce.


Notes:
1) If the chocolate glaze is too cool (i.e. not liquid enough) you may heat it briefly
 in the microwave or over a double boiler. A double boiler is basically a bowl sitting over (not touching) simmering water.
2) It is best to glaze the eclairs after the glaze is made, but if you are pressed for time, you can make the glaze a couple days ahead of time, store it in the fridge and bring it up to the proper temperature (95 to 104 F) when ready to glaze.

Chocolate Sauce
4½ oz (130 g) bittersweet chocolate, finely chopped
1 cup (250 g) water
½ cup (125 g) crème fraîche, or heavy cream
1/3 cup (70 g) sugar

Water and heavy cream are combined in one measure cup.


1) Place all the ingredients into a heavy‐bottomed saucepan and bring to a boil, making sure to stir constantly. Then reduce the heat to low and continue stirring with a wooden spoon until the sauce thickens.

2) It may take 10‐15 minutes for the sauce to thicken, but you will know when it is done when it coats the back of your spoon.

Coats the back of the spoon.


Notes:
1) You can make this sauce ahead of time and store it in the refrigerator for two weeks. Reheat the sauce in a microwave oven or a double boiler before using.
2) This sauce is also great for cakes, ice-cream and tarts.

Assembling the éclairs:
Chocolate glaze (see above for recipe)
Chocolate pastry cream (see above for recipe)

1) Slice the éclairs horizontally, using a serrated knife and a gently sawing motion. Set aside the bottoms and place the tops on a rack over a piece of parchment paper.

Shells cut in half. (Try 2 shells depicted)


2) The glaze should be barely warm to the touch (between 95 – 104 degrees F or 35 – 40 degrees C, as measured on an instant read thermometer). Spread the glaze over the tops of the éclairs using a metal icing spatula. Allow the tops to set and in the meantime fill the bottoms with the pastry cream.

I found it easier and aesthetically pleasing to drag the tops through the glaze instead of spreading with a spatula.


Glazed tops setting on a rack.


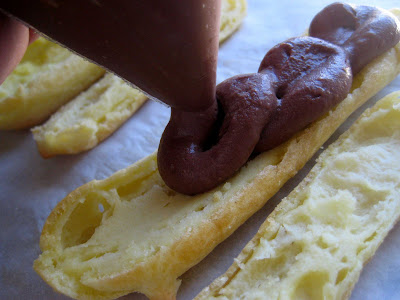
3) Pipe or spoon the pastry cream into the bottoms of the éclairs. Make sure you fill the bottoms with enough cream to mound above the pastry. Place the glazed tops onto the pastry cream and wriggle gently to settle them.

Filling the eclairs - no particular technique. Here I was just making swirls. Others I just piped in a straight line.


Notes:
1) If you have chilled your chocolate glaze, reheat by placing it in a bowl over simmering water, stirring it gently with a wooden spoon. Do not stir too vigorously as you do not want to create bubbles.
2) The éclairs should be served as soon as they have been filled.


Redo Eclair Shells Try#2
I was disappointed at the way my eclair shells turned out that I made another batch the following weekend to see if that's the way they should be or if it's my technique.

Rereading the recipe and looking at Julia Child's The Way to Cook, I found I did overlook a couple things.
1) Stirring the flour for 2-3 minutes. I thought this step was to ensure the flour was fully incorporated and absorbed the liquid. However, this step also dries out any extra liquid.

The technique is to mix, but also smash the choux against the sided and bottom of the pan so moisture would escape. Originally, I kept everything in a ball while mixing.

2) The final choux should be thicker. My first attempt the choux was very soft and flowing. The pictures I've seen is the choux stayed together a little more.

My try #2 choux. Note: The choux is not as runny. However, watching Alton Brown his choux was more pliable and tore into a V-shape when the mixing spoon was lifted from the dough. (Hmmm... another thing to try)


3) Piping with the ziploc produced ovalized strips which I wondered if it contributed to the ladyfinger look.

Since I didn't have a 2cm (about 0.75") plain round tip, I used a water bottle top which had a 0.75" diameter opening and a ziploc.


Piped choux. I also dragged a fork across the top to encourage rising and cracking, as read on the internet. I made a doube (side-by-side) eclair to see if I would get a bigger eclair.


The finshed Try #2 eclair shells.
Yes, they did turn out a lot bigger (in diameter). Not flat like the Try #1 shells.


The Finished Products
Try #1 - Taste good. Shell not as large and crispy as I had expected.


Try #2 - Taste is still very good. Shell is larger, but not as large as the local French Bakery's shell. Also, still not as crispy as I had hoped.


Overall, the eclairs tasted very good. The chocolate pastry cream filling and the chocolate glaze had an intense bittersweet chocolate flavor, not overly rich nor too sweet. The pastry cream and glaze are keepers. The eclair shells are very easy and straight forward, but I think needs more tweaking. However, that just may be my picky-side talking, especially when I can go to the local bakery to pick up hand made eclairs. I probably don't know what a "real" French eclair looks like, but I feel I need to work on the eclair shells to make them to my liking.

The motto for this challenge from Tony Tahhan and Meetak: Culinary Liberty For All. :-)