Monday, March 17, 2008

Happy St. Patrick's Day!

Today, everyone is a little bit Irish.
The traditional dinner in the USA used to celebrate St. Patrick's Day is corned beef and cabbage.

A couple years ago I made my own corned beef from scratch. It turned out very good with more flavor than the store bought corned beef. However, I didn't have the time to make one from scratch so I bought one from Costco. I like the one's from Costco. They don't seem as salty as the inexpensive on-sale corned beef at the local supermarket.

Cooking is simple
Put the brisket in a big pot of water and boil/simmer for 2 to 2.5 hours.

Cabbage - some people like to boil separately, but I like to add the cabbage the last 15 minutes (sooner or later for desired tenderness) into the corned beef liquid. The same with the carrots.

Potatoes - Boiled with the corned beef the first 30 minutes. Afterwards, I removed the potatoes from the liquid, cut them into cubes. Added salt, pepper and some chopped onions. Coated with olive oil and a couple pats of butter.
Finally, I roasted the potatoes in the oven 375 F for the last 30 minutes.
By roasting, I wanted some add texture to the meal instead of having a fully boiled mushy meal.

The Final Dish
Sliced corned beef, a wedge of cabbage, carrots, roasted potatoes, rustic olive bread I found at the supermarket and a dollop of horseradish to add a little kick.
Overall a simple meal to prepare where the brisket was very moist and not too salty.

Sunday, March 16, 2008

Beef Roast

Today was a beef roast day.

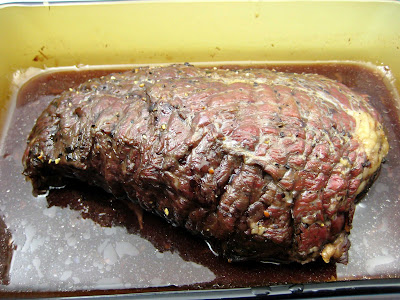
Purchased a Beef Chuck Mock Tender Roast.
Chuck is from the front shoulder area of a cow/bovine. Those muscles are well worked on an animal so it is usually considered to be a "less tender" cut of beef.

I was asking myself "What is mock tender"? Mock is to imitate or pretend so does mock tender mean "pretend tender" which is tough?

It looked like a good cut - single muscle, boneless and inexpensive. Also, it had the word tender in it. Did I fall for a marketing ploy? lol :-)

I trimmed the exterior fat and membrane/silver skin. I hope I didn't over do it.
After I trimmed the roast, it clicked that maybe mock tender means "mock tenderloin"? The trimmed roast does have a tenderloin shape to it.

Sprinkled the roast with a little salt. about 1 teaspoon of kosher salt. It really wasn't too much salt.
A few grinds of black pepper and a light coating of olive oil (about 1 to 2 teaspoons). I hoped the oil would replace the fat that I cut off in terms of browning.


Baked at about 200F for 4 hours. I measured the temperature and it was 140F which the low end of medium. I used the philosophy for tough cuts of meat - low and slow. Low temperatures for a long time (slow). My concern was that I'd end up with beef jerky.

The roast shrank a lot and looks a little jerky like.


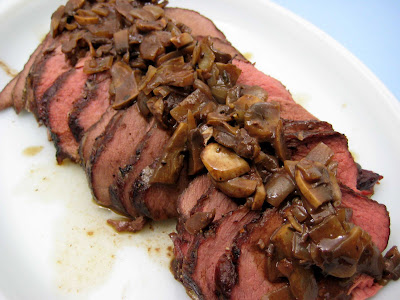
I chopped up about 1/2 cup of onion, 1/2 teaspoon shallot and 1 cup of mushrooms.

Sweated the onions and shallot in olive oil and a little butter. Afterwards, I added the mushrooms and a pinch of thyme.

When the mushrooms cooked down, I poured in the beef jus and a 1/4 c water to rinse out the baking dish. I, also, added a couple drops of Kitchen Bouquet

I let the mixture cook down.

With an electric slicer, I sliced the beef thinly and topped it with the onion-mushroom mixture. The beef turned out medium/medium-well. I lucked out. The 4 hours was just the amount of time I spent at work and my drive home.


But there's more!
I had a bottle of Johnny's French Dip Au Jus so I made some per the directs.

The Final Dish:
I main craving for today was actually a French Dip Sandwich.

I toasted a ciabatta roll, dipped in the au jus, added a light coating of mustard and mayo. The onion-mushroom "relish" added an additional beefiness to the sandwich. The sliced sweet potato offered a little sweetness to counter the savory sandwich. Also, I was craving sweet potatoes instead of broccoli. lol :-)


Overall, the thinly sliced beef was good and not that tough. The slices near the fat end of the roast had some gristle that can be cut out easily.

The bottled au jus didn't really seem to contribute a lot of beefiness, but the mushroom mixture using the roast juices had a nice beefy flavor. Next time, I'll try to find a way to make more jus from the roast. :-)

Saturday, March 15, 2008

Hard-Boiled or Hard-Cooked Eggs

Typically, I don't eat boiled eggs, but I've had a craving for an egg salad sandwich. Every once in awhile I'll get a craving for foods that are low on my enjoyment list.

It's like my feelings about Spam (the canned meat). About every two years, I have a craving for Spam. Eventually I'll buy a can and fry it up for breakfast. After which, I've met my sodium and Spam quota for another two years.

Being an engineering geek, I started think about the issue of hard-boiled eggs or hard-cooked eggs.

Background, a little long-winded, while I was in college, the math department shared a building with the Home Economics/Food Science department. I remember leaving calculus and diff e.q. classes smelling the food being cooked. Walking through the building, some classroom labs were set up with 6 or 7 kitchen. It all looked fun.

A classmate mentioned that he had taken the class and it was open to anyone. A few years later, I took the "Introduction to Foods" class. The class was a nice diversion from engineering classes, had a high girl to guy ratio, but more importantly we ate what we cook. :-)

One of the lessons involved egg cookery. The instructor discussed that based upon studies, for tender less rubbery eggs, the eggs should be hard-cooked not hard-boiled.

What's the difference?
Hard cooked: The eggs are brought to a boil, taken off the heat and allowed to sit in the hot water before draining and cooling. A better description can be found at the American Egg Board website: AEB: Hard-cooked eggs

Hard boiled - The eggs are boiled the full cooking time before draining and cooling.

As I mentioned earlier, being an engineering geek, I decided to make a science experiment out of my craving. Hard-boiled vs. Hard-cooked eggs.

The eggs I'm using expire March 17th, in two days.
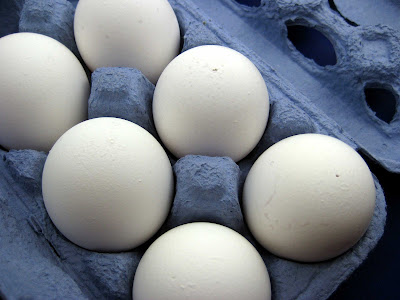
I used 4 eggs that weighed about 56 grams each.
I pierced the eggs at the air sac, at the fat end of the egg.
Note the pin-prick on the two eggs towards to top-right corner.

The Process:
1. I placed two eggs, one with a pin-prick and one without, into one pot. The other two in another pot.
2. Filled the pots with an ample amount of water - about 1" of water above the eggs.
3. Brought the pots to a boil. I did give the eggs a stir before the water started boiling.
4. For the hard-cooked egg pot, when the water comes to a boil, the pot was taken off the heat, covered and the timer set for 15 minutes.
For the hard-boiled eggs, I let the eggs boil, covered, for 10 minutes.
5. Cooling the eggs. After the allotted time, I dropped the eggs into an ice bath. The eggs with a pin-prick I allowed the eggs to cool completely in the cold water. The other two eggs I just dropped in the ice bath and immediately removed from the water.

What I was trying to show/prove to myself.
1. There is a difference in texture between hard-cooked and hard-boiled.
2. How cooling effects the yolk. The green ring around an egg yolk is due to slow cooling rate.
3. The pin-prick forms a better looking egg.


The Results
Top Left Egg: Hard-Cooked with Pin-Prick, completely cooled
Top Right Egg: Hard-Boiled with Pin-Prick, completely cooled
Bottom Left Egg: Hard-Cooked, No Pin-Prick, dunked and taken out
Bottom Right Egg: Hard-Boiled, No Pin-Prick, dunked and taken out
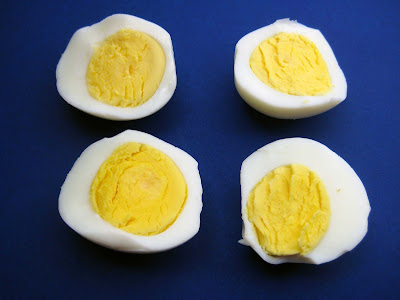

1. All the egg yolks look great - No green ring.
2. The idea of stirring is to center the egg yolks. This seemed to work for all but one of the eggs. I've also heard that spinning the egg on the counter before placing in the water will center the egg yolk.
3. The pin-prick is supposed to allow air to escape from the air sac so the egg has a nice oval shape. The top two eggs do have a slightly rounder shape than the bottom two.
4. Texture - I tasted each of the four eggs. The egg whites all seemed the same. Although, the hard-cooked eggs were very slightly less rubbery, but I just considered the eggs were all the same since the difference was very subtle.

Lesson learned:
a. Cooking - I don't think there was a big difference between the two methods. Maybe if I was cooking more eggs, but right now I'll consider them the same. I did use older eggs. I wonder if fresher eggs would behave the same.
b. Cooling - There didn't seem to be a big difference with the cooling method. However, I did use the eggs immediately. If I were cooking eggs ahead of time for use later on, I'd still let the eggs cool completely in an ice bath or running water to avoid the green ring around the yolk.
c. Pin-Prick - the pin prick did round the egg a little. If I'm making deviled eggs for a platter, I would still prick the end but use a thicker pin and use eggs that were a little fresher.

Note on egg freshness:
The fresher the egg, the smaller the air sac. This would make for a better presentation for deviled eggs. However, the fresher the eggs the higher the chance the shell will stick to the cooked eggs making peeling very difficult.

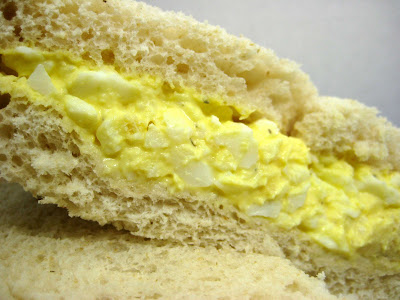
Back to why I made boiled eggs - egg salad sandwich.

For the remainder of the eggs, I minced with a fork.
about 2 Tablespoons of Mayonnaise
A little mustard
salt
pepper

Served between soft sandwich bread.

The sandwich hit the spot and I answered some lingering questions I had about egg cookery! :-)
Thursday, March 13, 2008

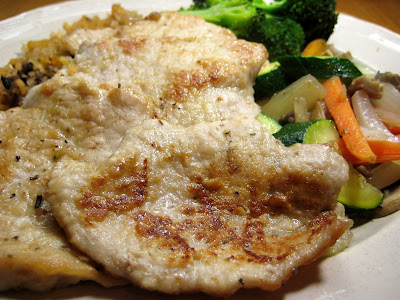
Pork Cutlets

I still had a chunk of uncooked pork loin in the refrigerator leftover from the Chile Verde recipe.

My desire was to make Pork Piccata. Pork piccata, similar to chicken piccata, is floured thinly sliced pork, fried and served in a lemon, butter, caper sauce. However, I didn't have any lemon nor capers. After work, I just wanted to go home and feed the pups so I bypassed the supermarket.

My alternative was Tonkatsu which is fried pork cutlets breaded with panko bread crumbs.
Well, when I looked through my pantry. I didn't have any panko. Where did they go? To the same place where lost socks go? I think I thrashed the panko last month since they were sitting in my pantry for over a year.

Other similar fried cutlet dishes -
Tonkatsu, Japanese
Weiner Schnitzel or Schnitzel, German
Milanesea, Portugal/Latin America

My alternative to my alternative - Simple Fried Pork Cutlets.

The fixins
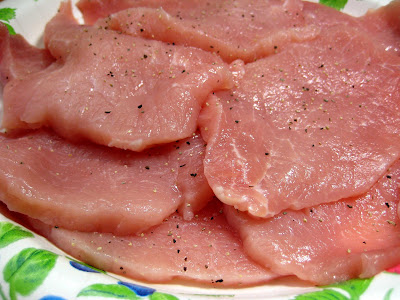
Pork sliced thinly. Typically pounded to thin out the slice, but I didn't want to put that much effort into the dish.
Flour
Salt
Pepper
Garlic powder


Mix the flour, 1/4 teaspoon (each) salt, pepper and garlic powder.
Coat the pork cutlets.


Pan fry in oil. I used an olive oil and butter mixture.
I estimate it was about 2 to 3 minutes each side.

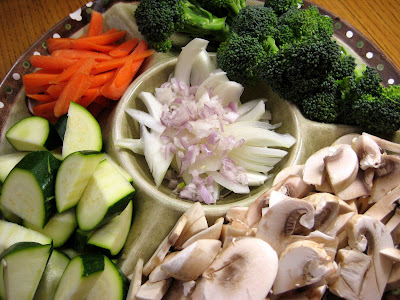
Sauteed Vegetables were served as a side dish.


The final dish
Since the cutlets were thin and from the pork loin, I half expected the cutlets to be dry and stringy. Surprisingly, the cutlets were moist and very tender.

Monday, March 10, 2008

Mustard Cabbage with Braised Pork

A few days before my chili verde craving, I braised pork belly with fermented black beans and tofu.

Today, I was craving vegetables. I think it was my body telling me to eat some leafy greens.

What I did today was boiled some Chinese Mustard Cabbage (Gai Choy) and served it with the leftover braised tofu. The mustard cabbage has a peppery taste to it that's stronger than Boc Choy or Swiss Chard.

Braised Pork over Gai Choy.
(Note: You'll probably notice that there is no pork in the picture. The pork was eaten in previous meals. hehehe.)

Sunday, March 9, 2008

Chili Verde

Recently purchased a pork loin on sale, $1.28 per pound. To me this was a great find, pork loin has almost 100% utility. Just a little trimming removing a little fat and silver skin and you're left with a very lean chunk of meat.

The decision was made to make Chile Verde, a green chile pork stew, and Mexican Rice. I have no set recipe and generally use what I have on-hand.

Chile Verde
The fixins
3 lbs Pork - cubed into about 1" chunk. Pork loin is good, but since it is a lean cut tends to be a little dry. Country style ribs, which I believe is from the shoulder blade, is another good choice since the meat has more marbling.
1 small can of roasted green peppers
2 cloves Garlic, minced
1/4 Onion, chopped
1 T Shallot, chopped
1 T Oregano
2 teaspoons Thyme
Salt
Broth or water
Green Chile Salsa (Salsa Verde) - Optional


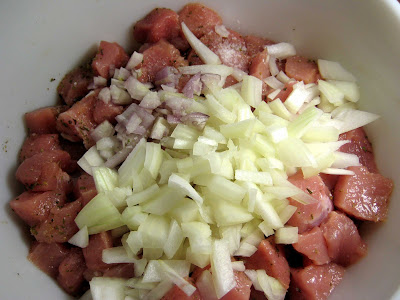
Cube the pork, season with about 1 or 2 teaspoons spoons salt, garlic, oregano, thyme, onion and shallot. Let marinade about 20 minutes.


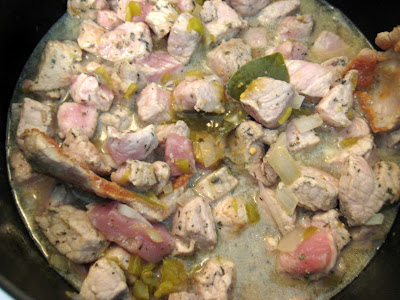
Brown the pork - You can actually skip this step and add the liquid and green chiles. About 1 cup of liquid, you want the liquid to only come 1/3rd the way up the meat. If you add more liquid (as pictured below), the stew is a little soupy, which isn't bad.


Bring to a boil and turn to medium to simmer. For the pork loin, about 45 minutes is good. For the country style ribs, about 1 hour.

At the last minute, add some green chile salsa. The green chile salsa optional but adds a little bit of spiciness to the Chile Verde. Taste to see if you need to add salt.


The side dish - Mexican Rice
2 cups of Long Grain Rice
1/2 cup Onion, chopped
1 T Shallot, chopped
1 clove garlic, minced
3 cups of Broth
Salsa
Oil and/or butter

Brown the rice with the oil. I used an oil and butter mixture. When the rice is starting to brown, I added the onions, shallots and garlic to the hot rice so the flavors will permeate the rice.


Add the liquid and salsa. Typically for rice I like using 1.25 cups to 1.5 cups of liquid per 1 cup of rice. The salsa gives the rice color and adds additional flavor.


Bring to a boil and turn down to medium, medium-low, to simmer.
Before serving, fluff the rice and taste for seasoning.


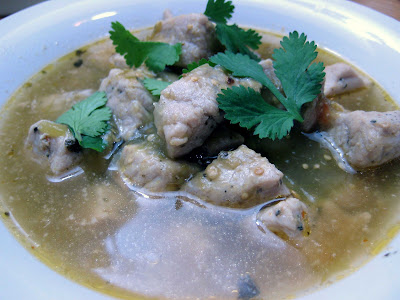
The final results
Bowl of Chile Verde


Rice, Beans and Tortillas on the side.

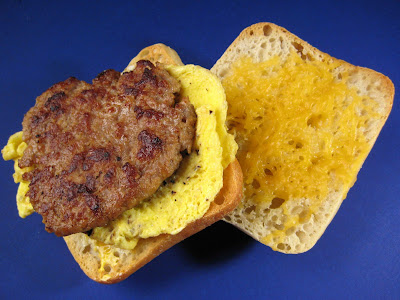
Breakfast Sandwich

When we eat out for breakfast, I generally order biscuits and gravy. My goal is to find a place with good Southern biscuits and flavorful sausage gravy. We've found some places with good biscuits and gravy, but not an outstanding "I gotta go there every week" type place.

My theory is that you need start out with good sausage. However, there's not much to choose from locally. The typical brand, Jimmy Dean, to me is kind of bland. This after many attempts to make a flavorful sausage gravy. Bacon gravy I can do. Sausage gravy has been more elusive.

I found another brand (Independent Meat Co. - Mild) while shopping so I decided to try it out. Rather than going through the effort of making biscuits and gravy, I decided to make a sandwich so I can taste the sausage first.

The fixins:
Toasted, buttered Ciabatta bread
Shredded Cheddar
Scrambled eggs
Sausage Patty
A little mustard and mayonnaise


Assembled and Cut


The sausage had a weak sausage taste.
My search continues.
I did find another brand, Farmland. Farmland is a national brand so I have high hopes about the next package.