Showing posts with label chiles. Show all posts

Sunday, January 15, 2012

Jan 15, 2012: Daring Cooks - Green Chile Chicken Tamales

Maranda of Jolts & Jollies was our January 2012 Daring Cooks hostess with the mostess! Maranda challenged us to make traditional Mexican Tamales as our first challenge of the year!

[Eat4Fun - Happy New Years! I've been wanting to make tamales again, but didn't have a plan. Fortunately this month's challenge gave me the extra push and a new recipe to try out! I decided to try the Green Chile Chicken Tamales.]

Recipe Source: Green Chile Chicken Tamales adapted from Epicurious http://www.epicurious.com/recipes/food/views/Green-Chile-Chicken-Tamales-108055

Mandatory Items: You must prepare a “dough” and a filling. These must be wrapped in a corn husk, parchment paper, or plastic wrapped and steamed to cook.

Variations allowed: Creativity is highly encouraged. Be it sweet, savory or altered due to dietary preferences and restrictions.

Preparation time:
Soaking the corn husks: 3 hours or up to 1 day


Green Chile Chicken Tamales:
Makes about 24 tamales

Ingredients
1 – 8 ounce (225 gram) package dried corn husks (If you cannot find corn husks, you can use parchment paper or plastic wrap.)

For filling:
1 pound (455 gram) tomatillos (can sub mild green chilies – canned or fresh)
4 – 3 inch (7½ cm) serrano chiles, stemmed and chopped (can sub jalapeno)
4 large garlic cloves, chopped
1 ½ tablespoons (22½ ml) Extra Virgin Olive Oil
2 cups (480 ml) low sodium chicken broth
4 cups (960 ml) (400 gm/14 oz) cooked and shredded chicken
2/3 cup (160 ml) (30 gm/1 oz) roughly chopped fresh cilantro (also known as coriander)

For the masa dough:
1 1/3 cups (320 ml) (265 gm/9⅓ oz) lard or vegetable shortening
1 ½ teaspoons (7½ ml) (10 gm/1/3 oz) salt (omit if already in masa mixture)
1 ½ teaspoons (7½ ml) (8 gm/¼ oz) baking powder (omit if already in masa mixture)
4 cups (960 ml) (480 gm/17 oz) masa harina (corn tortilla mix), I used instant masa mix
1 ½-2 cups (360 ml – 480 ml) low sodium chicken broth

Directions:

1. Place the dried corn husks in a large pot and cover with water.

2. Place a heavy plate or a smaller pot full of water on top of husks to keep them in the water. Let soak for 3 hours or up to 1 day, flipping occasionally until husks are softened.

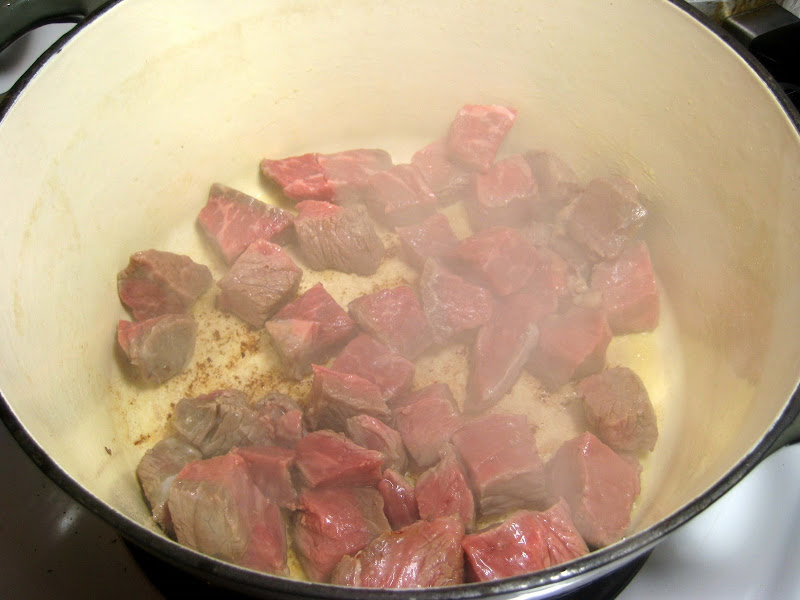
3. Once husks are softened, boil chicken about 20 minutes or until fully cooked. [I used a whole chicken using the breast and leg meat.]

4. Immediately place hot chicken into the bowl of an electric mixer with the paddle attachment. Turn mixer on high to shred chicken (this takes about 3-5 seconds). [My preference is to dice the chicken, especially the breast, against the bias. I don't like stringy meat in tamales.]

5. Place an oven rack on the top setting. Turn the oven on broil. Peel and rinse the tomatillos.

6. Line a heavy baking sheet with foil. Place tomatillos on baking sheet and place under broiler.

7. Broil (grill) until black spots form on tomatillos, then flip and broil (grill) other side. This takes about 5-10 minutes per side depending on the strength of the broiler.

8. Place roasted tomatillos and juices from the pan into a food processor and allow to cool about 5 minutes. Add the garlic and chopped Serrano chiles and process until smooth.

9. Heat the olive oil in a medium saucepan over medium high heat.

10. Add the tomatillo puree and boil, stirring continuously, for 5 minutes (it should turn thick like a paste).

11. Add in the chicken broth, stir to mix well. Reduce heat to medium low and allow to simmer, stirring occasionally until mixture coats the back of a spoon and is reduced to about a cup (240 ml).

12. Stir in the chicken and cilantro. Salt to taste.

13. Prepare the dough. In the bowl of an electric mixer, on medium high heat, cream together the lard or vegetable shortening, baking powder and salt.

Mix in the masa harina, one cup (240 ml) at a time.

14. Reduce the mixer speed to low, gradually add in 1 ½ cups (360 ml) of the chicken broth.

15. If the mixture seems too thick (you can taste it for moistness) add up to ½ cup (120 ml) more of the broth 2 tablespoons (30 ml) at a time. (The dough should be a cookie dough like texture).

16. Take 3 large corn husks and tear them into ¼ inch (6 mm) strips. (I would suggest you put these back in the water until use because they dry out and start breaking when you try to work with them.

17. Take a large pot with a steamer attachment. Pour about 2 inches (5 cm) of water into the bottom of the pot, or enough to touch the bottom of the steamer. Line the bottom of the steamer with corn husks.

18. Unfold 2 corn husks onto a work surface. Take ¼ cup (60 ml) of dough and, starting near the top of the husk, press it out into a 4 inch (10 cm) square, leaving 2-3 inches (5 -7½ cm) at the bottom of the husk. Place a heaping tablespoon (15 ml) of the filling in a line down the center of the dough square.

19. Fold the dough into the corn husk.

20. And wrap the husk around the dough.

21. Fold up the skinny bottom part of the husk.

22. And secure it with one of the corn husk ties.

23. Stand them up in the steamer. If there aren’t enough tamales to tightly pack the steamer, place crumpled aluminum foil in the excess space.

24. Steam the tamales for about 40 minutes or until the dough deepens in color and easily pulls away from the husk. [I steamed for 90 minutes.]


[The tamales turned out different. The texture was reminiscent of an English pudding - rich and soft, probably due to the extra lard and baking powder. I'm more familiar with a firmer, denser texture.

The filing was good. The serrano chiles gave the filling a little spicy bite.

Overall, I enjoyed the results.]

Monday, June 21, 2010

Jan 21, 2010: LOP Dan Dan Noodles

My journey into Sichuanese cooking was brought to you via Fuchsia Dunlop's book, Land of Plenty: A Treasury of Authentic Sichuan Cooking.

In the USA, Sichuan cooking has a reputation of being mind-blowing fiery. However, based upon the recipes I've made so far I would say the recipes are comfortably spicy, but I'm a chile-head. I was half expecting more layers of flavor - salty, sweet, sour and spicy, garlicy... etc, but the recipes I tried seemed to rely on savory and spicy.

Overall, I enjoyed the dishes I tried immensely.

My final dish I plan to make is Dan Dan Noodles. Two recipes are provided in the book, the second recipe appealed to me for the use of sesame paste. I have a lot of Tahini in the fridge from a previous Daring Kitchen challenge.

That's Dan Dan noodles, not to be confused with Bam Bam Rubble, Tom Tom Club (Genius of Love) and not to be confused with Gene Gene the Dancing Machine.


However, cooking, sharing and eating is just as fun where you just want to get up and dance!


Xie Laoban's Dan Dan Noodles

Ingredients
1 lb Fresh Chinese Noodles or 12 oz Dried Chinese Noodles
1 T peanut oil
3 Sichuanese Dried Chiles, snipped in half, seeds discarded
1/2 t whole Sichuan peppercorn
2 T Sichuanese ya cai or Tianjin preserved vegetable
4 oz ground beef
2 t light soy sauce
Salt to taste

For the sauce:
1.2 - 1 t Ground roasted Sichuan pepper
1/4 t salt
4 t sesame paste
1 T light soy sauce
1 T dark soy sauce
2 T dark chili oil with chile flakes

The new ingredients added to my pantry - salted, garlicky preserved vegetable greens and chili oil. I couldn't believe how difficult finding chili oil would be. There is a recipe included in the book, but since I picked this recipe at the spur of the moment I didn't feel like making my own.


This is the preserved vegetables. The main aroma was garlic. A good thing!


Making the sauce - combining the Tanini (sesame paste) and ground peppercorns.


Combining the rest of the ingredients... the resulting sauce was pretty thick, like a chocolate ganache.


Rest of the ingredients are pretty simple.
Whole peppercorn, seeded dried chilies, ground chicken mixed with the rest of the ingredients.


Fry the chilies and peppercorns in 1T of oil until fragrant.
Add the preserved vegetables to fry about a minute
Add the ground meat and cook.
Set aside for later.


When the noodles are cooked - I used fettuccine pasta.
Mix in the sauce and top with the meat filling.


The noodles were nutty, savory with a little punch from the Sichuan peppercorns. I probably undersauced the noodles, but overall I liked the results.

Thursday, June 17, 2010

Jun 17, 2010: LOP Kung Pao Chicken

So far I enjoyed the first dish I cooked from, Land of Plenty: A Treasury of Authentic Sichuan Cooking.

Another popular dish in the USA is Kung Pao Chicken.
Peanuts in a sweet, savory and spicy sauce cooked with Peanuts. Besides the restaurant version, The "authentic" version I'm familiar with was made by a classmate for a graduation party. She (Taiwanese, hence the air-quotes on "authentic") made the dish with chicken thigh meat. I on the other hand used chicken breast which was the best deal at the supermarket.

Kung Pao Chicken
(Ref: Fuchsia Dunlop's Land of Plenty - Gong Bao Ji Ding)
Ingredients
2 Chicken Breast(about 12 oz), cubed into even chunks
3 Cloves of garlic, minced
Same amount of Ginger, minced
5 Green Onions, White Parts Only, coarse diagonal slice
3 T Peanut Oil
8 - 10 Dried Red Chillies, split in half lengthwise and seeded
1 t Sichuan Peppercorns
75g (2/3 cup) Roasted Peanuts

For the marinade:
1/2 t Salt
2 t Light Soy Sauce
1 t Shaoxing wine
21/4 t Cornstarch
1 T Water

For the sauce:
3 t Sugar
1 t Cornstarch
1 t Dark Soy Sauce
1 t Light Soy Sauce
3 t Chinkiang Vinegar
1 t Sesame Oil
1 T Chicken Stock or Water

.

Directions

1.Pour a little peanut oil into the wok and heat until it smokes, swirling the oil around to cover the entire base of the wok. Pour off into a heatproof container. Add 3 tbsp fresh oil and heat over a high flame. When the oil is hot but not smoking, add the chillies and Sichuan pepper and stir-fry for a few seconds until they are fragrant (take care not to burn them).

The peppers frying in 3 T of oil.


2.Add the chicken and continue to stir-fry. When the chicken cubes have separated, add the ginger, garlic and spring onions and stir-fry until they are fragrant and the meat is just cooked.


3.Give the sauce a stir and add to the wok, continuing to stir and toss. As soon as the sauce has become thick and lustrous, add the peanuts, mix them in, and serve immediately


Adding the sauce mixture...


Finally, adding the peanuts to coat with sauce


Dished out onto a serving plate...


Another tasty recipe. It's not as sweet as the Taiwanese version that I remember. Also, the vinegar didn't add the tartness I was expecting.

I'm going to sound like a judge on Iron Chef America and state the oil 3 Tablespoons seems a bit much. I could probably get away with using 1 to 11/2T of oil. This is called "making the recipe my own." lol!

I'm thinking of layers of flavor - spicy, tart, sweet and numbing (from the peppercorns). I may try adding distilled vinegar to bump up the tartness of the dish.

However, overall, the Kung Pao Chicken was very good.

Wednesday, May 19, 2010

May 19, 2010: Chile Rellenos

Quick quiz:
What do you do when you have roasted pepper, cheese, eggs and chorizo/potato filling?

Answer: Make chili rellenos (battered stuffed chile peppers)!

I was trying to decide what to do with the leftover roasted chiles. While watching a Mexican cooking show. I don't remember which one. There was a segment on chile rellenos where they showed a cook making the batter with beaten egg whites and egg yolk.

Hey! I can do that! I've always wanted to make chile rellenos, but I that the batter was a big deal, but whipped egg whites and egg yolks I can do.

I just improvised on this recipe.

Chile Rellenos
Ingredients

4 Pobalano Chiles, roasted (not too soft since you will be stuffing), skinned and seeded
1 1/2 C Chorizo and Potato filling
4 oz Monterey Jack Cheese, shredded - that's all I had left.
2 eggs, separated (egg whites whipped to soft peaks before adding egg yolks)
1/2 t salt
Flour for dusting
Enchilada Sauce [I used canned sauce]

Seeding the Peppers
1. Since the intent is to stuff the pepper, make 1 slit into the pepper so you can remove the seeds and vein. Use a paring knife to cut the seeds away from the stem.


2. I found that using a spoon helps with skinning and scooping out the seeds.


3. Mix the cheese into the potato mixture.


4. Stuff the pepper. You don't want to overstuff it since you want the pepper to trap the ingredients. You can gently cradle the pepper as you fill. Use toothpicks as needed to suture the pepper.


5. Making the batter - eggs whipped to soft peaks. Egg yolks and salt added and mixed in.


6. Lightly coat each pepper with flour and dip into the batter. The stem makes for a nice handle. :-)


7. Coat thoroughly and off to the fryer.


8. Fry in 350F oil. Cook each side about 2 to 3 minutes.


9. Drain before serving
Remember to remove the toothpicks!


10. Served with enchilada sauce, queso blanco, shredded lettuce and salsa.
Remind your guest to watch for toothpicks! :-)


11. Ready for a bite. Potatoes and surprisingly cheesy. :-) The lettuce adds a nice crunchy contrast to the stuffed chile.

Sunday, May 16, 2010

May 16, 2010: Green Chorizo

I have roasted green chiles leftover from the Daring Cooks' challenge so I looked for a simple recipe.

Here's another simple recipe from Mexico - One Plate at a Time, hosted by Chef Rick Bayless

Green Chile Chorizo (Link: http://www.rickbayless.com/recipe/view?recipeID=236)
Chorizo Verde
Makes about 1 1/2 pounds (3 generous cups)

Ingredients

1 large fresh poblano chile [I had roasted]
1 or 2 fresh serrano chiles, stemmed and roughly chopped [I had 1 roasted serrano and 1 roasted jalapeno]
1 medium bunch of cilantro, tough lower stems cut off, the leafy part roughly chopped
1 1/2 pounds ground pork (you’ll need pork that’s a little fatty - 25 to 30% - and preferably coarsely ground) [I used country style ribs with the intent of using a food processor.]
3 tablespoons spinach powder (available on the internet) [I was debating whether I should make my own spinach powder by drying my own, but did not have the time... I left this ingredient out.]
2 teaspoons salt

Directions

1. Roast, skin and seed the peppers.


2. Mix and pulse in a food processor.


3. Hand mix to ensure complete mixing. Cover and refrigerate for several hours before frying.


Note: I should have pureed the chiles, cilantro and salt first to make a paste, before adding the meat. As you can see, there are still large leaves of cilantro in the final blend.

Friday, May 14, 2010

May 14, 2010: Daring Cooks Roasted Green Chile

Our hosts this month, Barbara of Barbara Bakes and Bunnee of Anna+Food have chosen a delicious Stacked Green Chile & Grilled Chicken Enchilada recipe in celebration of Cinco de Mayo! The recipe, featuring a homemade enchilada sauce was found on www.finecooking.com and written by Robb Walsh.


Our hostesses chose a Stacked Green Chile & Grilled Chicken Enchilada recipe using tomatillos. They recognize that some of you may not have access to fresh or canned tomatillos, or you may have already mastered a tomatillo sauce, so feel free to make any homemade Mexican style sauce that will challenge you.

Cinco de Mayo celebrations in the U.S. seem to get bigger and better each year. We don't know if that's because of the increasing Mexican-American population in the U.S. or if it's just a great excuse to have a fiesta with fabulous Mexican food. Either way we hope you'll join us in a little Mexican fiesta for May's Daring Cooks Challenge.

Recipe Source (Two recipes):
Fine Cooking (Online),
Stacked Green Chile & Grilled Chicken Enchiladas,
Green Chile Sauce

Notes:
1. Roasting the Anaheim chiles is a critical part of the Green Chile sauce. More information about how to do this is included below, but please resist the temptation to rinse the chiles to remove the skin or seeds. You will lose lots of flavor if you do this!!
2. If using a broiler to roast the chiles, lining the broiler pan or baking sheet with foil greatly simplifies the clean-up process!
3. You may want to consider using gloves when peeling and removing seeds from the chiles. I keep a set of gloves in the kitchen for just that purpose. All it takes is one hand to the eye or nose for a lot of pain to set in!

For those who can't find tomatillos... Audax Artifex makes the following recommendations -
I've done some research on substitutes for tomatillos and came up with green gooseberries (which you can easily get in Australia and New Zealand) which look and taste very similar to tomatillos but gooseberries can be tarter than tomatillos so use only 3/4 of the recipe amount or add some sugar. A number of recipe sites in Australia mentioned this substitute and they stated it was a good sub for tomatillos.

I just got a phone call back from a mate of mine who does a lot of Tex-Mex cooking he suggests green tomatoes with tamarind paste (1 kg tomatoes with 2 tablespoons of tamarind paste) which he says is the best sub he has found - the tamarind paste is very tart and adds that unique taste. Also he says that green tomatoes with equal amounts of lime juice and prune juice (no added sugar) is better than lime juice alone.

Tomatillos look like green tomatoes, except they're encased in a husk that you peel off using.


For this challenge we'll be roasting green chiles.

Roasting Fresh Chiles
1. Coat each chile with a little vegetable oil. If you are doing only a couple chiles, using the gas stove works. For larger batches (as in this recipe), grilling or broiling is faster.

I've never used my broiler so this is a chance to break it in after owning it for 6 years.
Also, I didn't bother oiling the peppers before roasting.


2. Lay the oiled chiles on the grill or baking sheet (line pan with foil for simpler clean-up). Place the grill or broil close to the element, turning the chiles so they char evenly. They should be black and blistered.

Char, baby, char!
Remember to turn on your vent fan and open some windows. :-)


3. As they are completely charred (they will probably not all be done at once), remove them to a bowl and cover with plastic, or close up in a paper bag. Let them rest until they are cool.

The charred peppers were placed in a bowl and covered to steam.


4. Pull on the stem and the seed core MAY pop out (it rarely does for me). Open the chile and remove the seeds. Turn the chile skin side up and with a paring knife, scrape away the skin. Sometimes it just pulls right off, sometimes you really have to scrape it.

5. DO NOT RINSE!

I found that using a spoon made for easy skinning and seeding. Tongs were used to steady the pepper so I don't accidentally get pepper juice onto my hand and eventually into my eye. Fortunately, I don't contacts.


Green Chile Sauce
Ingredients

1½ pounds Fresh Anaheim chiles (about eight 6 to 8 inch chiles) 24 ounces 678 grams - roast, peel, remove seeds, chop coarsely. Other green chiles (NOT bell peppers) could probably be substituted but be conscious of heat and size!)
7-8 ounces Tomatillos (about 4-5 medium)212 grams - peel, remove stems
4 cups Chicken broth (32 ounces/920 grams)
1 clove Garlic, minced
2 teaspoons yellow onion, minced
1 teaspoon dried oregano
½ tsp Kosher salt (add more to taste)
¼ tsp Black Pepper (add more to taste)
2 tablespoons Cornstarch (dissolve in 2 tablespoons water, for thickening)
Hot sauce, your favorite, optional

Directions:

1. Put a medium saucepan of water on to boil and remove the papery outer skin from the tomatillos. Boil the tomatillos until soft, 5 to 10 minutes. You can also grill the tomatillos until soft.

Instead of boiling, I went broiler crazy and started charring all the other sauce ingredients.


Slightly charred :-)


I added a jalapeno just in case I wanted to boost the heat level. However, I opted not to use it in the end.


2. Drain and puree in a blender or food processor.

3. Return the tomatillos to the saucepan along with the chicken broth, chopped green chiles, minced onion, oregano, garlic, salt and pepper.

Ready for the cooking.


4. Bring to a boil over medium-high heat and then reduce the heat and simmer for 10 minutes.

5. Add the cornstarch/water mixture and stir well. Simmer, stirring occasionally, until the sauce is thickened and reduced to 4-5 cups, another 10-15 minutes.


6. Adjust seasonings and add hot sauce if you want a little more heat.


Stacked Green Chile and Grilled Chicken Enchiladas
2 Boneless chicken breasts (you can also use bone-in chicken breasts or thighs)
3 tablespoons Olive oil or other neutral vegetable oil (use more as needed)
Kosher salt and pepper
12 Small Corn tortillas (5-6 inch/13-15 cm). (you can also use wheat tortillas or other wraps)
6 ounces grated Monterey Jack, 170 grams (other cheeses (cheddar, pepper jack, Mexican cheeses) can be used. Just be sure they melt well and complement the filling)
Green Chile Sauce
Cilantro for garnish, chopped and sprinkled optional


1. Heat a gas grill to medium high or build a medium-hot charcoal Coat the chicken with olive oil and season well with salt and pepper. Preheat oven to 450 degrees.

Instead of grilling a chicken, I went to the local Costco and purchased a rotisserie chicken. Inexpensive and tasty with the emphasis on easy.

Also, I used the bones and meat bits to make a stock for the green chile sauce.


2. Grill the chicken until just cooked through, 4-5 minutes a side for boneless chicken breasts.

3. Cool and then slice into thin strips or shred.

4. In a small skillet, heat 3 tablespoons oil over medium-high heat until very hot. Dip the edge of a tortilla into the oil to check – it should sizzle immediately.

5. Using tongs, put a tortilla into the pan and cook until soft and lightly brown on each side, about 15-20 seconds per side (at the most).

6. Drain on paper towels.

7. Add oil as needed and continue until all 12 tortillas are done.

8. In a baking dish large enough to hold four separate stacks of tortillas, ladle a thin layer of sauce.

9. Lay four tortillas in the dish and ladle another ½ cup (4 ounces/112 grams) of sauce over the tortillas.

10. Divide half the chicken among the first layer of tortillas, top with another ½ cup of sauce and 1/3 of the grated cheese.

Tortillas are fried and layered into a baking dish


11. Stack another four tortillas, top with the rest of the chicken, more sauce and another third of the cheese.

12. Finish with the third tortilla, topped with the remaining sauce and cheese.

13. Bake until the sauce has thickened and the cheese melted, about 20 minutes. Let rest for 5-10 minutes.

Baked 450F for about 20 minutes. Finished off with Mexican cheese, Queso Blanco. A semi-crumbly cheese almost like Feta, but not as crumbly and salty as Feta.


14. To serve, transfer each stack to a plate. Spoon any leftover sauce over the stacks and sprinkle with cilantro, if you wish. The stacks may also be cooked in individual gratin dishes.

The final dish... the stacked enchiladas topped with queso blanco and fresh tomatillo and avocado salsa. Mexican style brown rice and shredded lettuce. The shredded lettuce adds a nice cooling crunch to contrast the rest of the dish.


Overall, the flavor of the dish was good. The stacked enchiladas were a little mushy in the center... so that means I should have fried the tortillas a lot more darker, crunchier.

Recipe: Tamatillo-Avocado Salsa

Sunday, October 12, 2008

Oct 12: Beef Chili

What to do with the remainder of the beef bottom round roast? Hmmm....
Beef stew?
Roast beef?
Chili! I have a pantry full of dried chiles that should be used.
Okay... Chili it is!

There are a couple ways to make chili with dried chiles.
1. Soak the chiles and make a mash.
2. Toast and grind to make a chili powder.

I've tried the soak method and was not thrilled with the results.

This time I'll grind my own chili powder.

The Chiles
From top down...
2 New Mexico Chiles
1 Guajillo
1 California Chile
1 Ancho


The chilies were stemmed and seeded.
Cut into smaller pieces and toasted under the broiler with 1 tsp of cumin seeds.
Total toasting time was about 1 minutes. Remember to give the pan a shake to move stuff around.

I was worried that the toasting chiles would be eye-watering noxious, but the chiles gave off a sweet, toasty, raisiny aroma.


The toasted pieces went into a coffee grinder to form the powder.


Chili
The fixins'
3 lbs Beef Bottom Round Roast, trim off fat cap and cube (about 4 or 5 cups)
1/2 Onion, coarse chop
2 Garlic cloves, coarse chop
1/2 C Grape Tomatoes, halved
1 Celery Stalk, coarse chopped (Next time I'll leave it out).
2T Chili Powder
1/2 C Chicken Stock (That's just what I had)
1/2 tsp Oregano, dried
1/2 tsp Basil, dried
1 bay leaf
Salt and Pepper to taste

Brown the beef... To flour or not to flour. I decided not to flour. I wanted to save time.


Add veggies and chicken stock. I got bored with browning the beef so I just browned one side and tossed in the rest of the ingredients. :-)


Add the chili powder, oregano, basil, bay leaf and stock... Cover and simmer for about 2 hours.


The finished chili.


Chili up!
I tried toasting a taco shell in the oven... which fell through the grate and caught fire. lol!
I have pita bread instead.
The chili topped with onions and cheese.


Flavor... Not bad. Not extremely hot, but has a mild chili flavor. I think the cumin adds the flavor.

Beef still has some texture, not dry and stringy.

Where's the beans?
I didn't have any in the house.

Overall, I think it's a success for an improvised recipe.