Tuesday, August 31, 2010

Aug 31, 2010: Tofu Tueday - Savory Tofu Flower

It's Tuesday and time for another installment of Tofu Tuesday!

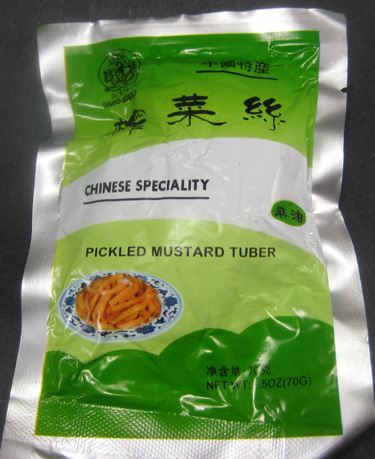
The new ingredient for today is Pickled Mustard Tuber.
The ingredients for this brand include Fermented Mustard Tuber, MSG, Salt, Chili, Sugar, Fennel, Licorice, Acesulfame Potassium, Sesame oil and Disodium this and that.


According to the package the pickled mustard tuber can be eaten as is.

The pickled mustard tuber is salty and crunchy. There's not mustard flavor nor is there any tartness from the pickling. You can taste the MSG, sugar and a faint bit of spiciness, not much though.


Today's tofu recipe is really easy to make.
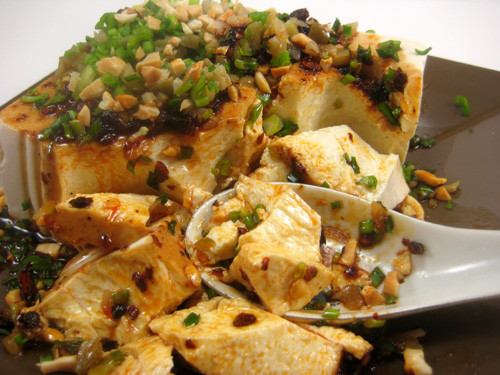
It's a Sichuan-style Tofu flower. I'm familiar with the sweet version of this and didn't even know there was a savory version.

Recipe is from "Land of Plenty"
Flower Bean Curd

2- 10 oz packages Silken Tofu [I used a 16 oz package]

Seasoning
1 T Soy Sauce
1 T Chili Oil with Flakes
1 t Sesame Oil
up to 1 t Sichuan Pepper, roasted and ground [I forgot this ingredient. The result was still delicious. :-) ]
2 T Peanuts, unsalted, roasted and coarsely chopped
2 T Preserved Mustard Tuber, finely chopped
4 Green Onions, green part cut into rings.

Directions:
1) Soak the whole block of silken tofu in boiling hot lightly-salted water. I simmered a couple minutes and allowed to sit a few more to heat through. [The original recipe calls for parsing out into individual bowls, but I opted to serve family style.]

2) Drain and top with the seasonings. How simple is that? Very!


3) Serve by scooping as much as you like... making sure you take a bit of the topping with each scoop. :-)


I enjoy savory foods. The soft custardy tofu is flavored with sesame oil, green onions, chili paste, mustard tuber and crunchy peanuts.

This was eaten with rice and made for a very simple flavorful Tofu Tuesday.

Monday, August 30, 2010

Aug 30, 2010: Garlic Chives as a Vegetable

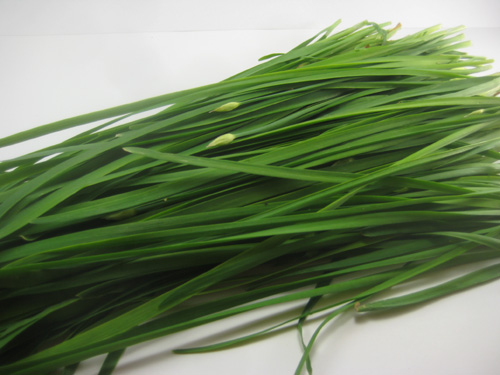
I originally purchased a bunch of garlic chives with the intention of making some type of dumpling. However, I worked the weekend so that plan was put on hold indefinitely.

I was reading through the cookbook, "Land of Plenty" and came across another simple recipe where the garlic chives is cooked with bacon and eaten as a vegetable. This make sense since rice is the staple for China and is kind of bland. The garlic chives being much milder than regular chives provide flavor and is long enough to be treated as a veg.

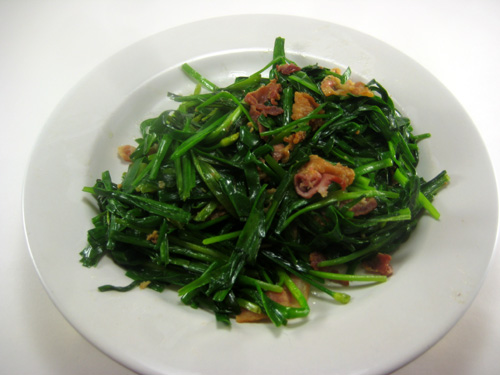
Flowering Chives with Smoky Bacon
8 oz Garlic Chives (Washed and cut into 2 in lengths)
3.5 oz Bacon (slab bacon preferred, cut into strips about the length of the chives)
2 T Oil
1 t Sesame Oil

1) The garlic chives was washed and cut into 2 inch lengths.


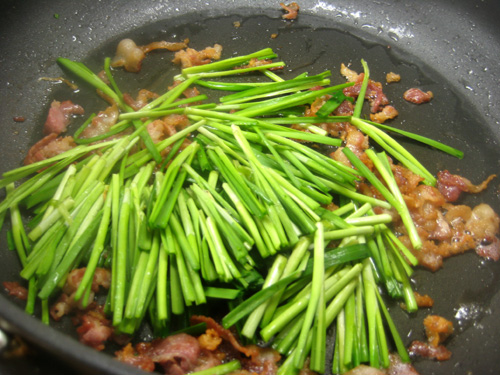
2) Fry the bacon in the oil for a couple minutes (I used strip bacon which I cut into smaller lengths).
The bacon put off quite a bit of fat so I drained all but 2 T of oil/grease.
Stem ends (thick parts) were added first to start cooking, stir fry for about a minute.
The leaves were added and stir-fried for around 3 to 4 minutes.
Add sesame oil just before plating.


3) Wait there's more... My addition to the recipe. :-)
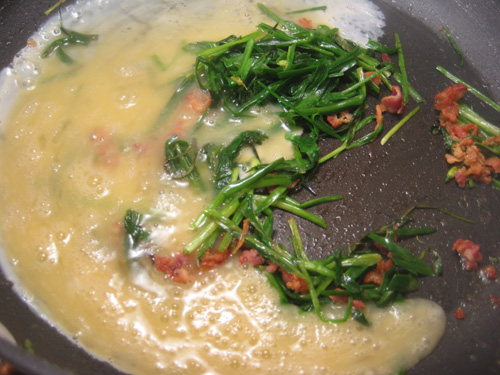
When I uses chives, I like to mix in some beaten eggs.
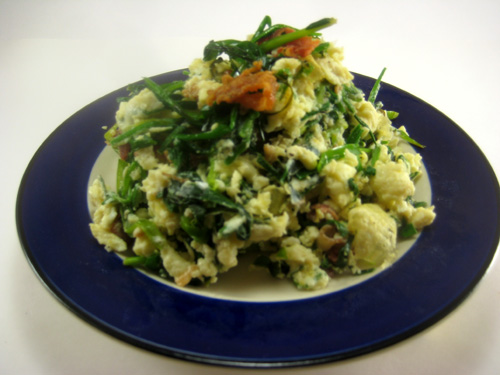
About 1/4 of the chive-bacon mixture was used and mixed into the eggs. Here I had 4 egg whites (leftover from the Daring Baker's challenge) and 1 whole egg to give the egg whites some "color."


Now we're done! Food's up!

Garlic chives with smoky bacon.


Scrambled eggs with garlic chives and bacon.


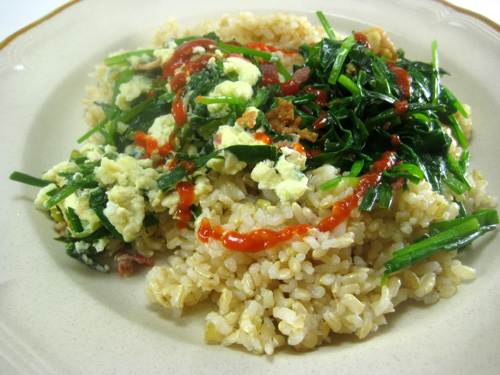
Served over brown rice and a couple squirts of Siracha hot sauce.


A simple, yet flavorful dinner!

Sunday, August 29, 2010

Aug 29, 2010: Hot and Numbing Fish (Smelt)

Before going off to work, I caught a few minutes of a cooking show where the Chef made Salt and Pepper Shrimp. Hmmm... That looks good!

Thumbing through Fuchsia Dunlop's Land of Plenty, I noticed a recipe for Hot-and-Numbing Tiny Fish. It looked very similar to a Salt and Pepper Shrimp dish. Hmmm... that sounds good too. I could use shrimp instead of whitebait called out in the recipe.

However, a couple days ago, I noticed wild smelt at the supermarket. Fresh, wild smelt is a once in a year thing so smelt it is instead of shrimp.

Hot-and-Numbering (Tiny) Fish

1 lb Smelt
3/4 C All-Purpose Flour (I also experimented around with cornstarch)

Marinade
1/2 t salt
1 T Shaoxing Rice Wine
2 Green Onions, chopped
2 T Fresh Ginger, chopped

Seasoning
2 T Oil
1/2 t Cayenne Pepper, ground
1/2 t Sichuan Peppercorn, toasted and ground


1) The clean the smelt, wash and pat dry.
Mix the marinade and pour over the fish. Coating thoroughly.
Let sit at least 20 minutes... Actually a lot longer since I went and mowed the lawn.
Note: For Chinese cooking, ginger is a very common ingredient used to reduce fishiness.


2) Drain the fish in a colander, reserving the green onion and ginger.
For coating the fish, I found it easier to use a bag for the flour and shake to coat.
I experimented around with all purpose flour (on the left) and cornstarch (on the right).
I wanted to see how the fish's crispiness would be effected by the coating used.
The flour appears to have a thinner coating while the cornstarch formed a slightly thicker layer.


3) Heat oil to 375F and fry for about 4 minutes. I noticed the oil temp dropped to about 345F during the frying.


4) The cooked fish.
The cornstarch coated fish is above.
Both fish look pretty much the same. The flour was just a but browner. Maillard reaction with the gluten?


5) Seasonings ready for the hot oil - ground Sichuan peppercorn and cayenne.


6) 2 T of oil heated in the wok. Cayenne added to color the oil (about 30 seconds) before the Sichuan peppers were added.

The fish was added to the seasoned oil and tossed around to coat.


The finished dish... or is it?


I saved the ginger and green onion from the marinade.
The wok was heated and the marinade was added to cook down.
The seasoned fish was added to soak up the ginger and green onion flavors.


The fish turned out nicely were the whole fish is edible and crunchy.
I noticed the cornstarch coated fish was a little more crispy than the flour coated fish, but with all the flavor from the cayenne, Sichuan pepper, green onions and ginger, the difference is almost unnoticeable.

Was it hot and numbing?
As I mentioned previously about the recipes in Land of Plenty, the hot wasn't mind blowing but there was a definite low comfortable burn. The numbing effect was there too from the Sichuan pepper.

The hot can be boosted by adding 1 t of cayenne instead of 1/2 t, but would the extra heat throw the balance of the dish off? I guess it comes down to personal preference.

Friday, August 27, 2010

Aug 27, 2010: Daring Bakers - Ice Cream Petit Fours


The August 2010 Daring Bakers’ challenge was hosted by Elissa of 17 and Baking. For the first time, The Daring Bakers partnered with Sugar High Fridays for a co-event and Elissa was the gracious hostess of both. Using the theme of beurre noisette, or browned butter, Elissa chose to challenge Daring Bakers to make a pound cake to be used in either a Baked Alaska or in Ice Cream Petit Fours. The sources for Elissa’s challenge were Gourmet magazine and David Lebovitz’s “The Perfect Scoop”.

Recipe Source: The brown butter pound cake recipe is adapted from the October 2009 edition of Gourmet. The vanilla ice cream is from ice cream genius David Lebovitz, adapted from The Perfect Scoop. The chocolate glaze for the petit fours is a larger adapted version of this ganache from Godiva Chocolate and the meringue for the Baked Alaska is a larger version of this meringue from Gourmet, May 1995.

Mandatory: Whether you make the Baked Alaska, the petit fours, or both, you must make the brown butter pound cake as written and the ice cream from scratch.

Variations Allowed: Both desserts can be made in any size or shape, and the ice cream can be any flavor you can think of! For the Baked Alaska, you can flavor the meringue however you want. For the petit fours, you are not required to use the chocolate glaze, or you can add additional flavors. You can also brush the cake with a simple syrup if desired.

[My Comments in Red: Alright now! Another chance to use my ice cream maker I purchased for the previous Daring Baker Challenge!]

Vanilla Ice Cream

1 cup (250ml) whole milk
A pinch of salt
3/4 cup (165g) sugar
1 vanilla bean, split lengthwise OR 2 teaspoons (10ml) pure vanilla extract [No Vanilla Bean - all gone from last month's challenge]
2 cups (500ml) heavy (approx 35% butterfat) cream
5 large egg yolks [I'm bold and daring... pushing the salmonella envelope! lol]
1 teaspoon (5ml) pure vanilla extract

1. Heat the milk, salt, and sugar in a medium saucepan until the liquid steams. Scrape out the seeds of the vanilla bean with a paring knife and add to the milk, along with the bean pod. Cover, remove from heat, and let infuse for an hour. (If you do not have a vanilla bean, simply heat the milk, salt, and sugar in a medium saucepan until the liquid steams, then let cool to room temperature.)

[Dissolving the sugar and salt in the milk.]


2. Set up an ice bath by placing a 2-quart (2 litre) bowl inside a large bowl partially filled with water and ice. Put a strainer on top of the smaller bowl and pour in the cream.

[Straining the heavy cream... making sure no chunky bits of butter end up in the ice cream?]


3. In another bowl, lightly beat the egg yolks together. Reheat the milk in the medium saucepan until warmed, and then gradually pour ¼ cup warmed milk into the yolks, constantly whisking to keep the eggs from scrambling. Once the yolks are warmed, scrape the yolk and milk mixture back into the saucepan of warmed milk and cook over low heat. Stir constantly and scrape the bottom with a spatula until the mixture thickens into a custard which thinly coats the back of the spatula.

[Five yolks ready to mixing! One yolk jumped the gun and is ahead of his buddies :-) ]


[Tempering the yolks with the hot milk... adding a little at a time to raise the temperature of the yolks slowly.]


4. Strain the custard into the heavy cream and stir the mixture until cooled. Add the vanilla extract (1 teaspoon [5ml] if you are using a vanilla bean; 3 teaspoons [15ml] if you are not using a vanilla bean) and refrigerate until thoroughly chilled, preferably overnight.

[The milk-yolk mixture was cooked until thickened to a thin pourable custard. Strained while adding to the heavy cream. Again, we don't want chunks of in our ice cream.]


[Lastly, 1 T of vanilla was added to the ice cream base. The base was refrigerated 4 hours before adding to the ice cream maker]


5. Remove the vanilla bean and freeze in an ice cream maker.

[20 minutes later... Ice Cream!]


Brown Butter Pound Cake

19 tablespoons (9.5 oz) (275g) unsalted (sweet) butter
2 cups (200g) sifted cake flour (not self-rising; sift before measuring)
1 teaspoon (5g) baking powder
1/2 teaspoon (3g) salt
1/2 cup (110g) packed light brown sugar
1/3 (75g) cup granulated sugar
4 large eggs
1/2 teaspoon pure vanilla extract

1. Preheat the oven to 325°F/160°C and put a rack in the center. Butter and flour a 9”x9” (23cmx23cm) square pan.

2. Place the butter in a 10” (25cm) skillet over medium heat. Brown the butter until the milk solids are a dark chocolate brown and the butter smells nutty. (Don’t take your eyes off the butter in case it burns.) Pour into a shallow bowl and chill in the freezer until just congealed, 15-30 minutes.

[Browning the butter]


[The finished butter ready for a quick freeze to firm up. Looks like I made beurre noir (black butter) instead of beurre noisette (brown butter). A quick taste of the butter I found no bitterness. Whew!]


3. Whisk together cake flour, baking powder, and salt.

4. Beat the brown butter, light brown sugar, and granulated sugar in an electric mixer until light and fluffy, about 2 minutes. Beat in the eggs one at a time, mixing well, and then the vanilla extract.

[I left the butter a little to long in the freezer. I had to break it down a little with the sugar before mixing.]


[Finally, the butter and sugar fluffed up with the hand mixer. At this point an egg was added one at a time until thoroughly incorporated.]


5. Stir in the flour mixture at low speed until just combined.

6. Scrape the batter into the greased and floured 9”x9” (23cmx23cm) square pan. Smooth the top with a rubber spatula and rap the pan on the counter. Bake until golden brown on top and when a toothpick inserted into the center comes out clean, about 25 minutes.

[A very thick batter was poured (actually scraped into a floured baking dish.
Bake 325 F for 25 minutes... Reality - it took 45 minutes.]


7. Cool in the pan 10 minutes. Run a knife along the edge and invert right-side-up onto a cooling rack to cool completely.

[Out of the oven... the pound caked domed a little in the center. I'll just have to trim it off to level the cake. Personally, the crust is the best part of any cake. :-) ]


Chocolate Glaze (For the Ice Cream Petit Fours)

9 ounces (250g) dark chocolate, finely chopped
1 cup (250 ml) heavy (approx 35% butterfat) cream
1 1/2 tablespoons (32g) light corn syrup, Golden syrup, or agave nectar
2 teaspoons (10ml) vanilla extract

Stir the heavy cream and light corn syrup in a small saucepan over medium heat until it comes to a boil. Remove from heat and add the dark chocolate. Let sit 30 seconds, then stir to completely melt the chocolate. Stir in the vanilla and let cool until tepid before glazing the petit fours.

[Chocolate and the hot cream mixture... before mixing. ]


Assembly Instructions – Ice Cream Petit Fours

1. Line a 9”x9” (23cmx23cm) pan with plastic wrap, so that no sides of the pan are exposed and so there is some extra plastic wrap hanging off the sides. Spread 1 ¾ to 2 cups (450ml to 500ml) ice cream into the pan. Cover with more plastic wrap and freeze several hours.

[Two cups of ice cream spread out into a thin layer on a baking dish. Wrapped and placed in the freezer]


2. Once the brown butter pound cake has completely cooled, level the top with a cake leveler or a serrated knife. Then split the cake in half horizontally to form two thin layers.

3. Unwrap the frozen ice cream. Flip out onto one of the layers of cake and top with the second layer of cake. Wrap well in plastic wrap and return to the freezer overnight.

[A large ice cream sandwich is made.]


[Wrapped and frozen... overnight]


4. Make the chocolate glaze (see above.)

5. While the glaze cools, trim ¾” (2cm) off each side of the ice cream cake to leave a perfectly square 7.5” (19cm) ice cream cake. Cut the cake into twenty five petit fours, each 1.5”x1.5” (4cmx4cm).

[Squaring off the edges. Note - only three edges are shown. The forth went towards a quality control taste test. Me!]
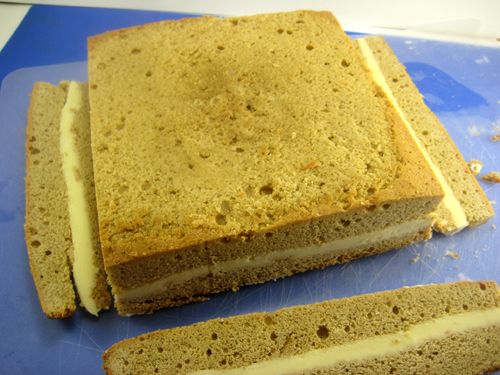

[Eyeballed the cutting... not too bad. The pieces are sort of square... lol]
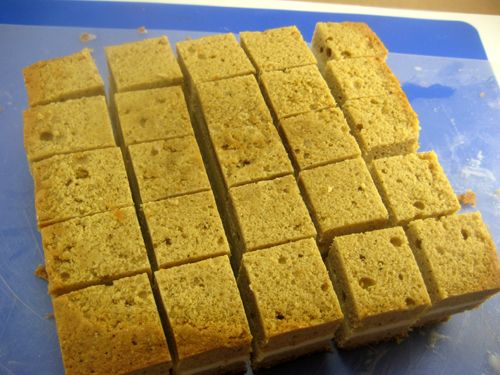

[Ready for more... but first a little freezer time to firm up.]


6. Glaze the petit fours one at a time: place a petit four on a fork and spoon chocolate glaze over it.

7. Place the petit fours on a parchment-lined baking sheet and return to the freezer for one hour.

[Some pieces were dunked in the chocolate glaze. Wow!]


The Finished Petit Fours

[I'm not that good at piping, but I used melted white chocolate with a little cream.
From Left to Right: Unglazed/Nekkid Ice Cream Petit Fours, Chocolate Glazed Petit Fours and Wedges dipped in chocolate... I call them Petit Threes. :-) ]


I had fun making the Petit Fours. I'm not sure if the freezing did the brown butter pound cake justice. Freezing dulls flavors. The beurre noisette (in my case beurre noir) did not offer up a strong flavor.

Warm pound cake served with vanilla ice cream and chocolate sauce is probably a better dessert. :-)
Tuesday, August 24, 2010

Aug 24, 2010: Quick and Easy Tuna Noodle Casserole

Here's a simple recipe that can be done quickly with what veggies you want. It's something that can be thrown together.

Tuna Noodle Casserole

8 oz Elbow Macaroni - aiming for 4 servings
10.5 oz can Cream of Mushroom Soup
7 oz can of Albacore Tuna, drained and mashed
1/2 Onion, chopped
1 Stalk Celery, chopped
1 Stalk Broccoli, peeled and chopped... Using every bit while the florets were steamed as a side dish.
3/4 C Frozen Peas... I would added more if I had more.
1/2 C milk
1/2 C Sharp Cheddar, shredded
1 T Pimento... Added for color. I would have used carrots. I didn't find any.
1 T Butter

1) Cook the macaroni per instructions... toss in the frozen peas for the last minute.

2) While the mac is boiling, saute fresh veggies.

3) Add the cream of mushroom soup and milk to the veggies. Add Tuna and break up the chunks.

4) Drain the pasta and add to the soup mixture. (You can eat at this point, but being a guy I have to use another dish. lol )

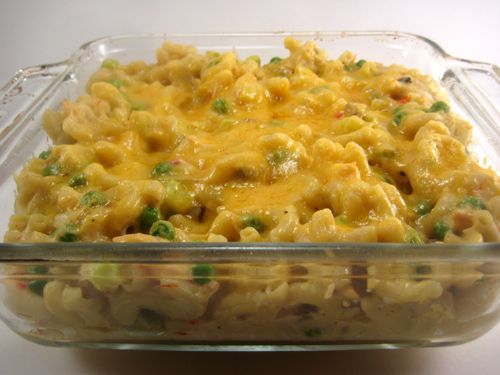
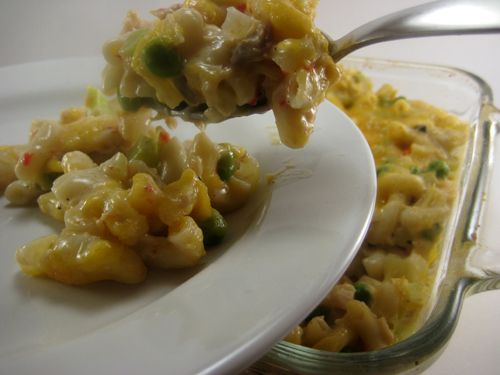
5) Pour into a 8 x 8 baking dish and top with cheese... Bake 350 F until cheese melted.


Service up!


A very simple dish that turned out nicely.
Use any veggies you like.

Thursday, August 19, 2010

Aug 19, 2010: Spicy Cold Noodles with Chicken Slivers

I have some leftover Costco rotisserie chicken. Yum! Yum! Yum!
Another quick meal day with minimal cooking... Recipe from Dunlop's "Land of Plenty"

Spicy Cold Noodles with Chicken Slivers

1/2 lb Fresh Noodles [The recipe calls for wheat noodles which I didn't have. Also, I wanted a quick meal so I used rice noodles.]
1 1/2 T Peanut Oil [I did not need it for the rice noodles.]
3 Oz Bean Sprouts [No bean sprouts so I used slivered Nappa Cabbage.]
4 Green Onions, thinly sliced

Sauce
2 T Sesame Paste + 1 T Water
1 1/2 T Dark Soy Sauce
1/2 T Soy Sauce
1 1/2T Chinese Black Vinegar
1 T Sugar
3 Cloves Garlic, crushed
1/2 t Sichuan Peppers, roasted and ground
2 T Chili Oil
1 T Sesame Oil

1) Mix the sauce and set aside.

The toasted Sichuan Peppers mixed into the rest of the sauce. I tried a dab of ground Sichuan peppers and after a minute my tongue went numb, as expected.


2) Blanch the Nappa cabbage and use the hot water to rehydrate the rice noodles (about 10 minutes). Drain and cool under cold running water.

3) Shred Chicken breast.

4) Plate and Eat
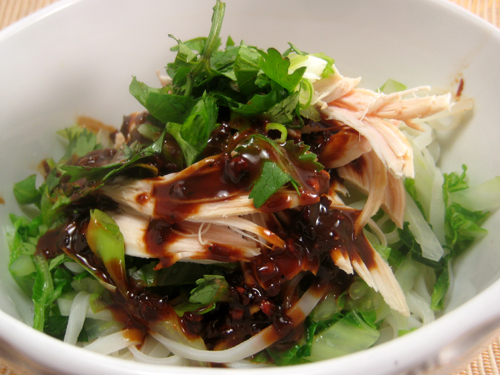
Noodles, chicken, sauce and garnish with green onions and chopped cilantro.


The noodles had a rich sesame paste flavor, with the slight numbing effects of the peppercorns.
Rich, savory, slightly spicy and slightly numbing. :-)

Wednesday, August 18, 2010

Aug 18, 2010: Cold Pork in Hot and Garlicky Sauce

It's been record breaking hot here in Seattle. The heat discourages a person to cook.

While thumbing through Fuchsia Dunlop's "Land of Plenty", I came across a recipe that looked like a good one for a hot day.

Cold Pork in Hot and Garlicky Sauce
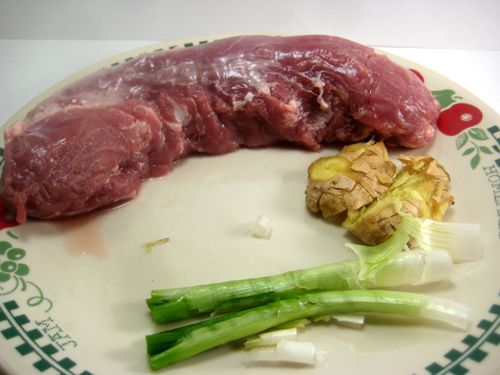
1 lb Pork Tenderloin
1.5 in Ginger, left whole, but smashed
2 Green Onions, white part - smashed

1/2 lb Bean Sprouts [I also added some slivered Nappa Cabbage. Both were blanched and cooled before serving.]

Sauce:
4 T Aromatic Soy Sauce
2 T Chili Oil
1 T Garlic, crushed
2 t Sesame Oil

Garnish:
Cilantro (or Green Onion tops)

1) Water, enough to cover the tenderloin, was heated to a boil with ginger and green onion.
After a couple minutes, to allow the ginger and green onion to flavor the water, the pork tenderloin is added. When the water came to a boil, the heat was lowered to a bare simmer. The pork is poached for about 30 minutes.


While the pork is simmering, the Aromatic Soy Sauce is made.

Aromatic Soy Sauce
1/3 C Dark Soy Sauce [Dark soy sauce is also known as "old" or "aged" soy sauce. It's typically thicker with the consistency of balsamic vinegar.]
2/3 C Water
6 T Brown Sugar
1/3 Stick of Cinnamon
1/2 t Fennel Seeds [Omitted - none in my pantry]
1/2 Star Anise
1/2 t Sichuan Pepper
Small Piece of Garlic, Crushed

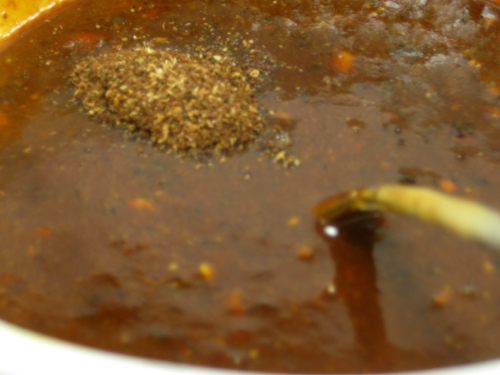
Bring to a boil and simmer 20 minutes. Strain before using.

For the brown sugar, I used a brown sugar candy stick. The weight was equivalent to about 3.5 T of brown sugar.


With the pork cooked and the Aromatic Soy Sauce finished, both were refrigerated (separately) overnight.

The Next Day...
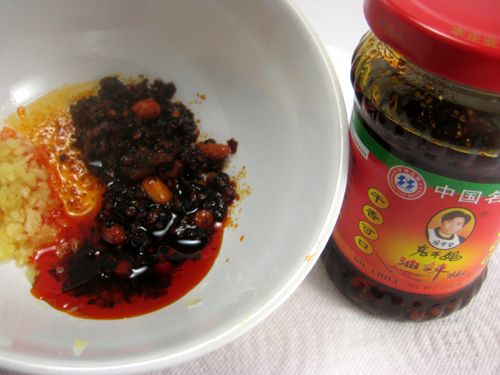
Making the sauce - Well I can't read Chinese, so when I go shopping I read ingredients or look for English words. This chili oil contains peanuts. Interesting.

Garlic and Chili oil shown, the rest of the ingredients for the sauce were added and mixed.


The vegetables were blanched for one minute and cooled. The veggies should retain some crispness to contrast the texture of the cooked pork and contrast the spicy sauce.

The veggies (bean sprouts and Nappa cabbage) were mounded onto the center of the plate.
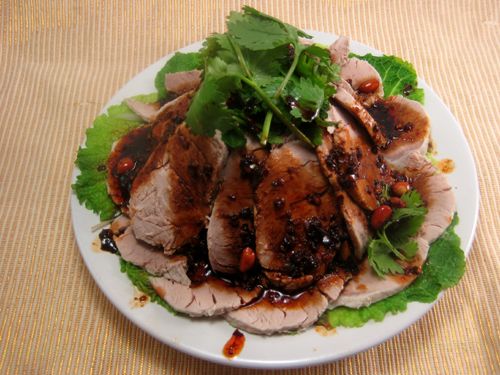
Thin slices of the cooked pork were arranged around the blanched vegetables. Sauce was drizzled around the pork. Cilantro was used as garnish.


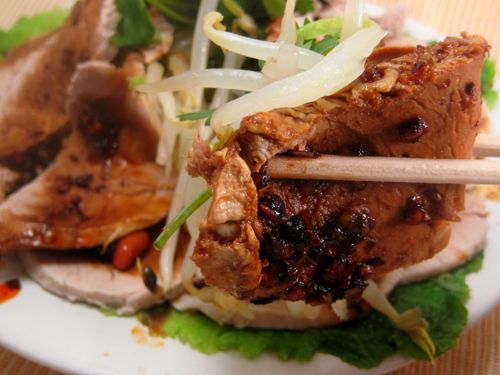
Digging in - Pork, vegetables and cilantro.
Extra sauce was off to the side for dipping or drizzling onto one's plate.


Another seemingly simple dish. The flavors are complex and not overpoweringly hot. Just a slight tingle. As I mentioned in previous post about Sichuan cooking, I'm not sure if the heat (spiciness) is supposed to knock you for a loop or just tingle your taste buds. My taste buds are happy :-)