Friday, October 31, 2008

Oct 31: Happy Halloween 2008

In the USA, a Halloween tradition is children, wearing costumes, going house to house asking for candy by saying, "Trick or Treat"... Which really means, "Give us candy or we will smash your pumpkins or egg your house!" LOL!

Last year, I seem to remember about 70 children. I hadn't planned on that many so I ran out of candy. I searched the pantry and found individually wrapped packages of microwave popcorn (from my favorite place Costco). Some of the kids actually preferred the popcorn over the candy.

This year we stocked up and we're ready for the little monsters.
A Wal-Mart deal was found on full size candy bars (3 for $1) so we have 81 bars.


Today was mostly rainy. Fortunately, the weather cleared up a little towards the evening.

However, the evening turned out slower than expected.
Cold weather with the threat of rain and the merchants downtown were holding an event that reduced the number of Trick or Treaters.

The numbers this year worked out to 65 Trick or Treaters, 7 bottles of water and a handful of tissues to a cute little monster with a very runny nose.

Wednesday, October 29, 2008

Oct 29: Daring Baker - Pizza

This month's Daring Bakers challenge is dedicated in Memory of Sherry Cermak who blogged at What Did You Eat?.

Daring Baker's is an group of online baking enthusiast where many of have formed lasting friendships, especially amongst the original Daring Bakers. Although I didn't know her, it is obvious from the tributes on various blogs that Sherry was a friend to many in Daring Bakers and to many in the general food blogging community.


Welcome to Pizzeria Giovanni!

Pizza is one of those food groups that I've been experimenting with since college. Wow! A Daring Baker's Challenge that I'm actually familiar with!

This month's challenge is hosted by Rosa of Rosa's Yummy Yums.

THE CHALLENGE: You have to use the tossing method (as explained below) for at least 2 Pizza Crusts. If you are not comfortable with it, then you can switch to the rolling method, but you HAVE to try the traditional method and exercise it, using at least two dough pieces. You should also capture the moment by either filming or photographing yourself while tossing the dough.

THE RULES: This month’s recipe leaves you with much freedom! You can either make the Pizza Dough gluten-free or the normal way. You may use the sauce (anything liquidy, saucy and spreadable like cream cheese, flavored oils, pesto, Nutella, Peanut Butter, pumpkin puree, etc...) and toppings of your choice, may they be savory or sweet, gluten-free, vegan, vegetarian or non-vegan/vegetarian. You must use BOTH (sauce & toppings).

JUST USE YOUR IMAGINATION!!!

Before I get to the pizza dough we're using for the challenge, this is the pizza sauce I've been using since college. A roommate worked in a mom and pop pizza parlor in high school and he showed me how he made sauce - tomato sauce, diced tomatoes and tomato paste. I tried different ratios of the three basic ingredients plus adding dried herbs. The following is the sauce I ended up with...

My Basic Pizza Sauce
1 can 14.5 oz Diced Tomatoes with Basil, Onion and Oregano
1 can 8 oz Tomato Sauce
1 to 2 T Tomato Paste
1 Clove Garlic, minced
1/3 t Basil, Dried
1/3 t Oregano, Dried
1 T Olive Oil

Heat olive oil and minced garlic to release flavors.
Pour in tomatoes and tomato sauce.
Add the dried herbs and let simmer about 5 to 10 minutes.
Puree using a stick blender.
Add tomato paste to thicken the sauce... Simmer another 5 minutes.
Let Cool before using.

RECIPE SOURCE: “The Bread Baker's Apprentice: Mastering The Art of Extraordinary Bread” by Peter Reinhart. Ten Speed Press, Berkeley, CA. Copyright 2001. ISBN-10: 1-58008-268-8, ISBN-13: 978-158008-268-6.

~ BASIC PIZZA DOUGH ~
Makes 6 pizza crusts (about 9-12 inches/23-30 cm in diameter). *

Ingredients:
4 1/2 Cups (20 1/4 ounces/607.5 g) Unbleached high-gluten (%14) bread flour or all purpose flour, chilled
1 3/4 Tsp Salt
1 Tsp Instant yeast
1/4 Cup (2 ounces/60g) Olive oil or vegetable oil (both optional, but it’s better with)
1 3/4 Cups (14 ounces/420g or 420ml) Water, ice cold (40° F/4.5° C)
1 Tb sugar
Semolina/durum flour or cornmeal for dusting

*Note: I halved the recipe to make 3 pizza crusts.


DAY ONE

Method:
1. Mix together the flour, salt and instant yeast in a big bowl (or in the bowl of your stand mixer).

2. Add the oil, sugar and cold water and mix well (with the help of a large wooden spoon or with the paddle attachment, on low speed) in order to form a sticky ball of dough. On a clean surface, knead for about 5-7 minutes, until the dough is smooth and the ingredients are homogeneously distributed. If it is too wet, add a little flour (not too much, though) and if it is too dry add 1 or 2 teaspoons extra water.

NOTE: If you are using an electric mixer, switch to the dough hook and mix on medium speed for the same amount of time.The dough should clear the sides of the bowl but stick to the bottom of the bowl. If the dough is too wet, sprinkle in a little more flour, so that it clears the sides. If, on the contrary, it clears the bottom of the bowl, dribble in a teaspoon or two of cold water.
The finished dough should be springy, elastic, and sticky, not just tacky, and register 50°-55° F/10°-13° C.

3. Flour a work surface or counter. Line a jelly pan with baking paper/parchment. Lightly oil the paper.

4. With the help of a metal or plastic dough scraper, cut the dough into 6 equal pieces (or larger if you want to make larger pizzas).

NOTE: To avoid the dough from sticking to the scraper, dip the scraper into water between cuts.
5. Sprinkle some flour over the dough. Make sure your hands are dry and then flour them. Gently round each piece into a ball.

NOTE: If the dough sticks to your hands, then dip your hands into the flour again.

6. Transfer the dough balls to the lined jelly pan and mist them generously with spray oil. Slip the pan into plastic bag or enclose in plastic food wrap.

7. Put the pan into the refrigerator and let the dough rest overnight or for up to thee days.

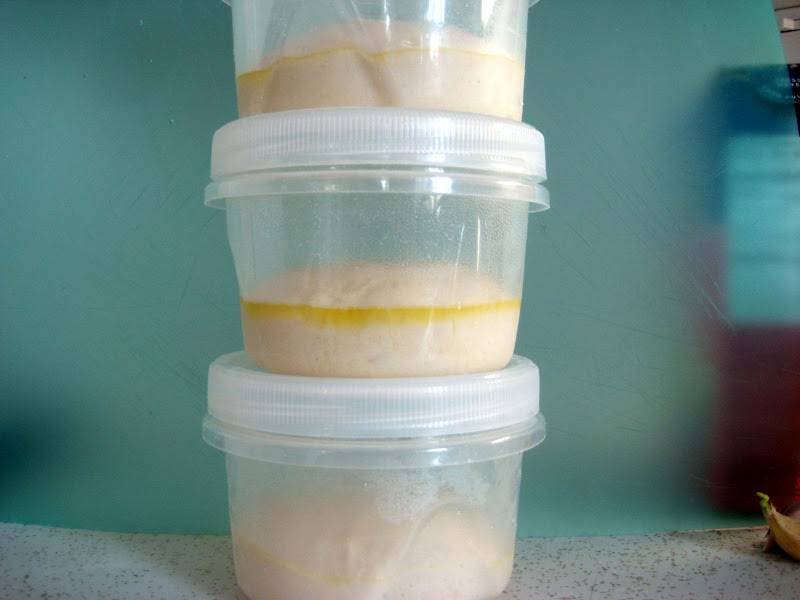
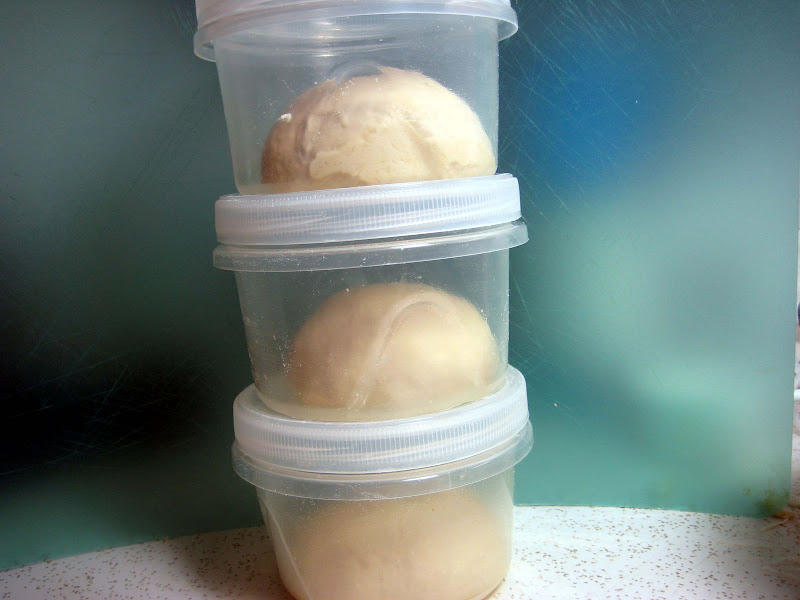
Dough packed and ready for the refrigerator... Each dough ball is about 170 grams each.

NOTE: You can store the dough balls in a zippered freezer bag if you want to save some of the dough for any future baking. In that case, pour some oil(a few tablespoons only) in a medium bowl and dip each dough ball into the oil, so that it is completely covered in oil. Then put each ball into a separate bag. Store the bags in the freezer for no longer than 3 months. The day before you plan to make pizza, remember to transfer the dough balls from the freezer to the refrigerator.

DAY TWO
The next day - out of the fridge.


8. On the day you plan to eat pizza, exactly 2 hours before you make it, remove the desired number of dough balls from the refrigerator. Dust the counter with flour and spray lightly with oil. Place the dough balls on a floured surface and sprinkle them with flour. Dust your hands with flour and delicately press the dough into disks about 1/2 inch/1.3 cm thick and 5 inches/12.7 cm in diameter. Sprinkle with flour and mist with oil. Loosely cover the dough rounds with plastic wrap and then allow to rest for 2 hours.

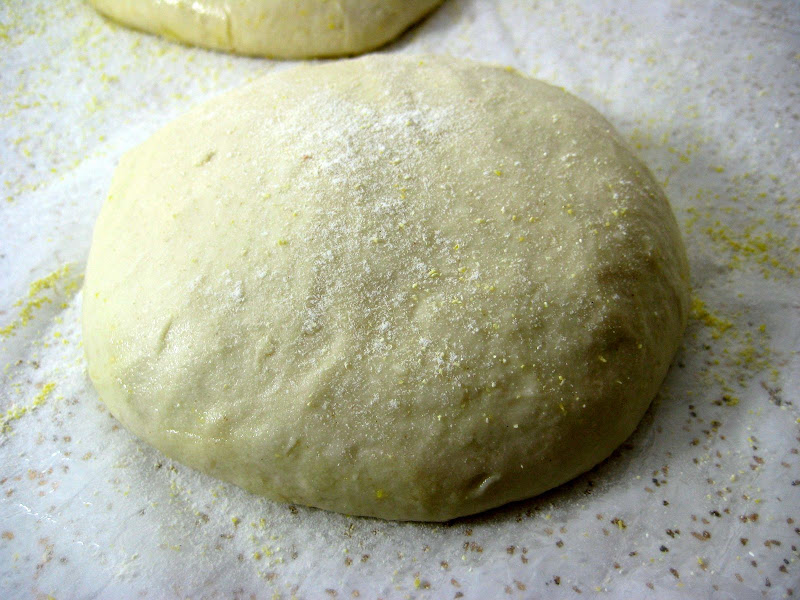
Dough taken out of the container. Dusted with a flour/corn meal mixture.

9. At least 45 minutes before making the pizza, place a baking stone on the lower third of the oven. Preheat the oven as hot as possible (500° F/260° C).

NOTE: If you do not have a baking stone, then use the back of a jelly pan. Do not preheat the pan.

10. Generously sprinkle the back of a jelly pan with semolina/durum flour or cornmeal. Flour your hands (palms, backs and knuckles). Take 1 piece of dough by lifting it with a pastry scraper. Lay the dough across your fists in a very delicate way and carefully stretch it by bouncing it in a circular motion on your hands, and by giving it a little stretch with each bounce. Once the dough has expanded outward, move to a full toss.


NOTE: Make only one pizza at a time.
During the tossing process, if the dough tends to stick to your hands, lay it down on the floured counter and reflour your hands, then continue the tossing and shaping.
In case you would be having trouble tossing the dough or if the dough never wants to expand and always springs back, let it rest for approximately 5-20 minutes in order for the gluten to relax fully,then try again. You can also resort to using a rolling pin, although it isn’t as effective as the toss method.

11. When the dough has the shape you want (about 9-12 inches/23-30 cm in diameter - for a 6 ounces/180g piece of dough), place it on the back of the jelly pan, making sure there is enough semolina/durum flour or cornmeal to allow it to slide and not stick to the pan.

12. Lightly top it with sweet or savory toppings of your choice.
NOTE: Remember that the best pizzas are topped not too generously. No more than 3 or 4 toppings (including sauce and cheese) are sufficient.

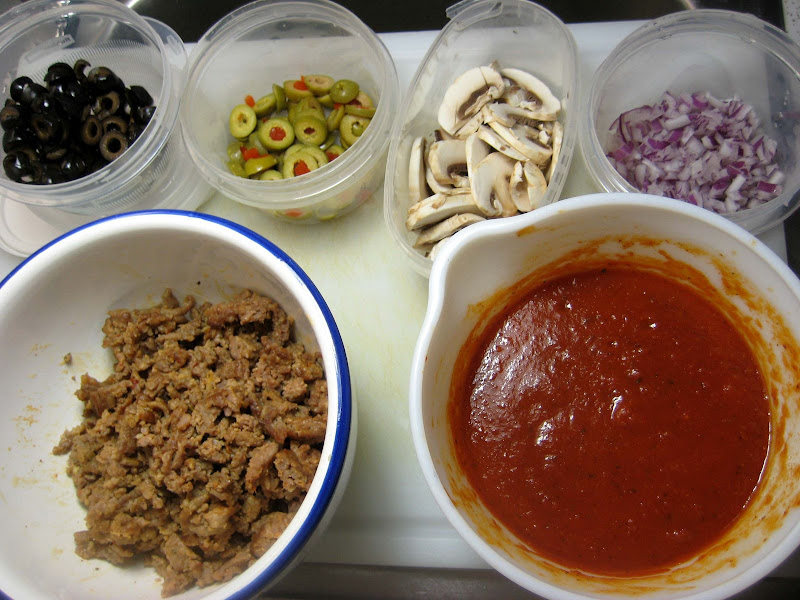
My toppings at the ready - olives (black and green), mushrooms, red onions, tomato sauce and mild Italian sausage. Cheese is not shown - mozzarella and cheddar.

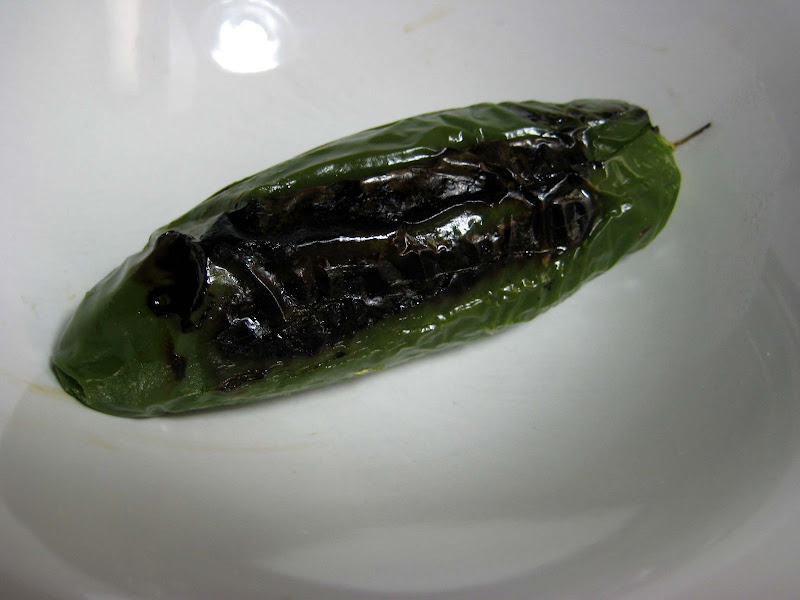
My secret ingredient! A roasted jalapeno pepper which I peeled and diced.

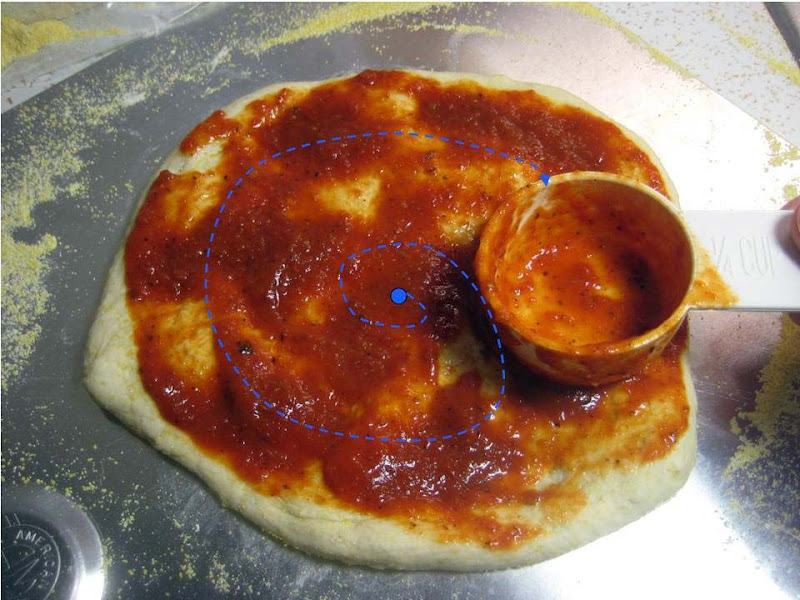
Based upon the many good pizza making videos on YouTube, this is a neat way to sauce a pizza.

Ladle sauce onto the center and use the bottom of the ladle to swirl the sauce to the edges. I used 1/4 C of sauce for a 10" pizza.

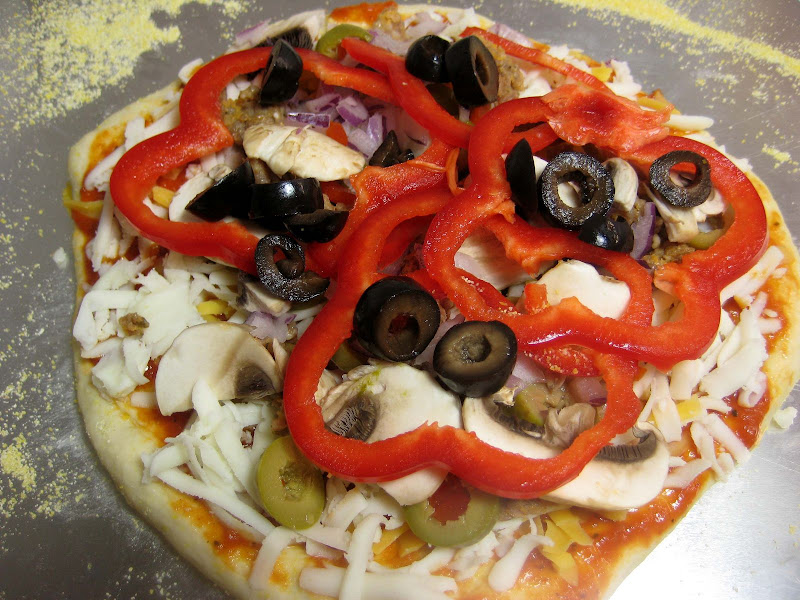
I tend to overload the pizza, but that's the way I like it.

13. Slide the garnished pizza onto the stone in the oven or bake directly on the jelly pan. Close the door and bake for about 5-8 minutes.

Note: Since this pizza dough recipe is on the sticky side, I had to use a length of dental floss to loosen the pizza from the peel and a spatula to slide the pizza onto the stone.
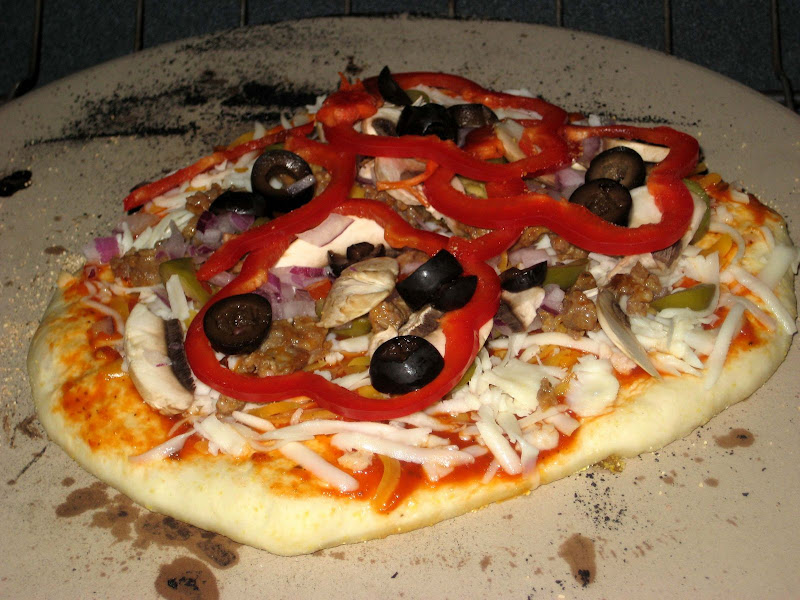

NOTE: After 2 minutes baking, take a peek. For an even baking, rotate 180°.

If the top gets done before the bottom, you will need to move the stone or jelly pane to a lower shelf before the next round. On the contrary, if the bottom crisps before the cheese caramelizes, then you will need to raise the stone or jelly.

14. Take the pizza out of the oven and transfer it to a cutting board or your plate. In order to allow the cheese to set a little, wait 3-5 minutes before slicing or serving.

Total Baking Time: 8 Minutes
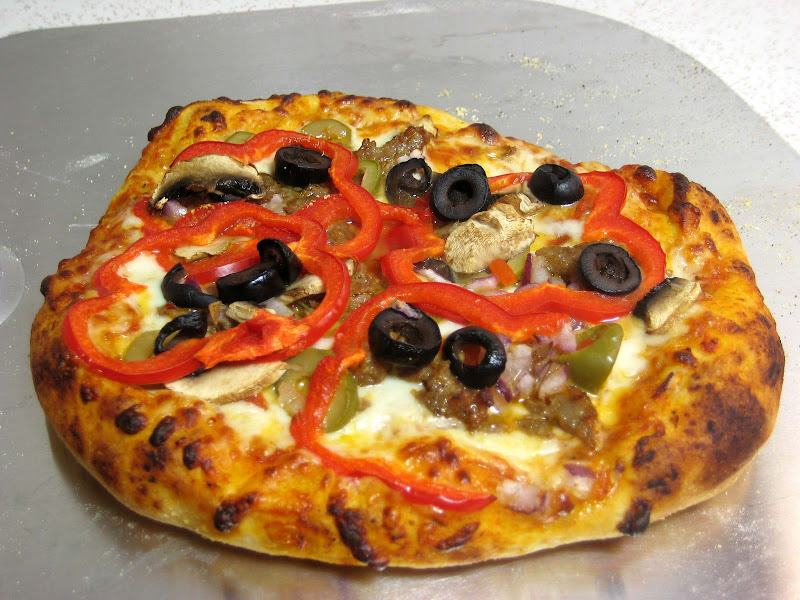

This is actually Pizza #3: My demo pizza with everything.

The first two pizza were made for quick consumption and only a couple pictures were taken. We were hungry! LOL! With this third pizza, we could spend the time taking step-by-step photos.

Pizza with everything
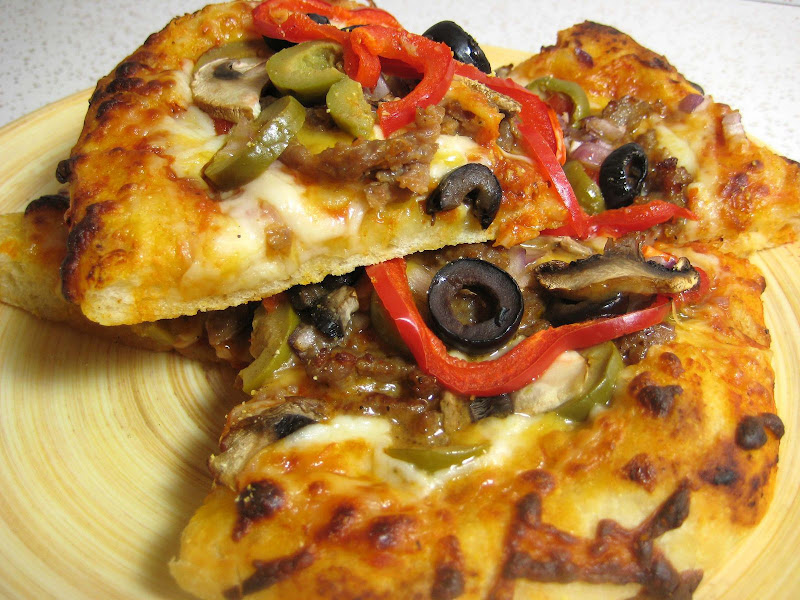

Nicely cooked crust. I purposely made this crust with a thicker crust.
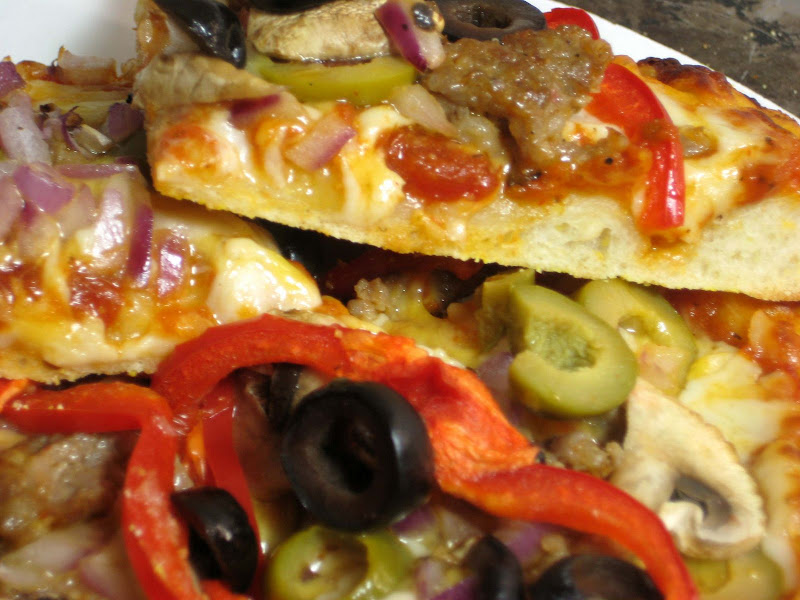

The First TWO Pizzas!
Reinhart's recipe is a wet dough using a 69% water to flour ratio. Most pizza dough recipes use a 60% water to flour ratio. Due to the higher water ratio, the crust spreads out very easily and makes for a thin pizza crust.

The resulting pizza crust turned out thin, light and airy. Almost too thin for the amount of toppings I used.

Overall, the pizza was very good.

For this challenge, here's the mandatory pizza tossing photo. Since it's so close to Halloween, I decided to wear my costume for the pizza tossing photo.

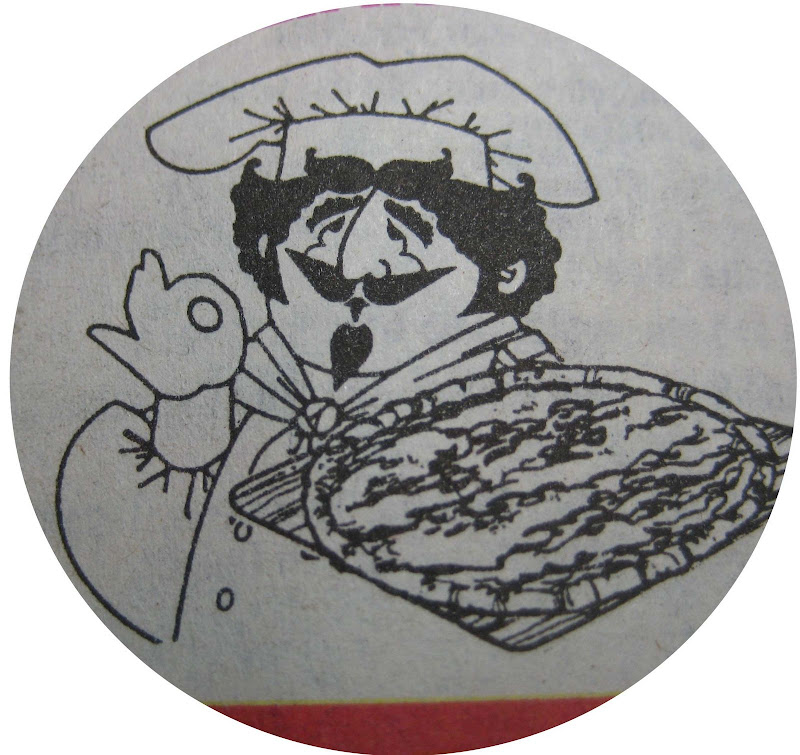
In the USA, when you flip through the phone book, Italian restaurants use a Chef Boyardee-like icon for their ads - a chef with a large handlebar mustache, wearing a chefs hats and chef's coat. Being a foodie, I couldn't go as a vampire or Frankenstein. I wanted to be a chef with a handlebar mustache! :-)

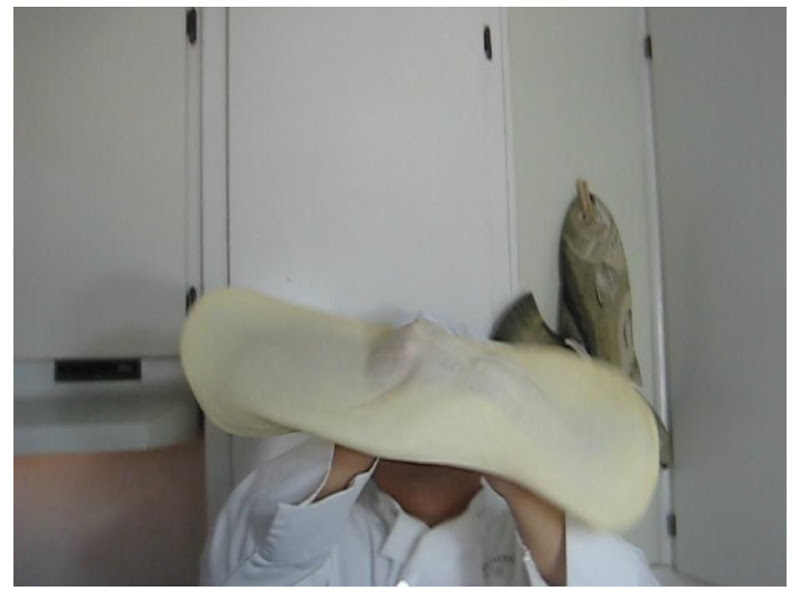
I noticed that tossing the pizza stretches the crust paper thin.
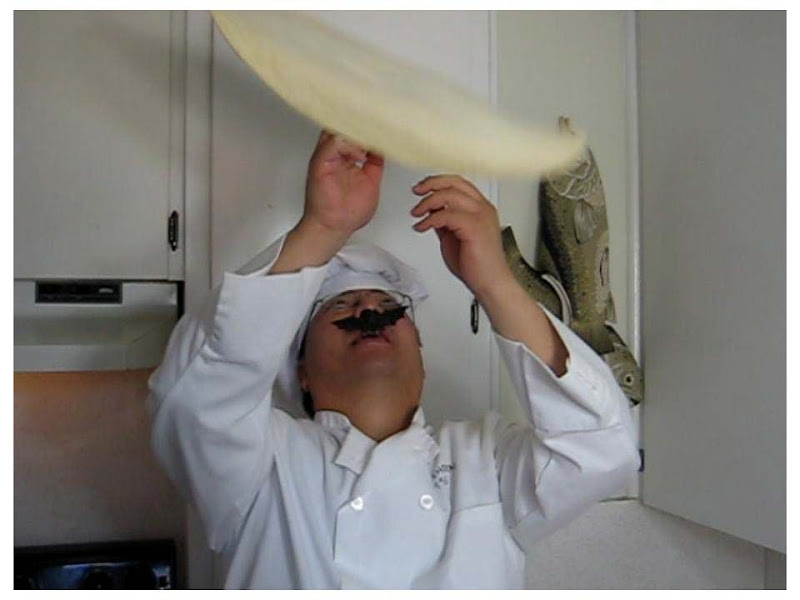

Whew! I caught it! No drop... No whole... Hat and mustache still in place.

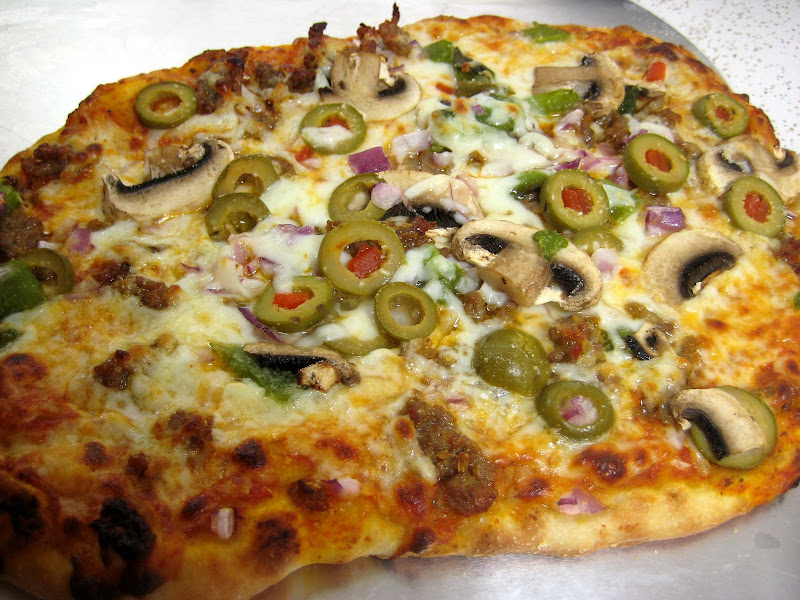
Pizza #1: green olive, sausage, mushroom, onion, roasted jalapenos and mozzarella.
Not shown: Garnished with fresh chopped tomatoes.

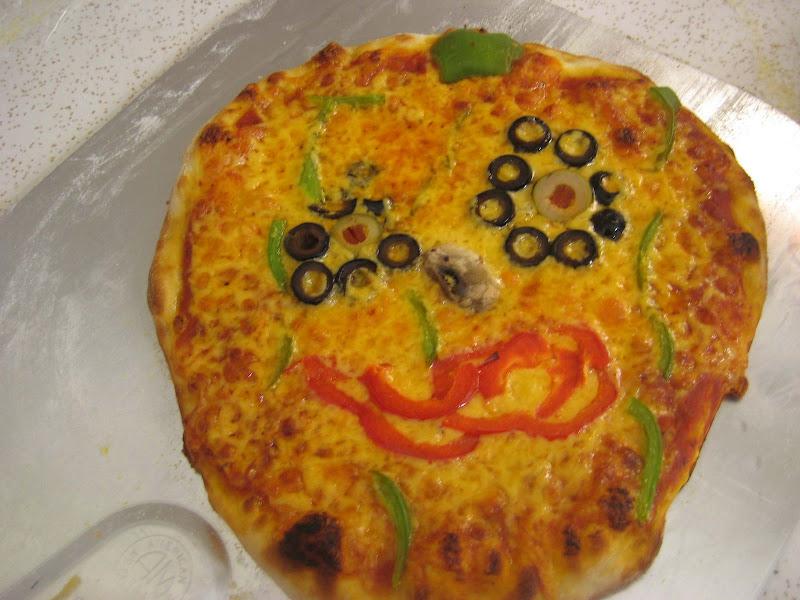
Pizza #2: My Jack O'Lantern Pizza: Cheddar (instead of Mozzarella), green and black olives, green and red bell peppers. The cheddar added a nice saltiness to the pizza.

Overall, the pizza turned out delicious. The crust turned out light and not too bready. However, I'm not sure if I would use such a high water ratio the next time around, 69%. My tendency is to be around %60 or until the dough feels right.

That's this month's challenge!
Making pizza dough is pretty straight forward and the ingredients for the dough are minimal - water, flour, yeast, a little oil and some salt and sugar.

I hope you all get around to making a pizza pie.

HAPPY HALLOWEEN!

Wednesday, October 15, 2008

Oct 15: Money Ramen ?

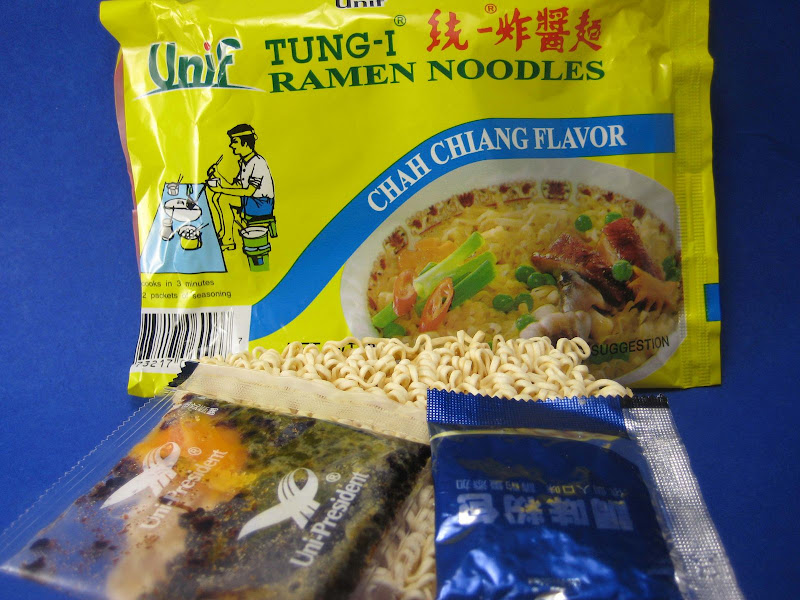
Found an interesting flavor of ramen at the market... Chah Chiang flavor.

What is Chah Chiang?
I don't know, but it sounds like money! Chah Chiang!


Instructions: (As written on the package)
1. Add noodles to 2 cups of boiling water, cook for 3 minutes. Stir occasionally Don't over-cook(for shorter noodles, break noodles before cooking).

2. Put 4/5 soup from the pan to the bowl (A) add the soup-seasoning to the bowl (A) to be served as soup.

3. Put the chah-chiang sauce to the pan, and stir chah-chiang sauce evenly in the noodles. Put the noodles to the dish (B).

4. Ready to enjoy the delicious Chah-Chiang noodles(B) and tasty soup (A).

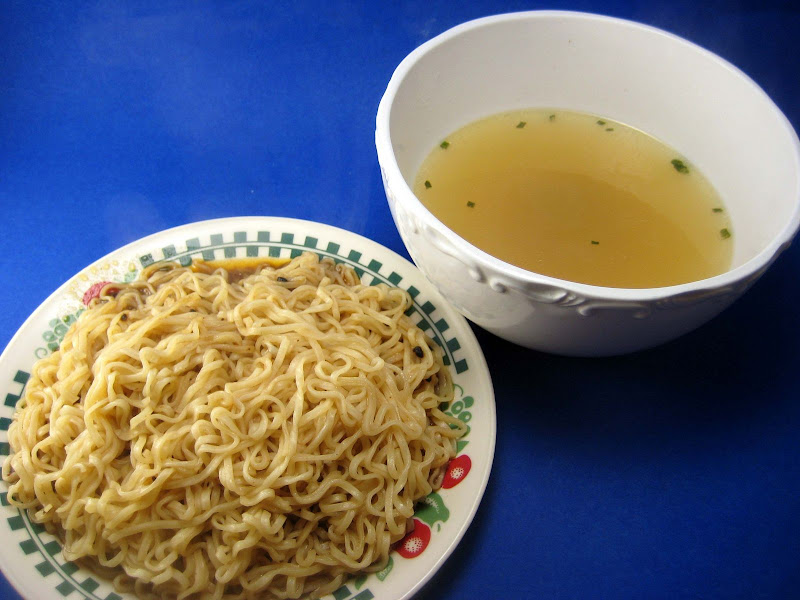
Dish of Noodles (B) and bowl of soup (A).


The soup tasted like "Oriental flavor" ramen and the chah-ching sauce was salty with soybean bits.

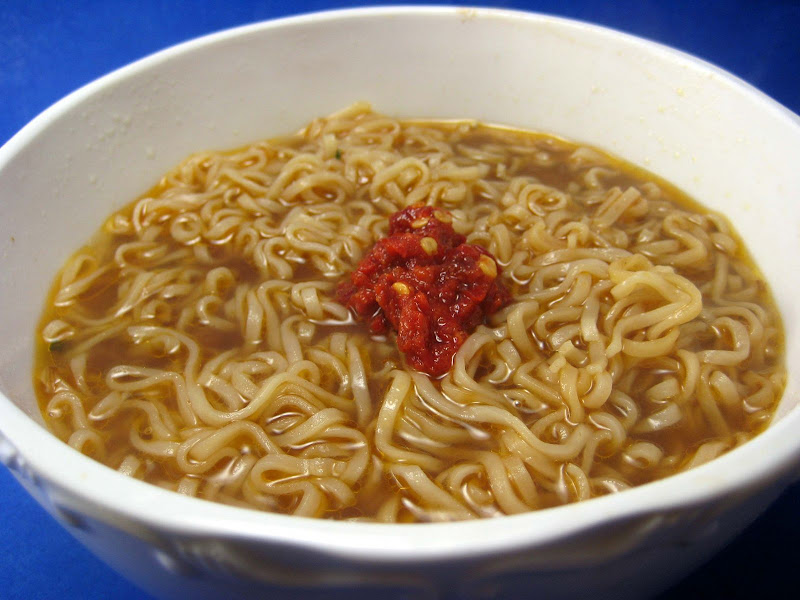
I ended up mixing plate(B) into bowl (A) to create the final dish, plus a little dallop of chili paste for extra bite.

Standard bowl of ramen. Nothing special. Salty and full of msg.


Ingredients: (As written on the package)
Oil Pack: Refined oil (contains one or more of followings: palm oil, sesame oil, soybean oil). refined salted-soy bean paste, chili paste, onion.

Soup Base Flavor Pack: Salt, monosodium glutamate, glucose, sugar, spices, disodium inosinate & disodium guanylate, artificial flavor, dehydrated chives.

A lot of mysterious ingredient, but I don't see any money... nor did I taste anything special.
Just an average bowl of ramen.

That's it for today's post.
Time to checkout.
Chah-Chiang!

Sunday, October 12, 2008

Oct 12: Beef Chili

What to do with the remainder of the beef bottom round roast? Hmmm....
Beef stew?
Roast beef?
Chili! I have a pantry full of dried chiles that should be used.
Okay... Chili it is!

There are a couple ways to make chili with dried chiles.
1. Soak the chiles and make a mash.
2. Toast and grind to make a chili powder.

I've tried the soak method and was not thrilled with the results.

This time I'll grind my own chili powder.

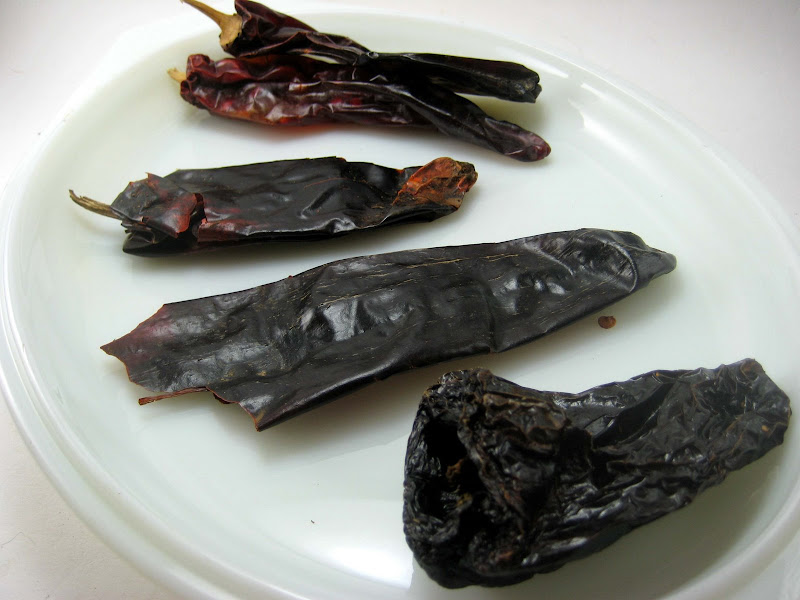
The Chiles
From top down...
2 New Mexico Chiles
1 Guajillo
1 California Chile
1 Ancho


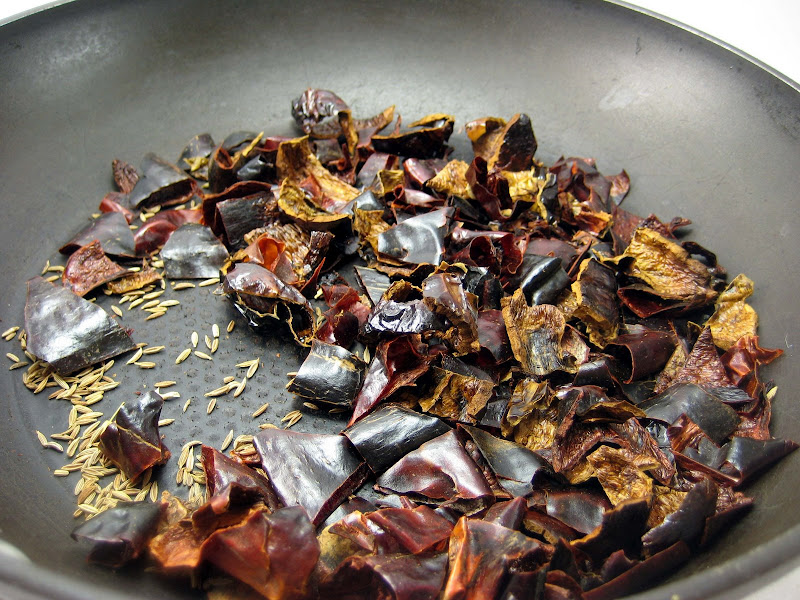
The chilies were stemmed and seeded.
Cut into smaller pieces and toasted under the broiler with 1 tsp of cumin seeds.
Total toasting time was about 1 minutes. Remember to give the pan a shake to move stuff around.

I was worried that the toasting chiles would be eye-watering noxious, but the chiles gave off a sweet, toasty, raisiny aroma.


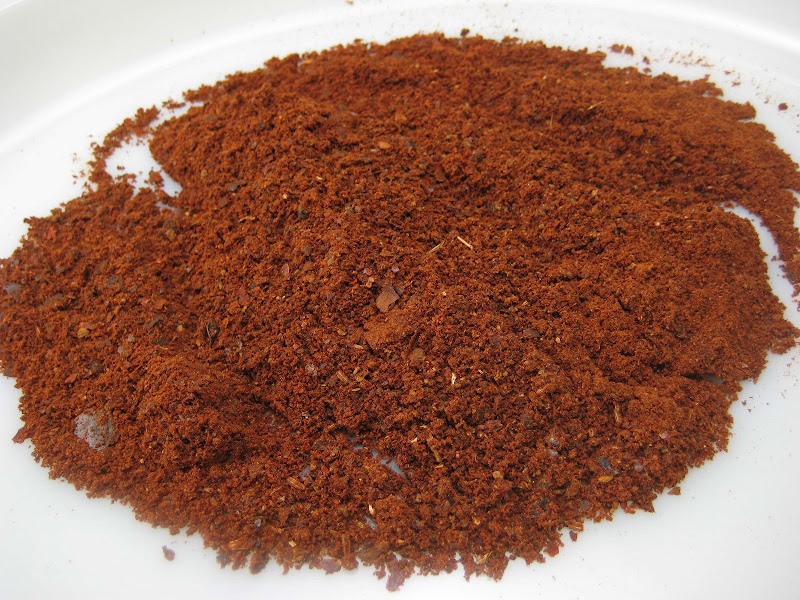
The toasted pieces went into a coffee grinder to form the powder.


Chili
The fixins'
3 lbs Beef Bottom Round Roast, trim off fat cap and cube (about 4 or 5 cups)
1/2 Onion, coarse chop
2 Garlic cloves, coarse chop
1/2 C Grape Tomatoes, halved
1 Celery Stalk, coarse chopped (Next time I'll leave it out).
2T Chili Powder
1/2 C Chicken Stock (That's just what I had)
1/2 tsp Oregano, dried
1/2 tsp Basil, dried
1 bay leaf
Salt and Pepper to taste

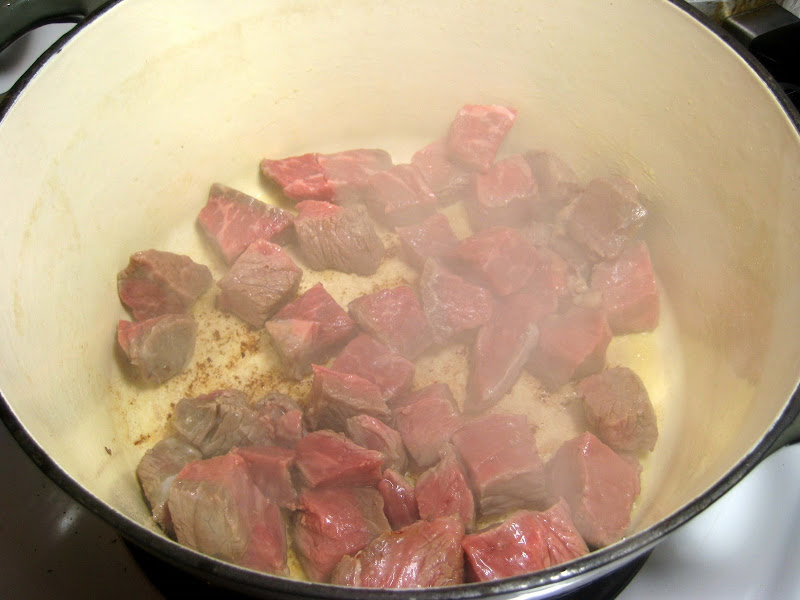
Brown the beef... To flour or not to flour. I decided not to flour. I wanted to save time.


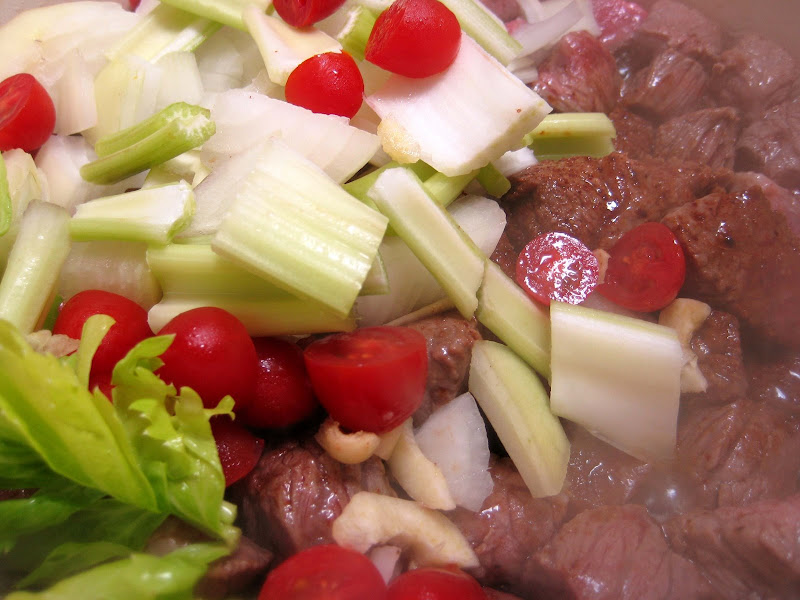
Add veggies and chicken stock. I got bored with browning the beef so I just browned one side and tossed in the rest of the ingredients. :-)


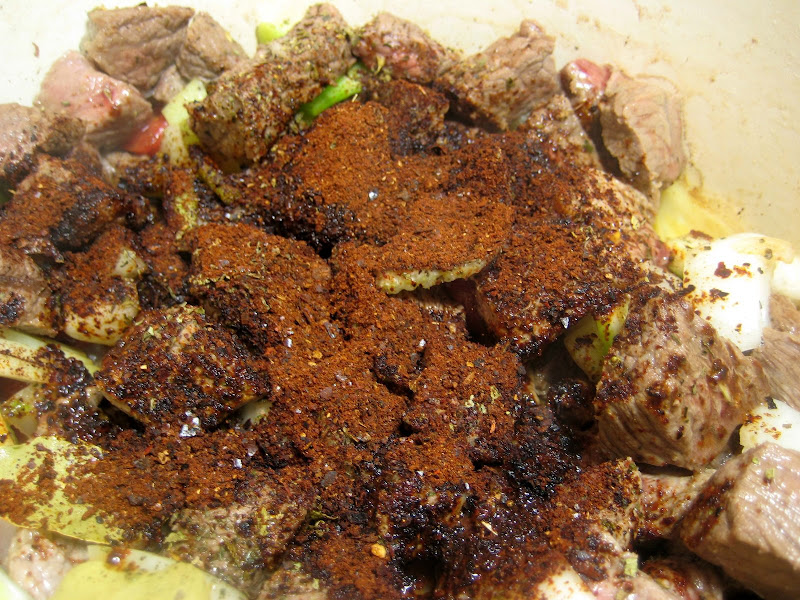
Add the chili powder, oregano, basil, bay leaf and stock... Cover and simmer for about 2 hours.


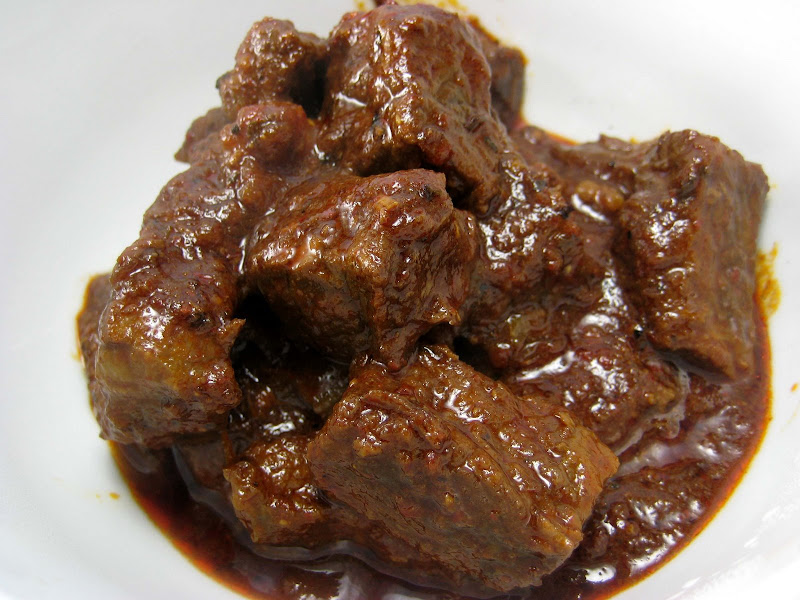
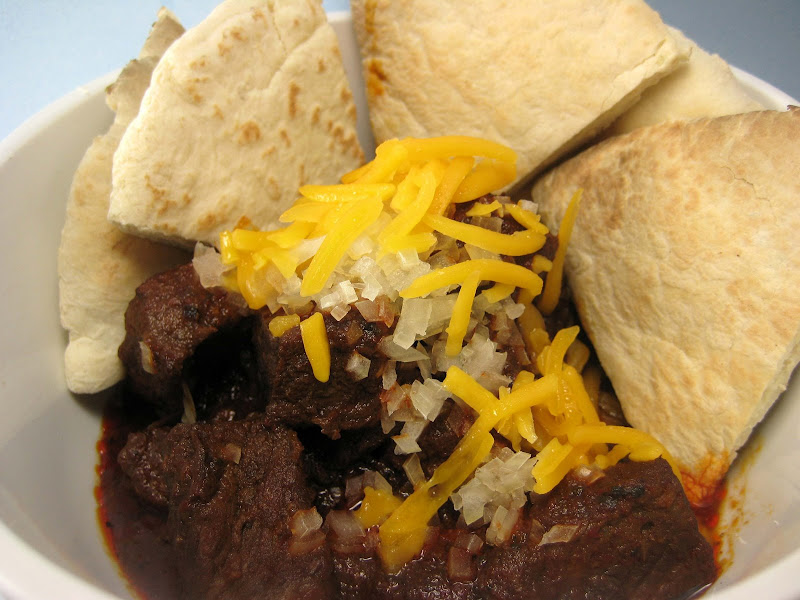
The finished chili.


Chili up!
I tried toasting a taco shell in the oven... which fell through the grate and caught fire. lol!
I have pita bread instead.
The chili topped with onions and cheese.


Flavor... Not bad. Not extremely hot, but has a mild chili flavor. I think the cumin adds the flavor.

Beef still has some texture, not dry and stringy.

Where's the beans?
I didn't have any in the house.

Overall, I think it's a success for an improvised recipe.

Wednesday, October 8, 2008

Oct 08: Dumpling Soup by Cheating :-)

Simple dinner tonight...
The cheating comes from using frozen store bought instead of making my own. :-)
The soup is made using the leftover gelatin clarified chicken stock.

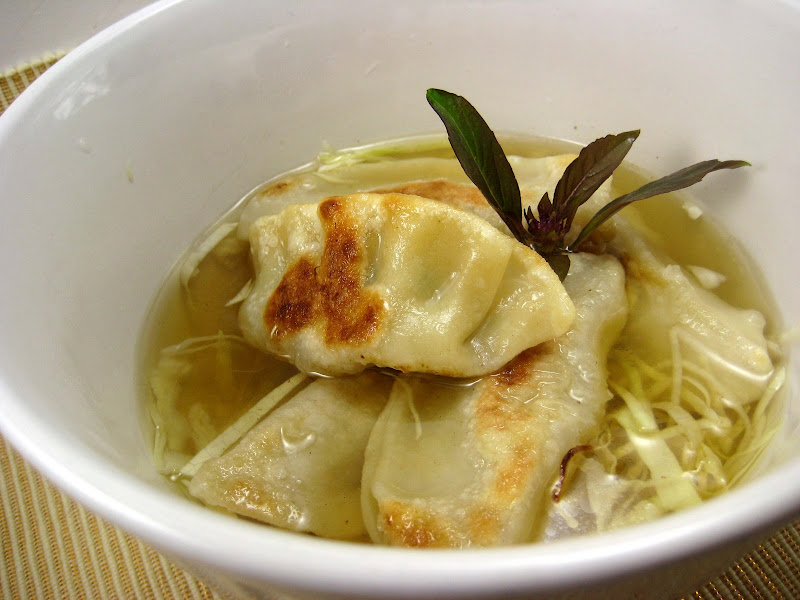
5 Frozen Chicken Potstickers, boiled per for about 8 minutes and pan-fried to slightly brown.
1.5 C Clarified Chicken Stock
1/2 C Cabbage, finely shredded
Thai holy basil for garnish.

Cabbage was placed in the bowl.
Bring stock to a boil and pour over the shredded cabbage. The residual heat will cook the cabbage.

Top with the cooked potstickers and garnish with the Thai basil.
The Thai basil is from the garden and actually has some flavor. Sometimes I'm surprised that the garden grown herbs actually have flavor.

A quick healthy meal.

Monday, October 6, 2008

Oct 06: Beef Bottom Round

Beef bottom round was on sale so I purchased a 4 pound roast.
The beef bottom round is a less tender cut of meat that's best cooked in liquid and it makes an so-so roast.

However, what I did was freeze the roast. After which I was able to slice thinly.
My plan is to make a Bulgogi inspired dish. Bulgogi is a Korean grilled beef dish usually made from sirloin or a better cut. However, the dish is sometimes made in a skillet.

The bulgogi inspiration of my dish is the soy sauce and sesame oil marinade.

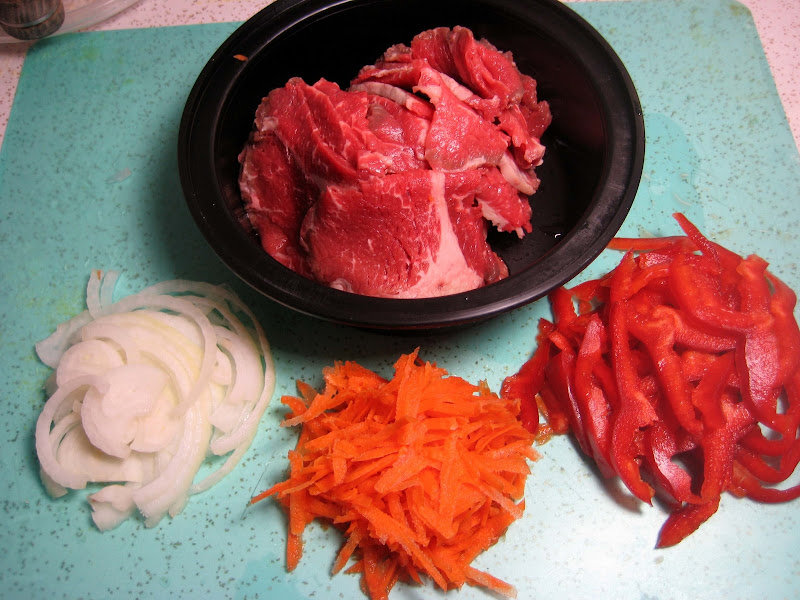
What I have for my dish...
1 lb Beef, thinly sliced
1/2 Red Bell Pepper, thinly sliced
1/2 Onion, thinly sliced
1/2 Carrot, grated


I fried a sample to check the texture of the beef. As expected the beef was a little tough.
To soften the beef a little, I mixed 1/2 tsp of baking soda in 1/2 C of water. The baking soda mixture was poured and mixed into the beef. After 5 minutes, the beef was thoroughly washed and dried.

Marinade
2 T Soy Sauce
1 t Sesame Seed Oil
1/2 t garlic powder

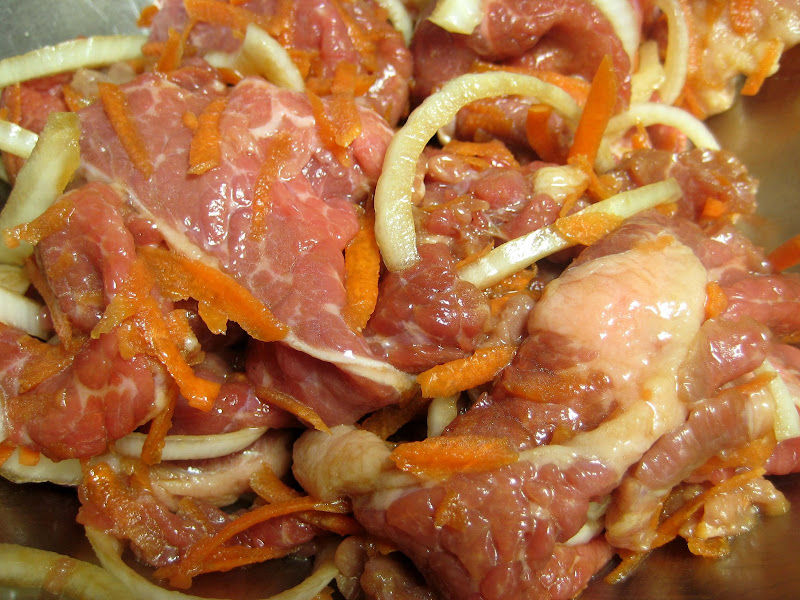
The onions and carrot were added to the beef and allowed to marinade.


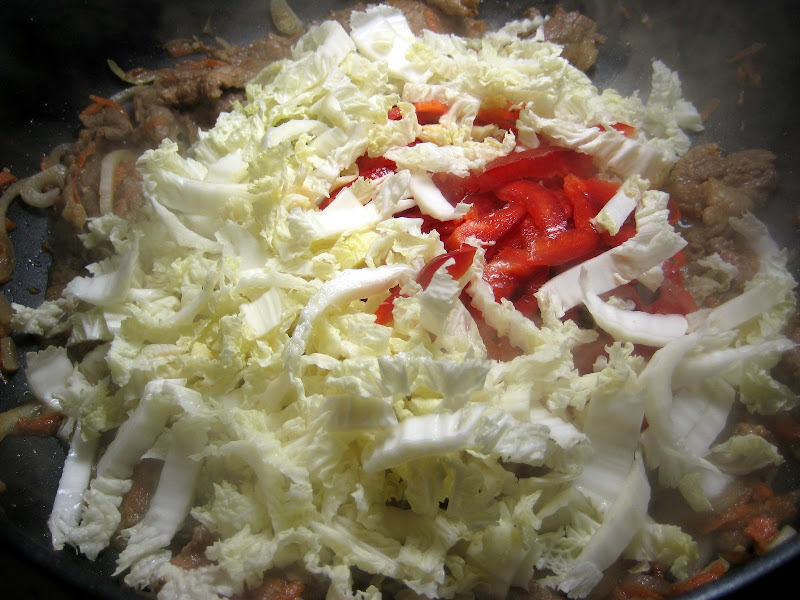
After 10 to 15 minutes, the beef was sauteed with garlic. Eventually, the beef released some liquid. It it doesn't you can use broth. I added the red bell pepper and some thinly sliced Nappa cabbage I found in the fridge. Add more soy sauce, sesame seed oil as needed.


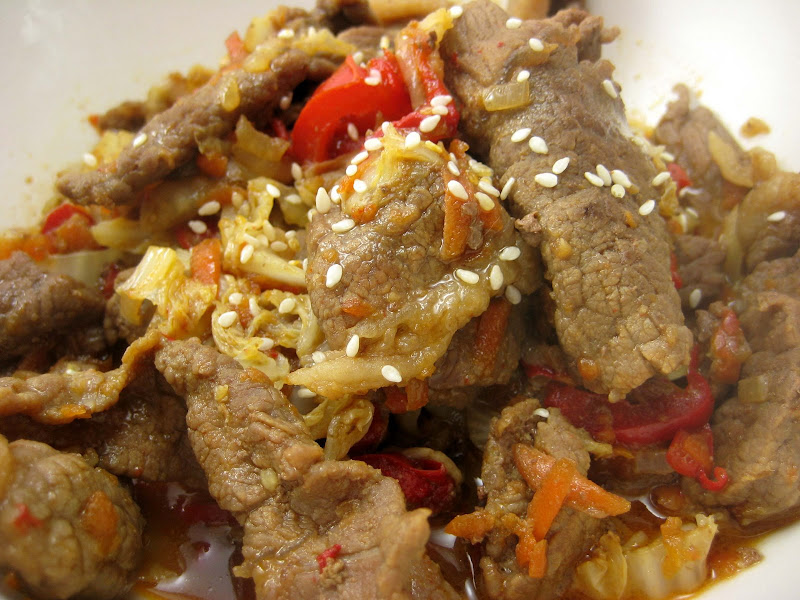
The cooked dish topped with sesame seeds.


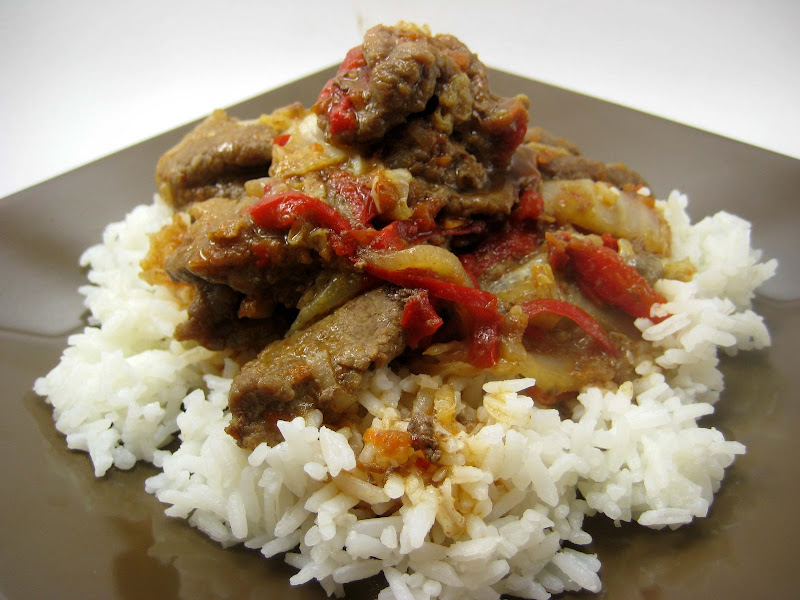
Beef served over rice.


The baking soda soak softened the beef a little bit. I kept the soak time short since the beef was thinly slicd and I didn't want to mush out the beef.

Friday, October 3, 2008

Oct 03: Experiment - Clarifying Stock with Gelatin

When I was researching methods to clarify stocks with egg whites, I came across another method of clarify stock using gelatin.

To me, this was intriguing... How does gelatin work to clarify stock? Does it really work?

How does it work?
The stock is frozen solid. Afterwards, the stock is wrapped in cheese cloth and allowed to thaw into a clean bowl while in the refrigerator. The gelatin forms a microscopic matrix that traps impurities, but he water is able to pass through.

Does it work?
That's the objective of this experiment to find out. :-)

I have 4 cups of broth that I divided into 2-two cup portions.
One portion will be the control (as is, nothing added) and the other portion will have gelatin added to the liquid.

Amount of gelatin?
0.5% per weight of the liquid.
The 2 cup portion of stock weighed 460 grams... so I added 460*.5% = 2.3 grams. My scale is not that accurate so I added a 1/2 teaspoon.

The gelatin was added to 1 cup of warm broth to soften for about 5 minutes. Afterwards, I added to the rest of the broth and brought to a boil.


The two portions of broth were placed in separate bowls. Covered with saran wrap and placed in the freezer for two days.

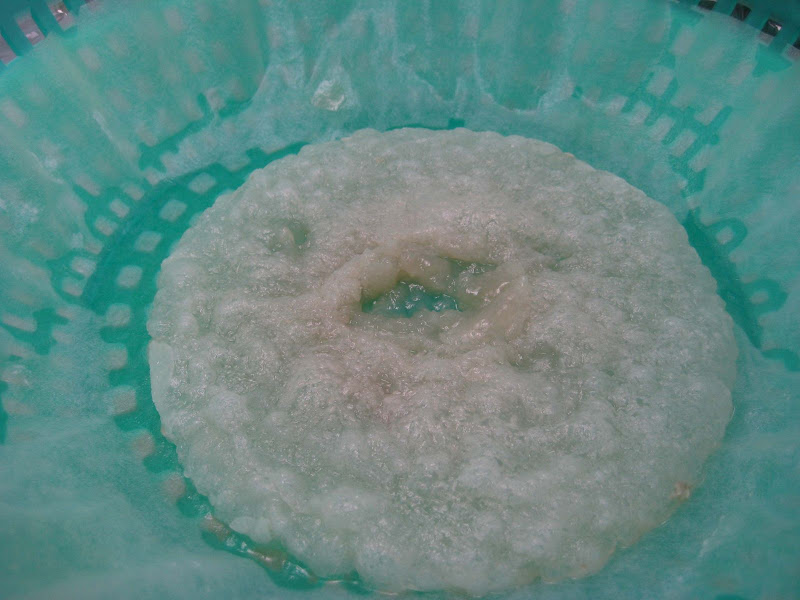
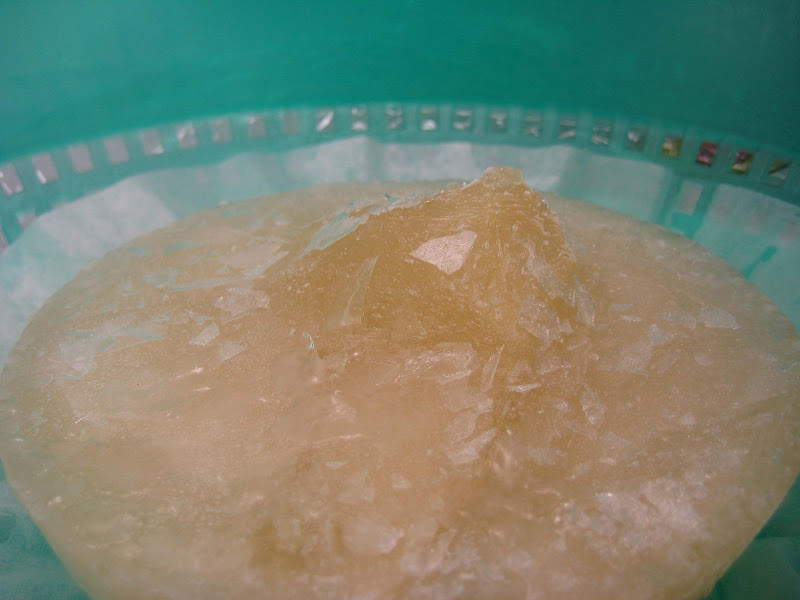
This is the basic broth - no addictions. Instead of cheesecloth, I used a coffee filter. This was placed in the refrigerator to thaw slowly.


After 36 hours, the only stuff left is a slimy puddle. Looks like the stock did contain gelatin from the chicken bones.


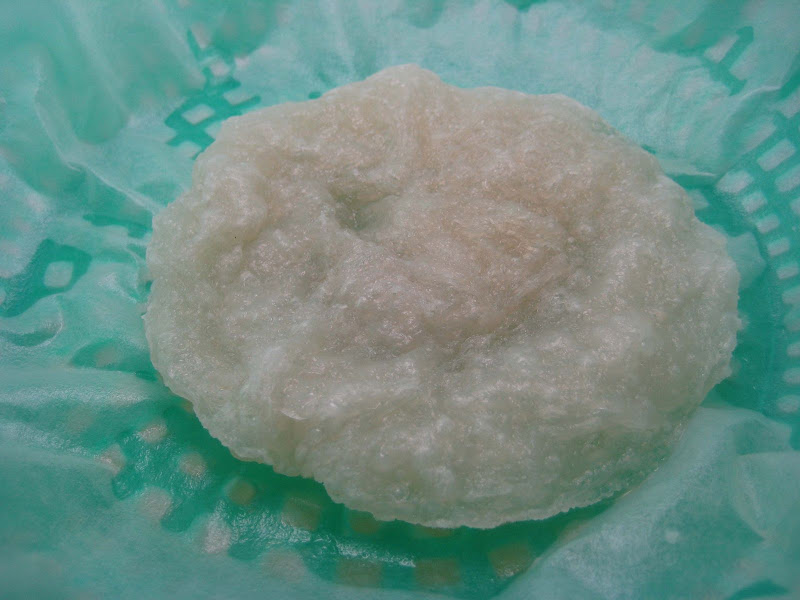
This is the broth with the added gelatin. Interesting thing to point out in both pictures, the little mound near the center of the stock-sicle. Water is one of the few compounds that actually expand when it freezes. (Typically, materials shrink as they get colder). You can tell the stock froze from the outside towards the center. As the stock expanded, it pushed the slushy center into a mound.


After 36 hours in the refrigerator, there's more slimy junk.


Surprisingly, both stocks were clarified. The little gelatin in the basic stock was able to filter out the impurities. The stock with the added gelatin was clear and seemed a little lighter in color. However, both had the clarity of a glass of white wine.

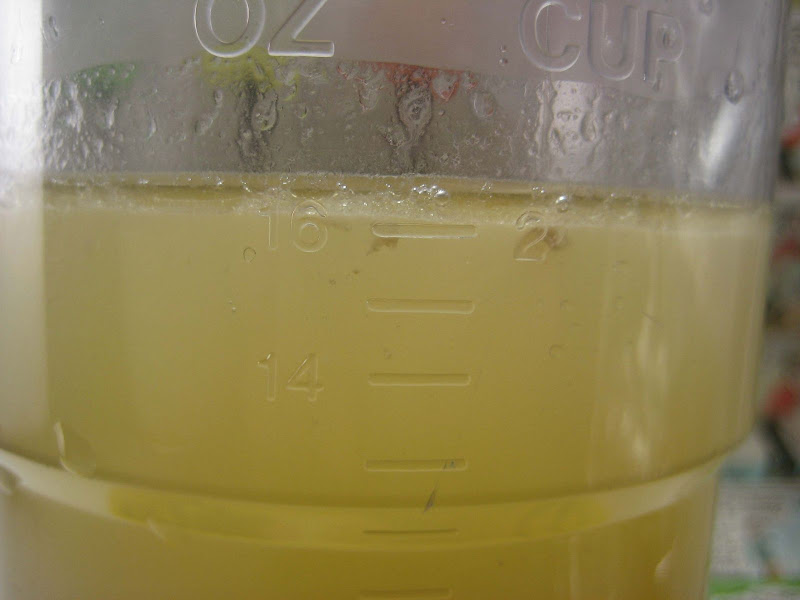
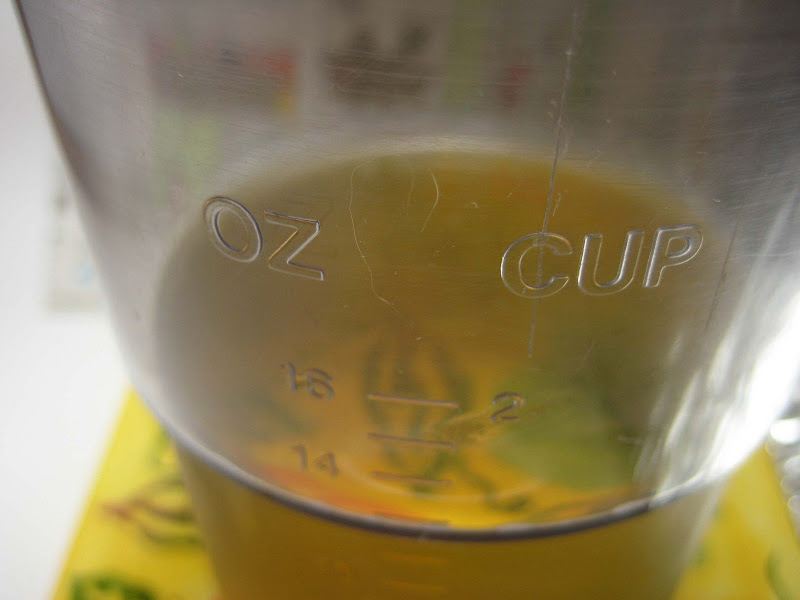
Both samples started with 16 fluid ounces.
Remaining stock (Control - no gelatin added): 13 fluid ounces
Remaining stock (0.5% gelatin added): 11.7 fluid ounces
I did not try squeezing any out of the coffee filter. The broth had 36 hours to drain. I figured what was still on the filter was trash.


Bowl of stock before clarification.


Bowl of stock after clarification.


The gelatin worked at clarifying the stock. Typically, meat stocks made by boiling bones contain natural gelatin and additional gelatin isn't needed. However, the batch I made did not gel in the refrigerator so I figured I needed to added a little.

Based upon the results, I could have clarified the stock without adding the extra gelatin. However, adding the extra gelatin is just insurance.

Tasting
Currently, I have a cold so I can't taste much of anything.
The clarified stock was warm and soothing for my sore throat.
Other than that, I'd have to wait to get over my cold to get a real taste.

One of the pros of this method, you can use it to clarify almost any stock or juice.

One of the cons of this method is the gelatin in the stock and the fat are filtered out so you end up with a flavorful "water". Some people miss the mouth feel of the gelatin and fat in their stock.

Further Discussion and Information can be found at this link: Clarifying broth and juices with gelatin

Thursday, October 2, 2008

Oct 02: Quick Healthy Meal

Work has been hectic with test running late on the weekdays and, on the weekends, starting early in the A.M. Also, being stuck in a lab with sick people, spreading their germs, didn't help either.

I feel like I just finished taking finals back in the ye' ole college days. You know staying up late cramming for finals and the stress of taking the final. The past few days my body has been trying to fight off a cold - nasal congestion, sore throat and general blah-blah feeling.

Today, I decided to eat something simple and healthy.
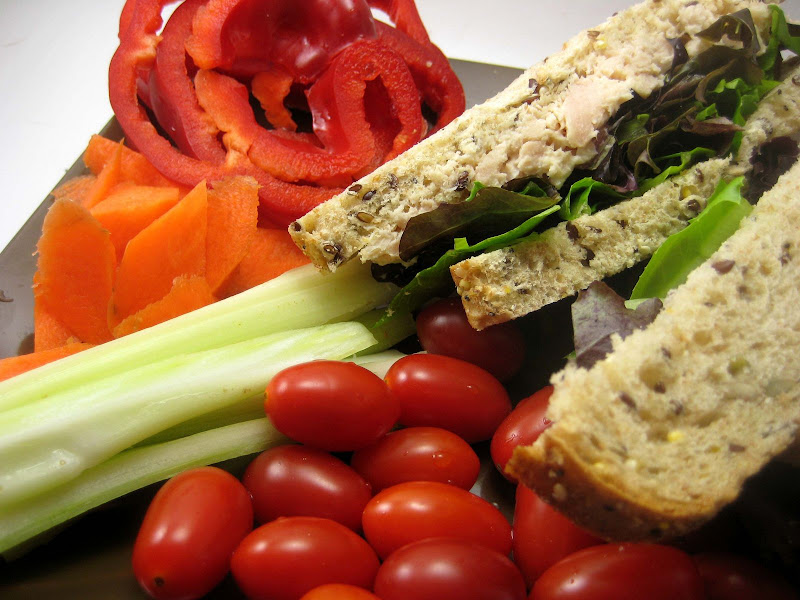
Red bell pepper - has more vitamin C ounce for ounce than an orange.
Carrots - beta carotene
Celery - fiber
Tomato - lycopene (which I think has been discredited)
Whole wheat organic bread, Tuna and mixed bag of baby lettuce.
Washed down with 1 C of Trader Joe's Kefir - contains 10 Probiotic bacteria (I'm assuming the kefir still contains live, active cultures.)

I think I covered all of the colorful food groups. :-)