Showing posts with label eggs. Show all posts

Monday, August 30, 2010

Aug 30, 2010: Garlic Chives as a Vegetable

I originally purchased a bunch of garlic chives with the intention of making some type of dumpling. However, I worked the weekend so that plan was put on hold indefinitely.

I was reading through the cookbook, "Land of Plenty" and came across another simple recipe where the garlic chives is cooked with bacon and eaten as a vegetable. This make sense since rice is the staple for China and is kind of bland. The garlic chives being much milder than regular chives provide flavor and is long enough to be treated as a veg.

Flowering Chives with Smoky Bacon
8 oz Garlic Chives (Washed and cut into 2 in lengths)
3.5 oz Bacon (slab bacon preferred, cut into strips about the length of the chives)
2 T Oil
1 t Sesame Oil

1) The garlic chives was washed and cut into 2 inch lengths.


2) Fry the bacon in the oil for a couple minutes (I used strip bacon which I cut into smaller lengths).
The bacon put off quite a bit of fat so I drained all but 2 T of oil/grease.
Stem ends (thick parts) were added first to start cooking, stir fry for about a minute.
The leaves were added and stir-fried for around 3 to 4 minutes.
Add sesame oil just before plating.


3) Wait there's more... My addition to the recipe. :-)
When I uses chives, I like to mix in some beaten eggs.
About 1/4 of the chive-bacon mixture was used and mixed into the eggs. Here I had 4 egg whites (leftover from the Daring Baker's challenge) and 1 whole egg to give the egg whites some "color."


Now we're done! Food's up!

Garlic chives with smoky bacon.


Scrambled eggs with garlic chives and bacon.


Served over brown rice and a couple squirts of Siracha hot sauce.


A simple, yet flavorful dinner!

Saturday, September 20, 2008

Sep 20: Fried Chicken

My earliest memories of eating fried chicken was in SF's Chinatown at a luncheon somewhere. The chicken had a flavorful, juicy, crispy batter crust. The chicken seemed to be infused with a nice flavor of garlic and ginger.

Also, the local chicken place was not a KFC, but a Pioneer Chicken.
I remember Pioneer Chicken had a battered crust and a lot of flavor.
Their logo looked like an Italian Chef wearing chef whites and chefs hat riding in a chuck wagon. The color scheme of the restaurant was orange. Orange?!?!
Yes, in the 70's orange was an in-color. lol!

This website popped up with Pioneer memorabilia. They all must have looked the same for I could swear that's how the neighborhood Pioneer chicken looked with the brickwork and the sloping windows.

My first bite into KFC was in high school. Back then KFC was still known as Kentucky Fried Chicken until Fried became a bad word. I thought the colonel's chicken was kind of bland, except for salt, and soggy.

Moving away to college and with the closing of Pioneer Chicken, that's when I went on my quest to perfect my fried chicken recipe.

For me, the key to fried chicken is obtaining a thick crispy crust. Making flavorful chicken is actually the easy part. It's the crust that has been more elusive. I've tried batters, different types of coatings and flour. For the most part, the flavor was their, but the crust just wasn't their for me.

In college, my roommates were the Guinea pigs. I've had roommates wake up in the middle of the night to eat the last pieces of chicken. lol... funny stuff.

After college, my fried chicken quest kind went to the wayside. I lost recipes from numerous moves, frying makes a mess, takes a lot of time to fry and people eating healthy.

A few years ago, I was watching Paula Deen on The Food Network. She was making fried chicken using self-rising flour. I gave it a try and the crust turned out really nice. Crunchy and has some thickness to it... so self-rising flour has been my go to coating when I make fried chicken.

Today, I make fried chicken. The basis is Paula Deen's Recipe: Southern Fried Chicken.

Fried Chicken
2 eggs
1/4 to 1/2 C Hot Sauce
2T Water
1/2 Chicken - half breast, thigh, drumstick and wing.
salt
pepper
garlic powder
1 C flour
1 1/2 t Baking Powder
1/2 t Salt
1 t Cajun Seasoning
Oil for frying (I had soybean oil)

Hot sauce, eggs and chicken.
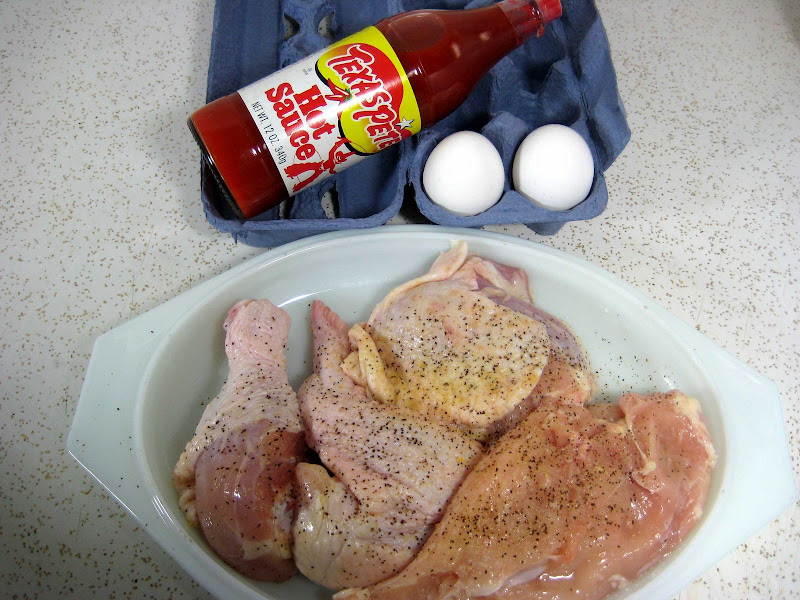


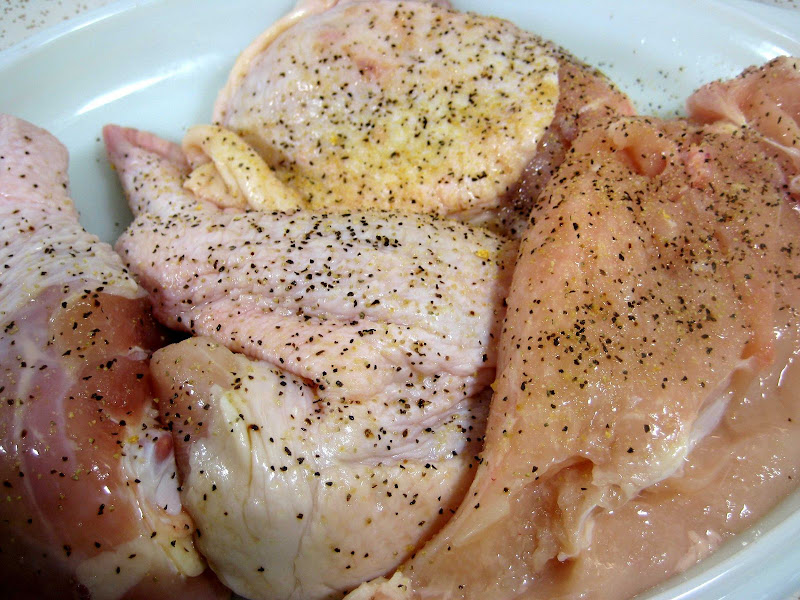
Season chicken with salt, pepper and garlic powder. I didn't measure the amount. Season to your liking.

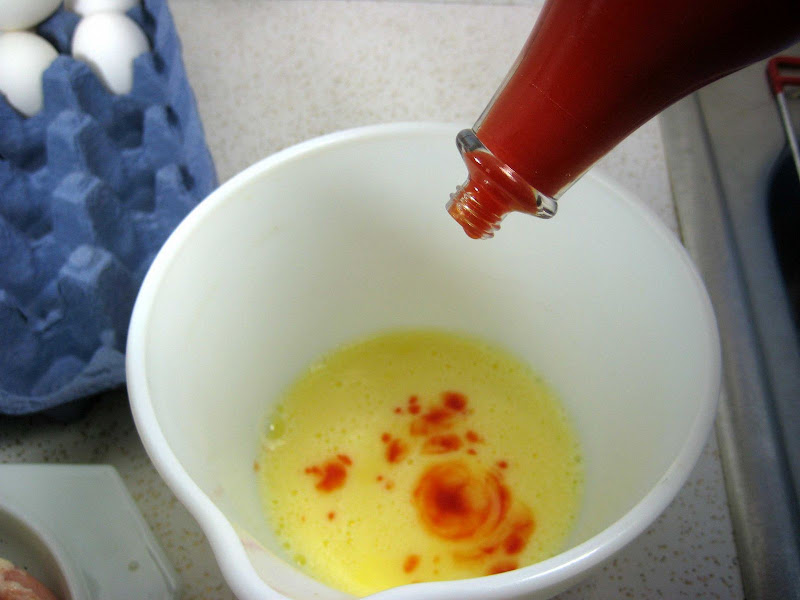
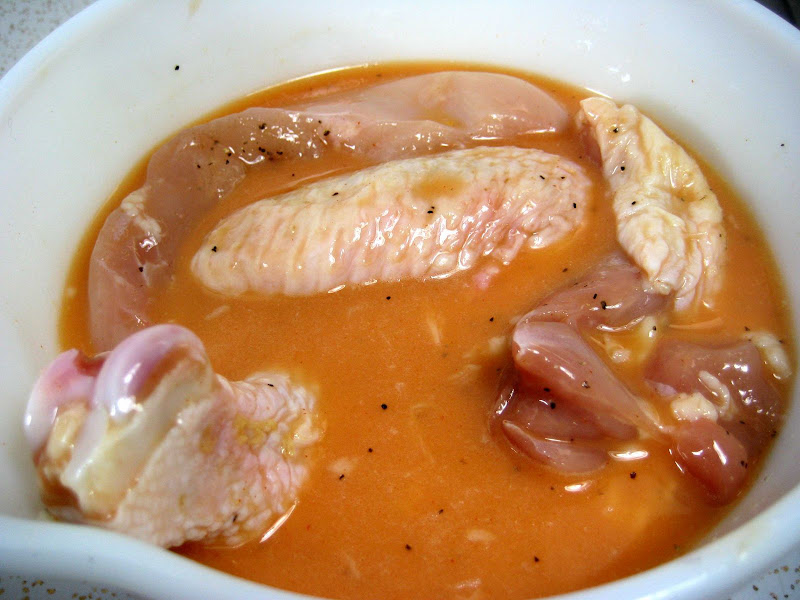
Beat the egg with 2 T of water and add the hot sauce. I added about 1/4 of hot sauce or until the mixture looks orange.

Add the chicken pieces to the egg mixture and let marinade.

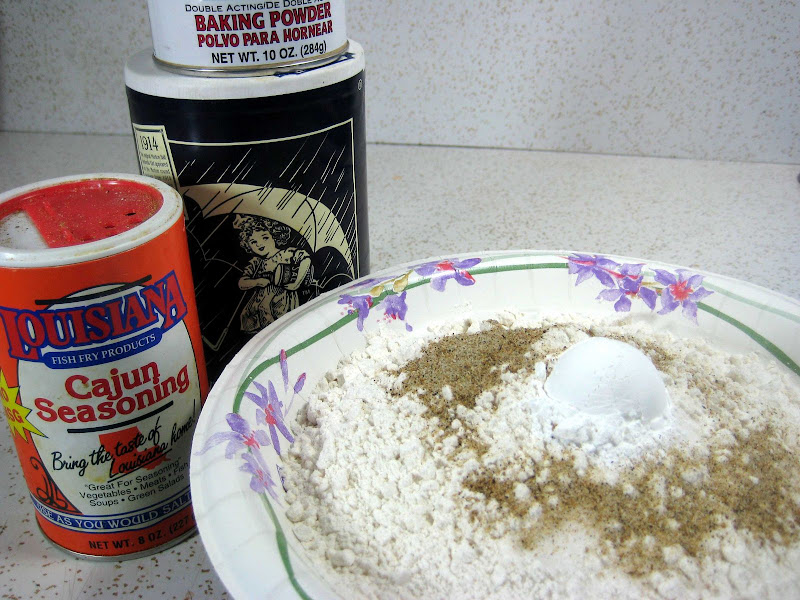
Making self-rising flour is very easy. What makes self-rising flour self-rising is the addition of baking powder and a little salt. I added Cajun seasoning to add flavor to the flour.
Dump into a Ziploc and mix.

Heat a skillet or a pot with oil... 350F.
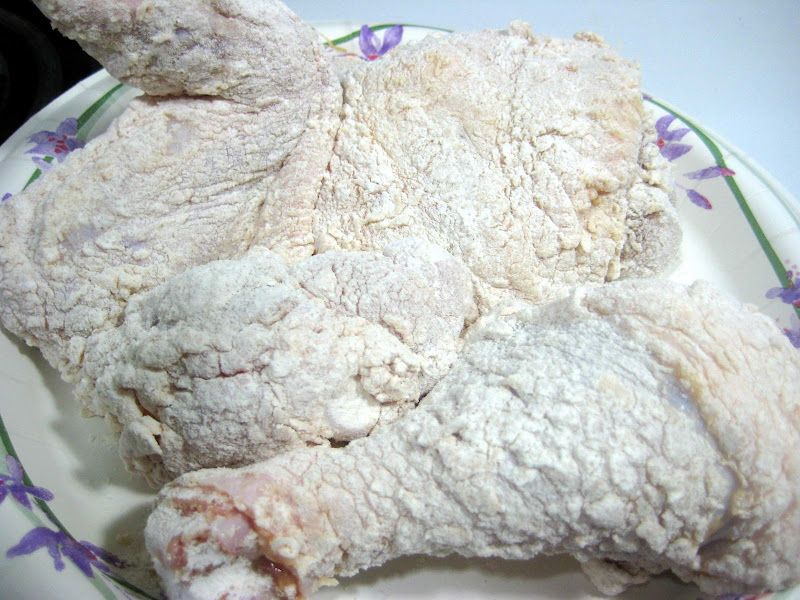
When the oil is about to reach temperature, add the chicken to the flour and coat thoroughly, as shown below.

Carefully place the chicken into the oil. I increased the burner to medium-high.
Cook 10 minutes before flipping.
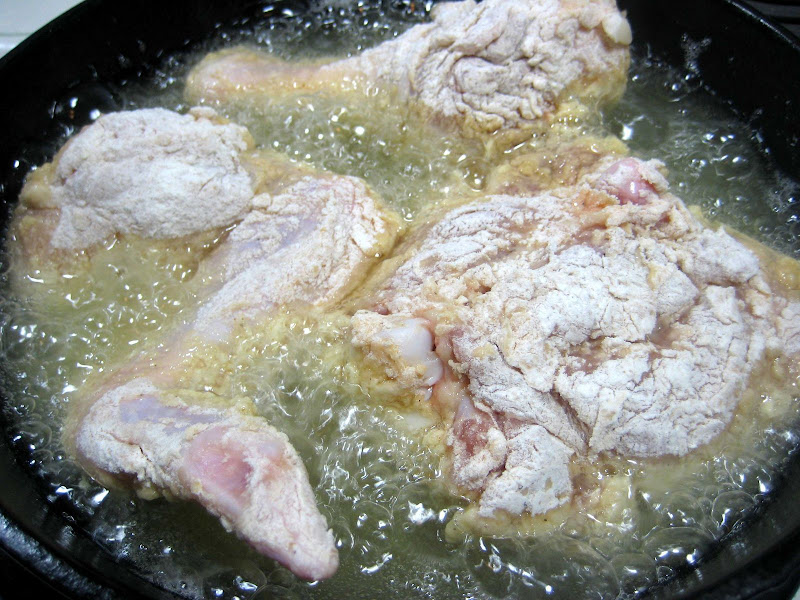


The pieces are flipped and allowed to cook another 15 to 20 minutes.
Turn occasionally to ensure even cooking.
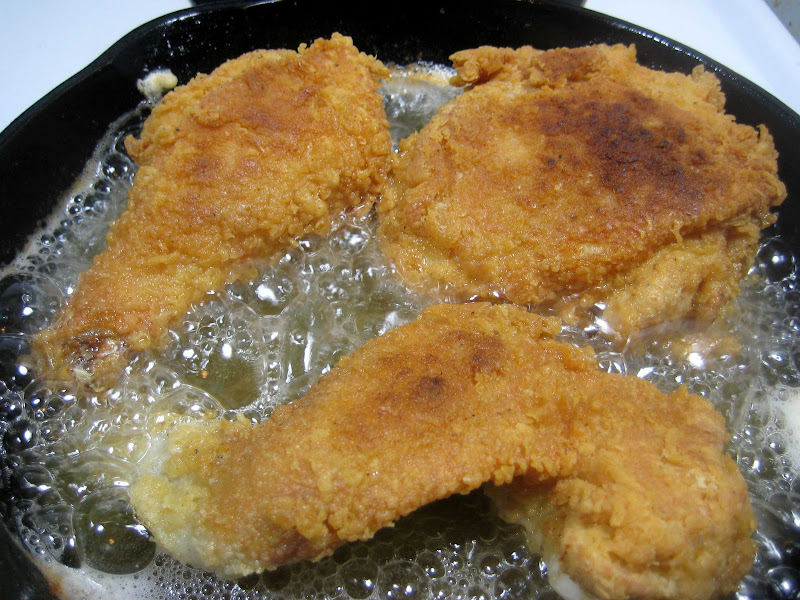

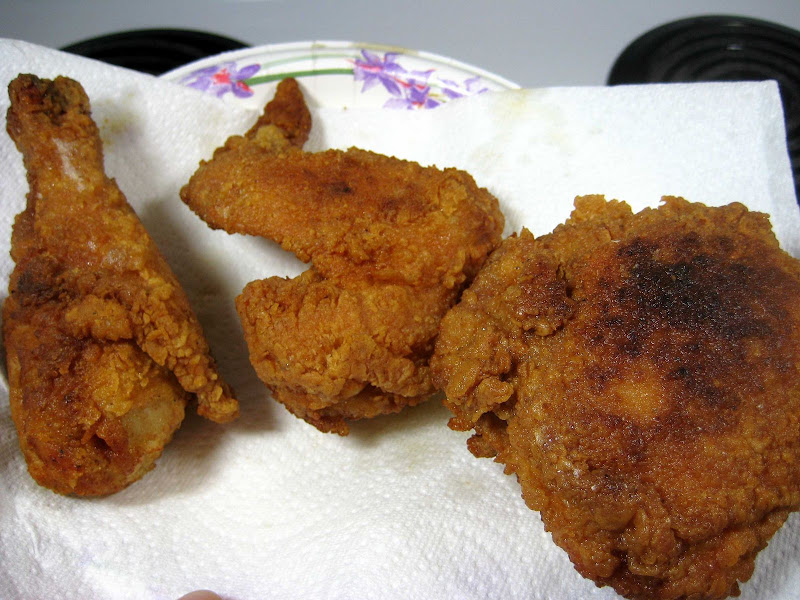
Total cooking time for these pieces was about 20 to 25 minutes.

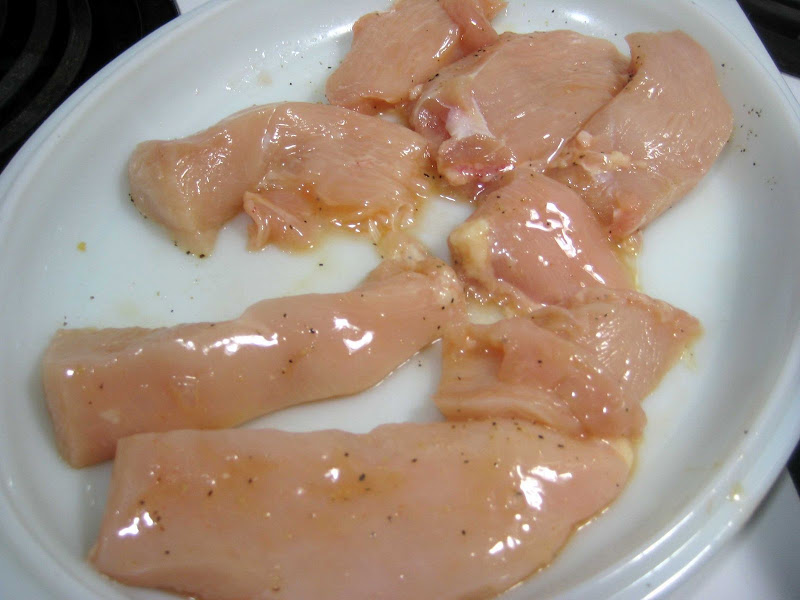
While the chicken was cooking, the breast was sliced into "fingers"/"nuggets" and placed back in the egg mixture to marinade.

Pieces dredged and coated.
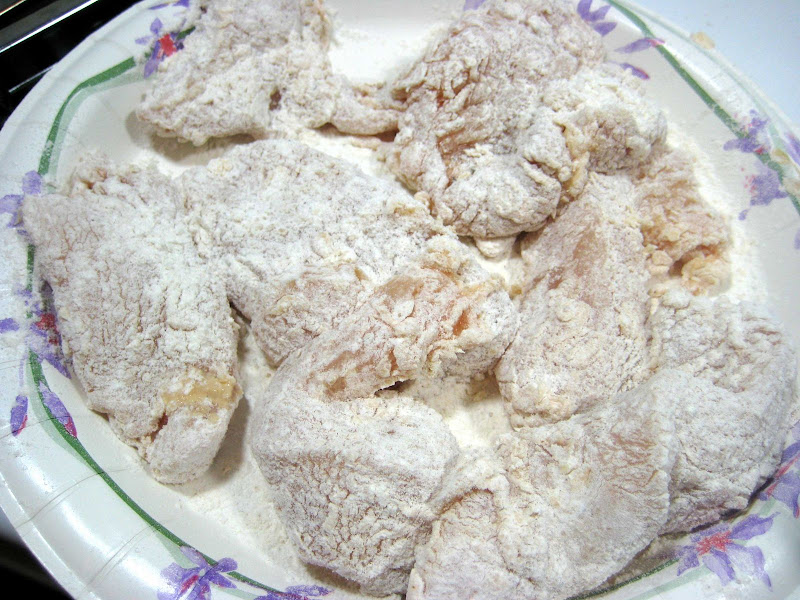

Fry about 3 or 4 minutes before flipping.
After flipping fry another 3 or 4 minutes.


The finished chicken! Total cooking time was about 45 minutes.
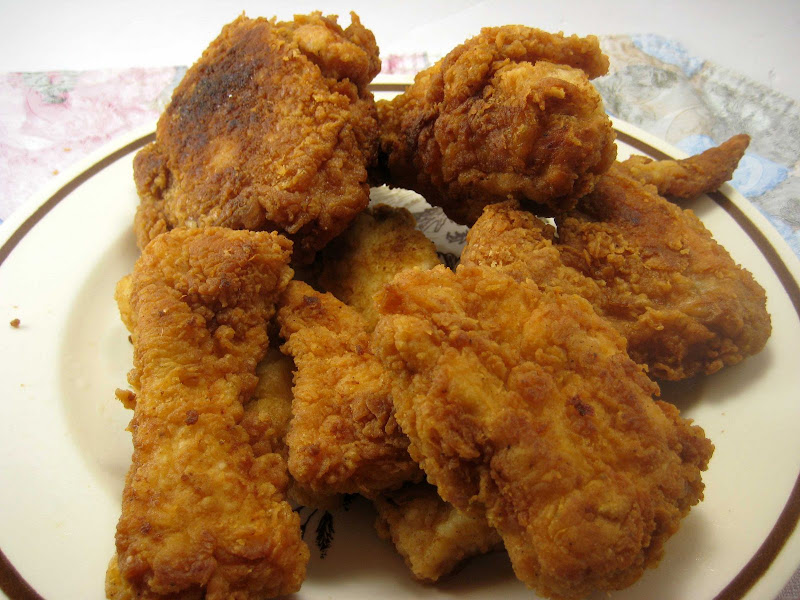

For me the thigh piece is the best part of fried chicken. Stays moist and has a lot of flavor.
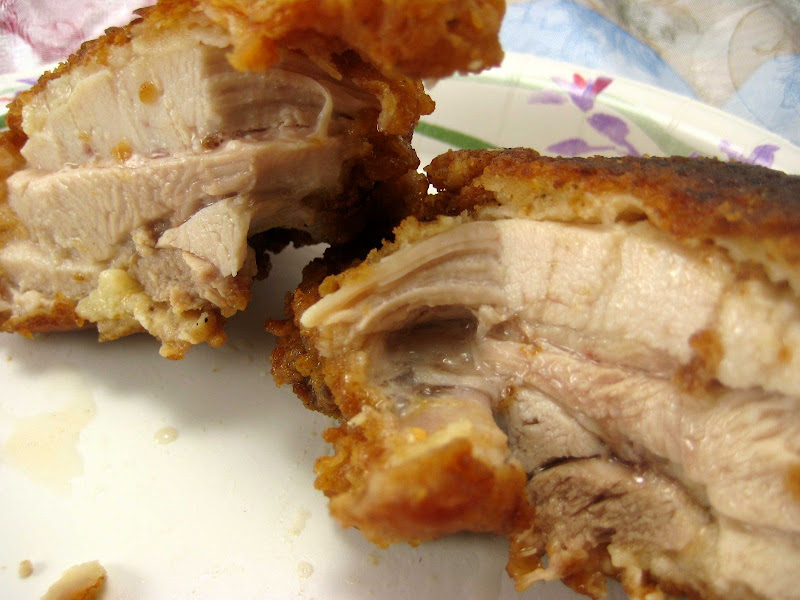

Overall, the chicken turned out nicely. Very nice, thick, crunchy coating.
A very nice flavor. The vinegary hot sauce adds a very faint tang and the Cajun season, plus the garlic powder, adds extra flavor.

I do usually add extra herbs and spices... my secret blend... but I wanted to keep the chicken very simple.

Tuesday, September 2, 2008

Sep 02: Eclair Follow-Up (The Experiment)

This is a follow-up/continuation of the Daring Bakers Challenge - Chocolate Eclairs which I posted Sept 31st.

I was initially disappointed with the results of the eclairs. The choux did not puff the way I imagined and some deflated into ladyfingers... and this (I thought) was supposed to be the "easy" part of the challenge.

Seeking advice in the Daring Bakers Forum, the advice centered around baking times. The reason for the deflating eclairs is undercooking. Another factor that I wasn't sure of was the consistency of the choux before piping. The recipe called for "ribbons". Julia Childs recipe shows a stiffer scoopable choux while Alton Brown's choux was in-between - soft but no ribbons.

The flat eclairs bugged me so much that I decided to make the choux recipe one more time, but this time I'll experiment with baking times. I also tried another consistency of the dough and another piping tip.

The Dough
The basic recipe was the same as the challenge... the only difference was the amount of egg added to form the final choux dough.

Try #1 - followed the recipe to the letter. The final dough was smooth and free flowing, but viscous like honey or molasses.


Try #2 - I looked through a Julia Childs cookbook and the picture of the finished choux was firm and scoopable. I beat the eggs this time instead of adding whole unbeaten eggs. This dough is scoopable. I added about 4 eggs instead of 5.


Try #3 (about 2 1/2 weeks after tries #1 and #2) - I caught Alton Brown's show on choux pastry. His recommendation was the dough should form a "V" when lifted by the spoon and it should tear. Again, I added beaten the eggs... added about 4.5 eggs. The texture was sticky... like getting stuck in the mud. Note the jagged edges where the dough did tear.


The Tip
The recipe called for a 2cm tip (which is about 0.75 inches).

Try #1 - used a ziploc with a corner cut out. Note eclairs are flat to start out with and not really round.


Try #2 - I noticed the end of my water bottle had a 0.75" diameter opening so I used that as a tip in the ziploc. :-) A little dough did slip pass the end of the bag.


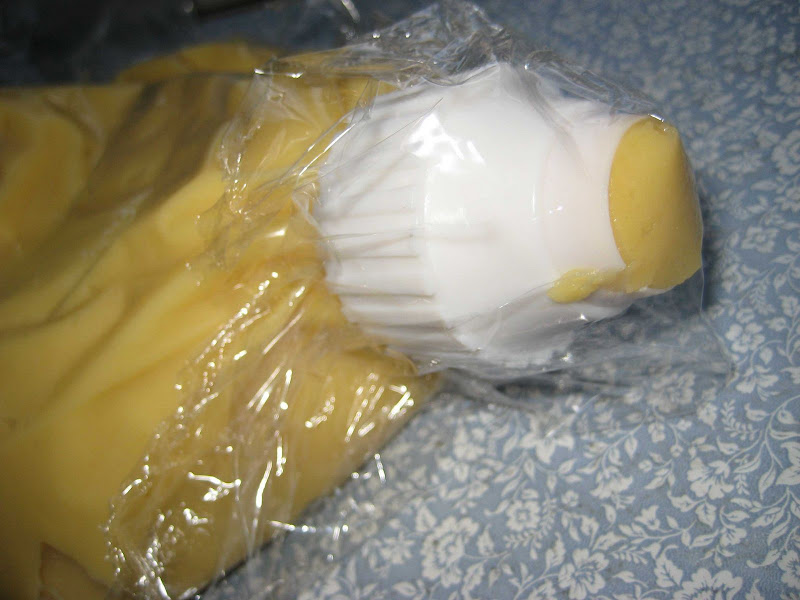
For Try #3 - I caved in and purchased a large piping coupler. I was actually looking in a craft store and there it was. Tip diameter is 0.75 inches. The coupler is two parts that screws together so there should be no problems with leakage.


The Baking Experiment
I decided on 6 baking times and temperatures
1. PH Method (Basic recipe) - 375F, with spoon, without spoon... 20 minutes total.
2. PH Method, no spoon - 375F no door propping, but rotated... 20 minutes total
3. PH Method With Water - Same as one except added a pan of water in the oven... 20 minutes total
4. CIA Method - 325F for 30 minutes (rotate at 15)
5. Alton Brown Method - 425F for 10 mins, rotate, 350F another 10 minutes... 20 minutes total
6. PH Method (Basic recipe) again to see if anything changed.

PH = Pierre Herme
CIA = Culinary Institute of America

Example: Experiment 3 - Water
A pan of water is placed in the oven while the oven is preheating. The water increases the humidity in the oven which is supposed to help the choux rise.

Note: I only baked 3 at a time.
From left to right:
W01 - as piped
W02 - scored with a fork (the lines are supposed to help the choux puff up like an accordion)
W03 - scored with a sharp paring knife (to see if a sharp cut into the dough would work better than the tines of a fork)


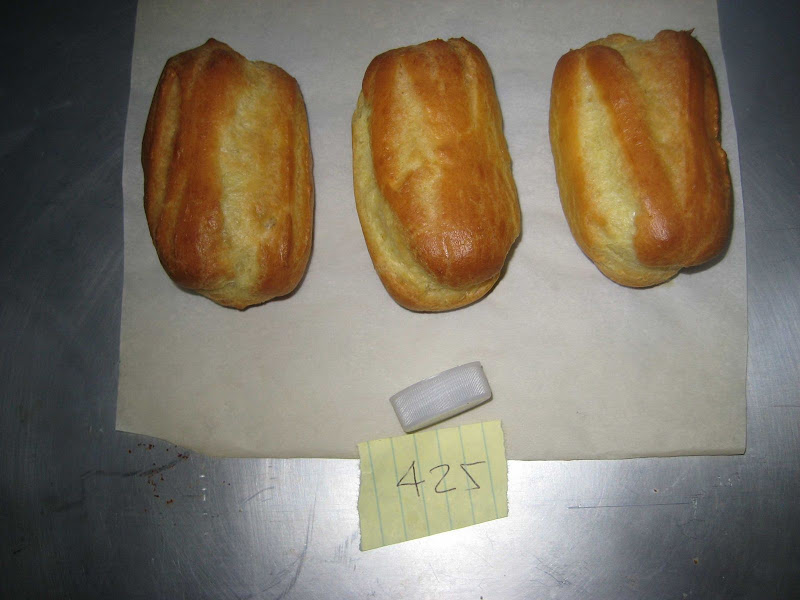
The finished results - The water bottle cap gives scale. The inner ring (dark) is 0.75 inches.
Definite puffing in this shot. Taken out of the oven. No deflating.


A top view - an increase in width too! All these sizes are about the same, but the knife slits seemed to puff the best.


These puffed the most and were baked at 425F. Makes sense. More heat gives more steam.


Comparison of all the results for Try #3.
All methods puffed really well and there was no deflating.
The water pan seemed to help with size, but the choux baked at 425F seemed to puff the most.
Using a knife to make shallow grooves seemed to help. However, using a knife to make grooves should be done on the sides so the top is thicker and uniform looking.


Try #3 - The finished eclairs. Made the chocolate pastry cream filling, but he topping this time is a ganache (because it was easier).


Conclusion - All baking methods seemed to produce good results. General rule of thumb... The hotter the oven the better.

However, I'm starting to believed dough consistency contributes a lot more to the final product size. For example, the ribbony choux produced flat eclairs (too much liquid?) while try #2 was better but still had some deflation (too little water?) and try #3 was the best. A lot of puffing and no deflation.

Sunday, June 22, 2008

Jun 22: Creme Brulee (Burnt Cream)

A few years ago I received a Creme Brulee Set as a present (Thanks Shawn!). The set contained four porcelain ramekins and a torch.

Since I'm a budding pyro, the torch was the first piece I used. However, I did not make the dessert until today.

The recipe contained in the set was very straight forward and simple.

Creme Brulee (Burnt Cream) is a silky smooth custard dessert with a crunchy sugar topping.

The Fixins'
3/4 C Heavy Cream... Today I used whipping cream.
1T + 2 tsp Sugar... For some reason, I had stuck in my mind 3/4 C sugar and measure it out... thinking that's a lot of sugar. Fortunately, I reread the recipe.
2 Egg Yolks
1/2 t vanilla

Preheat oven, 300F and boil some water - I used 1 cup.
1. Combine cream and sugar in a small saucepan over medium heat. Cook and stir occasionally to a simmer... about 5 to 6 minutes.

2. In a separate bowl, beat egg and vanilla until light.

3. Slowly add that hot cream mixture into the beaten egg to temper the eggs. Continue adding and beating the mixture.

4. In a baking pan, arrange ramekins. Pour in brulee mixture evenly into each ramekin.

5. Pour the boiling water into the baking dish so the brulees will bake in a water bath. Water should be halfway up the side of the ramekins.

6. Cover loosely and bake for about 25 to 30 minutes.

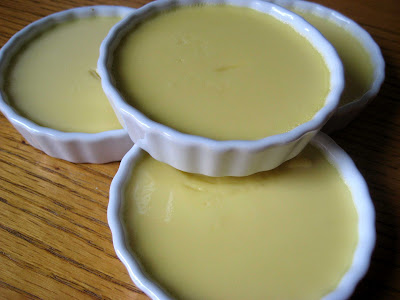
The four ramekins out of the oven and cooled. Afterwards, the individual ramekins were wrapped in cling film and refrigerated.


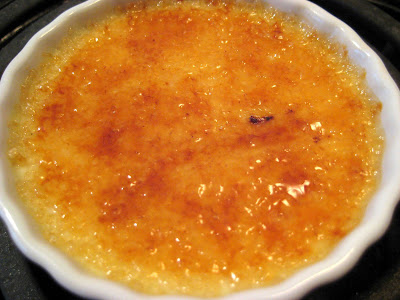
The burnt part of burnt cream.
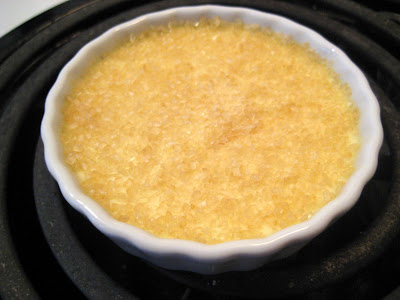
Before serving, sugar was sprinkled sugar atop the custard.
The image shows Sugar in the Raw(TM)(aka turbinado sugar).


The torch was used to melt, slightly caramelize the sugar to form a crunchy topping.


For the sugar topping, I tried granulated sugar about 1/2 to 1 tsp. The topping didn't seem to harden up properly. Shawn suggested using turbinado sugar. At the local Starbucks, I picked up a couple packets of Sugar in the Raw (TM). Don't worry I didn't steal the packets. Being a shareholder, I'm part owner so the packets are complimentary. lol.

The final dessert turned out well. Silky smooth vanilla flavored custard. The turbinado sugar did the trick for the crunchy crust.

Of course, I can't leave well enough alone.
My next try I plan to use heavy cream and use a vanilla bean instead of vanilla extract.

Wednesday, April 2, 2008

Apr 2 - Corned Beef Hash 2

Corned beef hash again?!?!

Actually, since my first attempt at corned beef hash, I've been craving poached eggs.

I'm craving a fluffy, tender, silky smooth poached egg. Corned beef has is just a means to the end.

Corned beef hash... The last time the dish was a little dry so this time I added boiled cabbage and raw onions to add moisture to the mixture.

The Fixins
1/2 C Corned Beef, diced. (That's all I had)
1/2 C Cabbage, boiled and drained
1/2 C Potatoes, Frozen Southern Style Hash Browns (Didn't have fresh)
1/4 Small Onions, coarse chop
1 Clove Garlic
Tarragon
Thyme

Place ingredients in a food processor.
Corned beef, onions, garlic, thyme and tarragon.


Added potatoes and cabbage


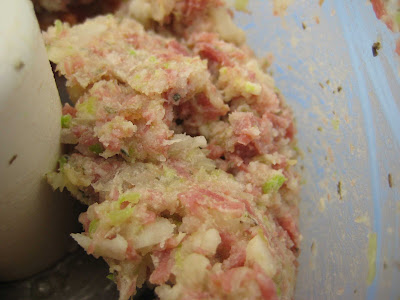
This time I ran the food processor to really mix and grind the ingredients together as shown below.


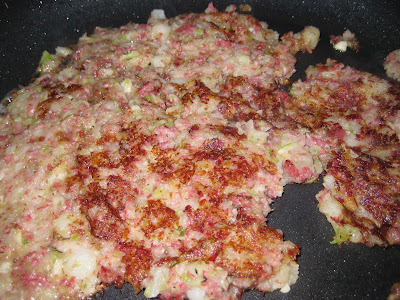
Pan fry in a little butter


Now to the main point of my craving - poaching eggs.
As a gift, I received Julia Child's cookbook, The Way to Cook.

Her method for poaching eggs calls for piercing the egg at the "fat" end where the air sac is located. Next, the egg is submerged in boiling water for 10 seconds. This is supposed to help coagulate a thin film of egg white around the shell which helps keep eggs together when added to the poaching water.

Egg with the small hole at the air sac end.
Note: When I dropped the egg into the boiling water, egg white was shooting out of the hole so I panicked and plucked the egg out after 5 or 6 seconds.


A pot of water is brought to about a simmer where bubbles are barely forming.
2.5 T of vinegar was added to 1 quart of water. The water tasted like a very weak lemon. The acid helps the egg proteins to coagulate instead of spreading out.

The egg poaching away. When I cracked the egg into the water, it sank to the bottom and a small bit stuck to the bottom. I waited a few seconds and used a spatula to gently release the egg. The egg was poached about 4 minutes.


This is my control egg. Just an egg cracked into a custard cup and gently slipped into the water. Interestingly, the egg did spread out more. The vinegar appeared to help keep the egg from really spreading out into thin wisp. Also, note the water is fairly clean. Usually without vinegar there would be stray bits of egg white floating in the poaching liquid. This egg also sank to the bottom of the pan. I used the spatula to release the egg.


The Final Dish
Corned beef hash over toasted English muffin topped with the poached eggs.
The egg on the left is the control egg while the egg on the right is the 10 second boiled egg.


Overall, the corned beef has was a lot better this time around. The extra moisture helped. Surprisingly, Julia Child's 10 second boil method produced a nice looking egg that was very tender (melt in your mouth, sort of) and light. The control egg was fine, but not as fluffy and tender.

BONUS METHOD:
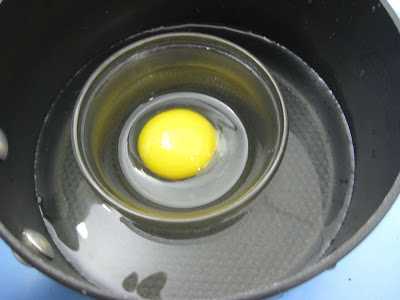
I remember working in a small diner where a customers would occasionally request poached eggs. The eggs were cooked in little metal cups. Since I didn't have any poaching cups, I used a buttered custard cup to cook the egg.

I brought the water to boil with the cup in place. I was worried the cup would crack if I placed the cup into boiling water.


The egg was boiled for about 5 or 6 minutes, covered. When I lifted the lid, I caught a slight whiff of hydrogen sulfide... One reason I really don't like hard boiled eggs.


The egg plated. Retains it's shape. Looks like a flying saucer.


The egg is cooked medium. It's pretty much a hard-boiled egg. Egg whites kind of dense. Not fluffy and tender. Note to self... don't use egg cups when poaching eggs. Julia Child's method and vinegared water is the way to go.

Saturday, March 22, 2008

Corned Beef Hash

I had some leftover corned beef and roasted potatoes so I decided to make corned beef hash. When I go out for breakfast, corned beef hash or biscuits and gravy are my two must tries at a restaurant, but not at the same seating. lol :-P

The Fixins'
3/4 C roasted potatoes, coarse chop
3/4 C corned beef, coarse chop
2 T onion, coarse chop
1 T bell pepper, coarse chop
1.2 T parsley
1/4 t garlic powder
Pinch of tarragon
Pinch of thyme

Of course, being a guy I have to use every dish, pot and pan, plus pull out appliances to make this dish.

I typically just chop and fry, but this time I wanted to try a finer mince so I dumped all of the ingredients into the mini food processor and gave it a few pulses.


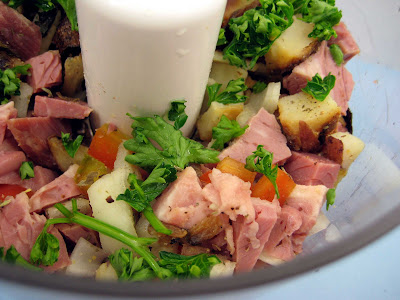
The ingredients after a few pulses. This looked good to me. I didn't want a mash. The mixture at this point looked a little dry, but I continued on.


Pan frying the corned beef hash in a canola oil/butter mixture, about 1 T (T = Tablespoon).
I remember watching the show, Good Eats, and Alton Brown used a weight to cook his corned beef hash recipe. I believe the weight acts to increase the contact area and help brown the hash, similar to a bacon press. I used a sauce pan filled with water as the weight. Pot #2. :-)


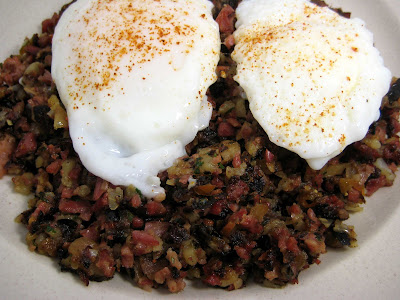
The hash did not flip as a pancake, but turned out crumbly. I also poached a couple eggs as a topper.

Corned beef hash topped with two poached eggs and a sprinkle of cayenne pepper.
I got a little distracted and didn't flip the hash sooner. The crispy bits are a little dark. :-)


The Final Dish
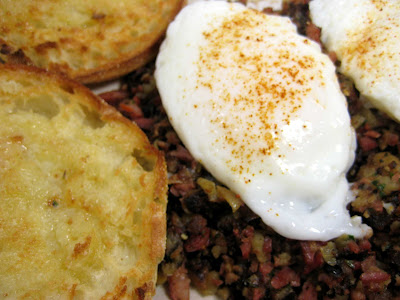
Corned beef hash, poached eggs served with a buttered English muffin. Instead of Hollandaise sauce, ketchup and Louisiana style hot sauce was used.


Overall, the dish had good flavor but was a little dry and crumbly. I was hoping for something a little more moist and cohesive.

Corned beef hash was originally based upon leftovers. I had some cabbage and carrots from the St. Patrick's Day meal, but didn't want that in this dish. However, those veggies would have added extra moisture to the dish. Also, the roasted potatoes I did use are drier than boiled potatoes.

Next time boiled potatoes will be used and that should increase the moistness of the dish. Also, increasing the veggies a little - onions, bell pepper, fresh garlic and parsley, will help too. Finally, a little broth can be added to increase moisture and flavor.

Final utensil count
Pot and Pan Count: 3 (Frying pan, weight pan and poached egg pot)
Appliance: Food processor
Other: Cutting board, knife, slotted spoon, spatula

Not bad for a simple breakfast. lol!